
[FIXED] NVIDIA Control Panel Missing on Windows 10 | SoftwareKeep
Are you unable to find and open the NVIDIA Control Panel? There are multiple possible causes of the NVIDIA Control Panel missing on Windows 10. Learn how to fix it here.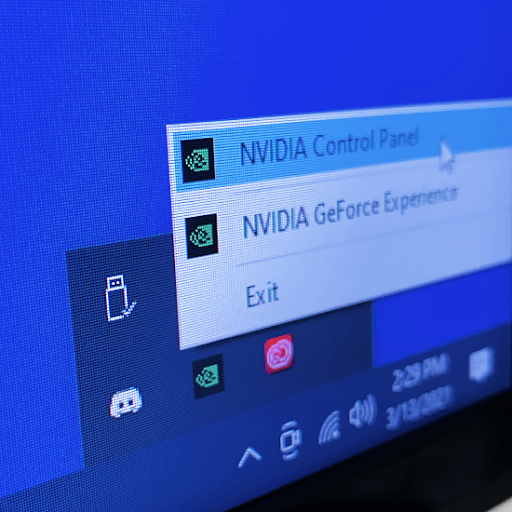
NVIDIA graphics cards are popular among all computer users. They’re incredibly powerful, affordable, and allow users to customize a wide variety of options to create optimized experiences. However, some users are unable to access these settings as the NVIDIA Control Panel app seems to be missing.
At the time of writing, the NVIDIA Control Panel is the only way to access the settings of your NVIDIA branded video card. Not being able to open the NVIDIA Control Panel makes it so you won’t be able to experience the best-looking output or might deal with lag due to bad optimization.
In this article, you’ll learn more about the causes for the NVIDIA Control Panel missing, and we’ll show you how to fix the error.
What causes the NVIDIA Control Panel missing error?
At the time of writing, there is no direct cause of this error appearing on your Windows 10 system. However, just like other system and application errors, there are multiple possible causes that might lead to this outcome. After determining a likely cause, you’ll be able to troubleshoot the issue easier.
Here are the most common scenarios that lead to the NVIDIA Control Panel missing:
- Driver issues
— Something might be wrong with your graphics card drivers or the NVIDIA Display Driver. An outdated, corrupted, or not-compatible driver can break the control panel of your graphics card. You can easily troubleshoot this by updating or reinstalling key drivers.
- Windows 10 update
— Have you recently updated your system to the latest release, or upgraded to Windows 10 from an earlier OS? If yes, your graphics card driver might not be compatible with your system anymore. Rolling back an update may help you fix this.
- Missing or incorrect Windows Registry entries
— The Registry is used for controlling many settings on your PC. If entries are missing or incorrect, the control panel may be missing on your computer. Fixing this requires you to use the Registry Editor.
- Corrupt NVIDIA Control Panel
— The NVIDIA Control Panel itself may become corrupt if its files are deleted or damaged. This can be fixed is by reinstalling the software altogether.
- General bugs
— Some general Windows 10 errors and bugs are capable of making the NVIDIA Control Panel missing.
The list above is only some of the possible causes. They may help identify which course of action you need to take in order to fix the NVIDIA Control Panel. Even if you’re dealing with a unique case, the guides below will help you restore the application.
How to fix NVIDIA Control Panel missing on Windows 10
There are multiple different ways to fix the NVIDIA Control panel missing. Some of these methods are general troubleshooting, while others target specific issues. Proceed down the list and find which solution works for you.
Keep in mind that some of our solutions require you to have a local account with administrator permissions. Need help? Check out our How to make a local user an administrator in Windows 10 guide.
Method 1. Unhide the NVIDIA Control Panel
It’s a common mistake to hide the NVIDIA Control Panel, causing it to go missing from your system tray. In rare cases, Windows 10 itself or an added third-party application automatically hid the icon, making it seem like it’s missing.
Here’s how to unhide the NVIDIA Control Panel:
-
Open the search bar in your taskbar by clicking on the magnifying glass icon. You can also bring it up with the
Windows
+
S
keyboard shortcut.
-
Type in
Control Panel
and click on the first search result. Alternatively, click on
NVIDIA Control Panel
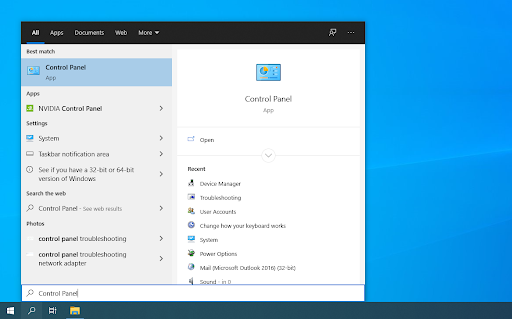
is available from the search results.
-
In the classic Control Panel, change the view mode to
Large icons
, and then click on
NVIDIA Control Panel

from the items.
-
Once the NVIDIA Control Panel is open, click on the
Desktop
menu on the top. Make sure there’s a checkmark next to
Add Desktop Context Menu
and
Show Notification Tray
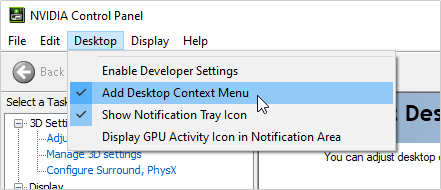
Icon. If there isn’t, simply click on them to add it.
-
Close the NVIDIA Control Panel and try opening it by right-clicking on your desktop or using the system tray.
Method 2. Restart your NVIDIA services
A huge number of services are constantly running on your computer to keep apps and features running. Sometimes, NVIDIA services might need to be restarted in order for the control panel to re-appear.
Restart these services by following the steps below:
-
Press the
Windows + R
keys on your keyboard. This is going to bring up the Run utility.
-
Type in “
services.msc
” without the quotation marks and press the
Enter

key on your keyboard. This will open the Services window.
-
Locate the “
NVIDIA Display Container LS
” service from the list. Right-click on it, and select
Restart

from the context menu.
-
Repeat the step above for the following services:
NVIDIA LocalSystem Container
,
NVIDIA NetworkService Container
, and
NVIDIA Telemetry Container
.
-
After you restarted all of the NVIDIA services, check if you can see the panel in your system tray or desktop context menu.
Method 3. Open the NVIDIA Control Panel manually
You might be able to force the NVIDIA Control Panel to show up by opening it manually first. You can do this by following these steps:
-
Right-click on an empty space in your taskbar and choose
Task Manager

-
If the Task Manager launched in compact mode, make sure to expand details by clicking on the “
Mode details

” button.
-
You should be on the
Processes
tab by default. Scroll down until you see a process called
NVIDIA Container
. There might be multiple versions of this process in your list, which is normal.
-
Right-click on any of the NVIDIA Container processes, and then choose
Open file location

from the context menu.
-
Click on the
Up
arrow next to the File Explorer’s address bar as shown on the image below. Alternatively, manually navigate to the
C:\Program Files\NVIDIA Corporation

folder.
-
Open the
Control Panel Client
folder, → and then right-click on the
nvcplui.exe
file → and choose
Run as administrator

. If prompted, enter your account password.
-
Check if the NVIDIA Control Panel shows up in your system tray or desktop context menu.
If none of the methods have worked so far, we have two more solutions that might just do the trick. These are more general troubleshooting tips, but they often help the most.
Method 4. Update your NVIDIA display driver
It’s extremely important that your graphics card driver is always up-to-date. Especially after major Windows 10 updates, compatibility issues can appear and cause all sorts of errors.
Your NVIDIA display driver being outdated or damaged may have led to the Control Panel missing. There are 3 ways to fix this:
Option 1. Update display adapter driver manually
-
Check the type of graphics card you’re using:
Press the
Windows
and
R
keys on your keyboard at the same time. This will bring up the
Run
utility.
-
Type in “
dxdiag
” without the quotation marks, and press the
OK
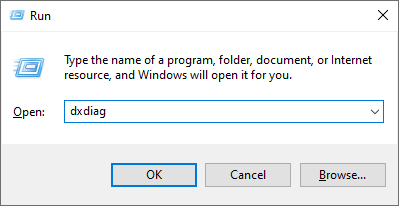
button. This is the shortcut to reach the DirectX Diagnostics tool, which allows you to view information about your system.
-
Switch to the
Display
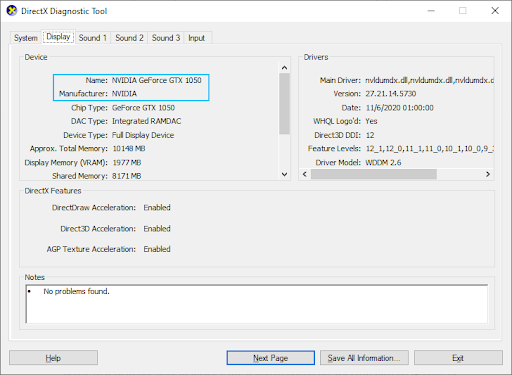
tab.
-
Under
Device
, take note of the name and manufacturer of your graphics card.
-
-
Go to the corresponding manufacturer’s website, and then navigate to their download page. Here are some of the most common manufacturers’ web pages where you can find driver downloads:
-
Intel Drivers & Software page
-
NVIDIA Driver download page
-
AMD Drivers and support page
-

Find your graphics card model using the provided search tools, and download its newest driver.
-
Download and install the latest driver by double-clicking on the downloaded file and follow the on-screen instructions. You might be prompted to restart your device.
Note: Always make sure that you’re always downloading and installing the correct driver that matches your graphics card. If you’re uncertain, try searching on Google, or contact the customer service of your manufacturer.
Option 2. Update display adapter driver automatically
-
Press the
Windows
and
R
keys on your keyboard at the same time. This will bring up the
Run
utility.
-
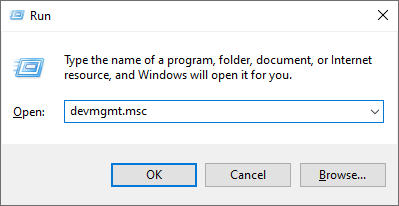
Type in “
devmgmt.msc
” without the quotation marks, and press the
OK
button. This will take you to the Device Manager window.
-
Expand the
Display adapters

section by clicking on the arrow icon to the left.
-
Right-click on your current driver, and then select the
Update driver
option.
-
Click on
Search automatically for updated driver software

to allow Windows 10 to automatically update your driver. When you’re done, feel free to exit out of the Device Manager and restart your computer.
Option 3. Update your drivers with a third-party app
While it’s not necessary to use a third-party app for driver updates, it’s an option that is available to all Windows 10 users. You can also find and download third-party updater tools such as Driver Booster, DriverHub, or DriverPack Solution to automatically update drivers.
Most of these tools are free and easy to use. If you’re not satisfied with the service, we recommend searching the internet for more advanced apps.
Always make sure that the app you’re using is trustworthy. Some applications that offer to fix or update your drivers contain malware, adware, or spyware. We recommend searching the name of the product and reading reviews made by real users before downloading any software.
Method 5. Don’t overclock your GPU
Overclocking your GPU may be very helpful if you’re looking for performance gain. What it essentially does is lift the limits of your graphics card, allowing it to perform above safe limits. It can also lead to many errors happening on your PC, making it a costly gamble to overclock your GPU.
Numerous stories detail computers breaking down due to overclocking – make sure you always stay within limits. Going too far may cause your graphics card to completely stop working.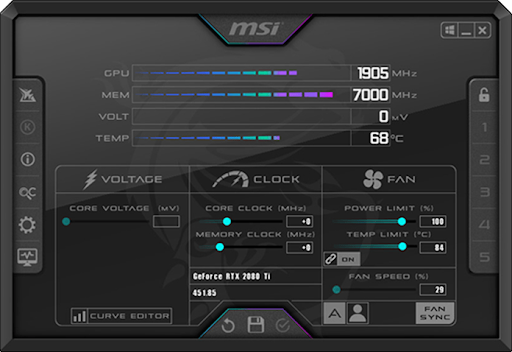
An overclocked GPU might be the reason why you experience the NVIDIA Control Panel missing. While the direct relation is unknown, many users have reported that disabling the overclock on their GPU made the NVIDIA Control Panel re-appear.
We hope this article was able to help you fix the NVIDIA Control Panel missing on Windows 10! Now you can customize, tweak and optimize your graphical settings quickly and easily.
Final thoughts
If you need any further help with Windows and Windows apps, don’t hesitate to reach out to our customer service team, available 24/7 to assist you. Return to us for more informative articles all related to productivity and modern-day technology!
Would you like to receive promotions, deals, and discounts to get our products for the best price? Don’t forget to subscribe to our newsletter by entering your email address below! Receive the latest technology news in your inbox and be the first to read our tips to become more productive.
If you’re looking for a software company you can trust for its integrity and honest business practices, look no further than SoftwareKeep. We are a Microsoft Certified Partner and a BBB Accredited Business that cares about bringing our customers a reliable, satisfying experience on the software products they need. We will be with you before, during, and after all the sales.
You may also like
» Nvidia Telemetry Container Missing: How to Fix Error Code 0x0003
» How to Optimize Windows 10 for Gaming
» How to fix ‘Application has been blocked from accessing graphics hardware’


