Can’t find software update on Mac? Here are 6 fixes
Mục lục bài viết
Solved: Why the Software update is not showing on a Mac
4 min read
So, you can’t find software update on Mac. You know there is one available, but for some strange reason, it’s not showing up. Firstly, don’t panic; you’re not on your own. It’s a known issue. Thankfully, we’ve got the simple fixes here in this article.
If you’ve been waiting for the perfect moment to install the latest version of macOS only to discover your device says, “Your Mac is up to date,” don’t get stressed, just walk through these awesome tips, and we’ll get your Mac updated in no time. Let’s get started.
How to find a software update on Mac
If you’re new to the world of Apple and MacBooks, here’s a quick reminder on how to search for and install updates.
You can either set your Mac to update automatically or manually install updates on your device. Here’s how:

-
Select System Settings from the main Apple menu > General > Software Update.
-
Ensure the Automatic Updates option is turned on to make use of that particular feature.
-
Then, check for an available update. Click Update Now to get started with the installation.
If you run a macOS version older than macOS Ventura, go to System Preferences > Software Update.
Now you know where to find available macOS updates. For those struggling with software updates not working on a Mac, we’ve got the fixes you need below.
Fixes for software update is not showing on Mac
Before we get started with the fixes, here’s a quick tip that, in some cases, is the only thing you need to do. With the Software Update pane open (use the instructions from the section above), press the Command – R keys to refresh the page. If you still can’t find the software update on a Mac, follow the below tips.
1. Restart your device

If you haven’t tried this already, take a moment to restart your device. This simple tip can fix a magnitude of MacBook issues. It’s an obvious but worthwhile step — just click Restart from the main Apple menu.
2. Check your internet
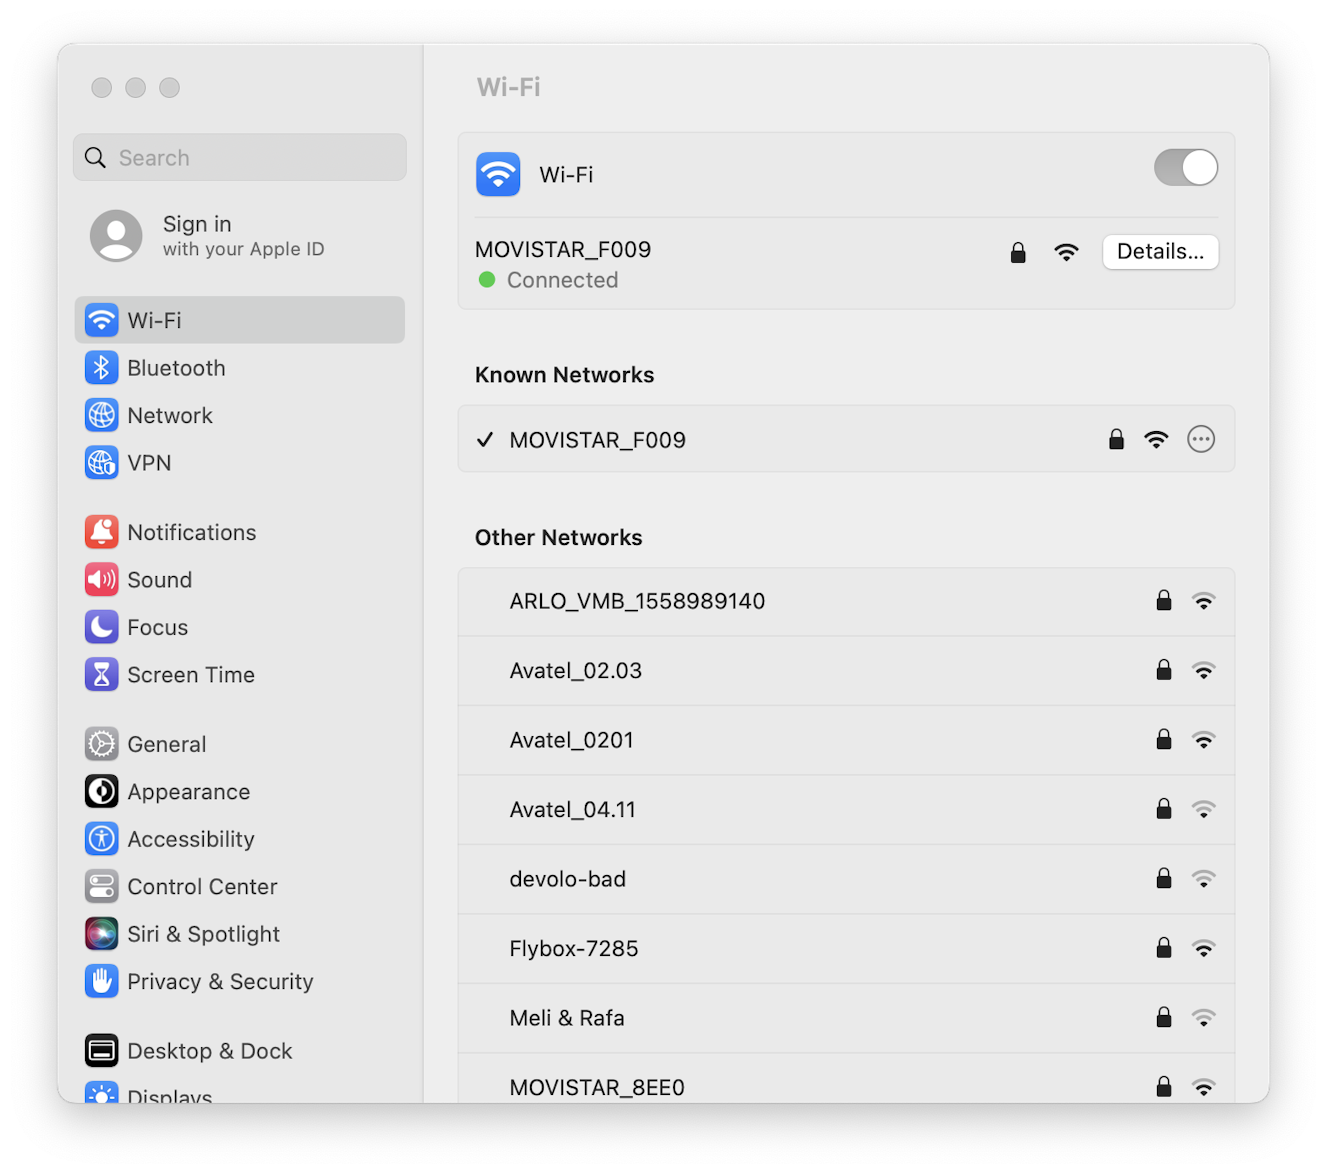
So, when no software update in System Preferences/System Settings is available, it’s worth checking your internet connection. You’ll need a stable connection to download and install the latest macOS.
Just open your preferred web browser and try to open a webpage. If you do discover your internet is out, here are a few simple things you can try:
Check for service outages
Before you waste time trying to troubleshoot your internet, first check with your provider that there are no reported outages. If they’re experiencing issues, then it’s likely you will, too.
Turn your Wi-Fi on and off

That’s right; the old on-and-off trick works wonders. Select the Wi-Fi icon from your top menu bar and toggle your connection off and then back on.
Reset your router
Check your router manual and try resetting it. Sometimes, moving your MacBook closer to your router will also help with connectivity issues.
3. Check for Apple server outages
Occasionally, Apple’s macOS software update servers suffer outages and problems, which will, of course, in turn, mean you have difficulties installing or downloading updates.

It’s really easy to check via the Apple System Status page. If you see a green light next to macOS software update servers, then you know everything is ok.
4. Run some simple Mac maintenance
When you encounter frustrating issues like updates not showing on your Mac, it’s not always possible to identify what causes them.
The truth is, it’s likely several things that are causing the issue. That’s why it’s always a good idea to carry out some regular system upkeep — things like removing temporary or broken files, repairing permissions, and rotating system logs can really help keep problems at bay.
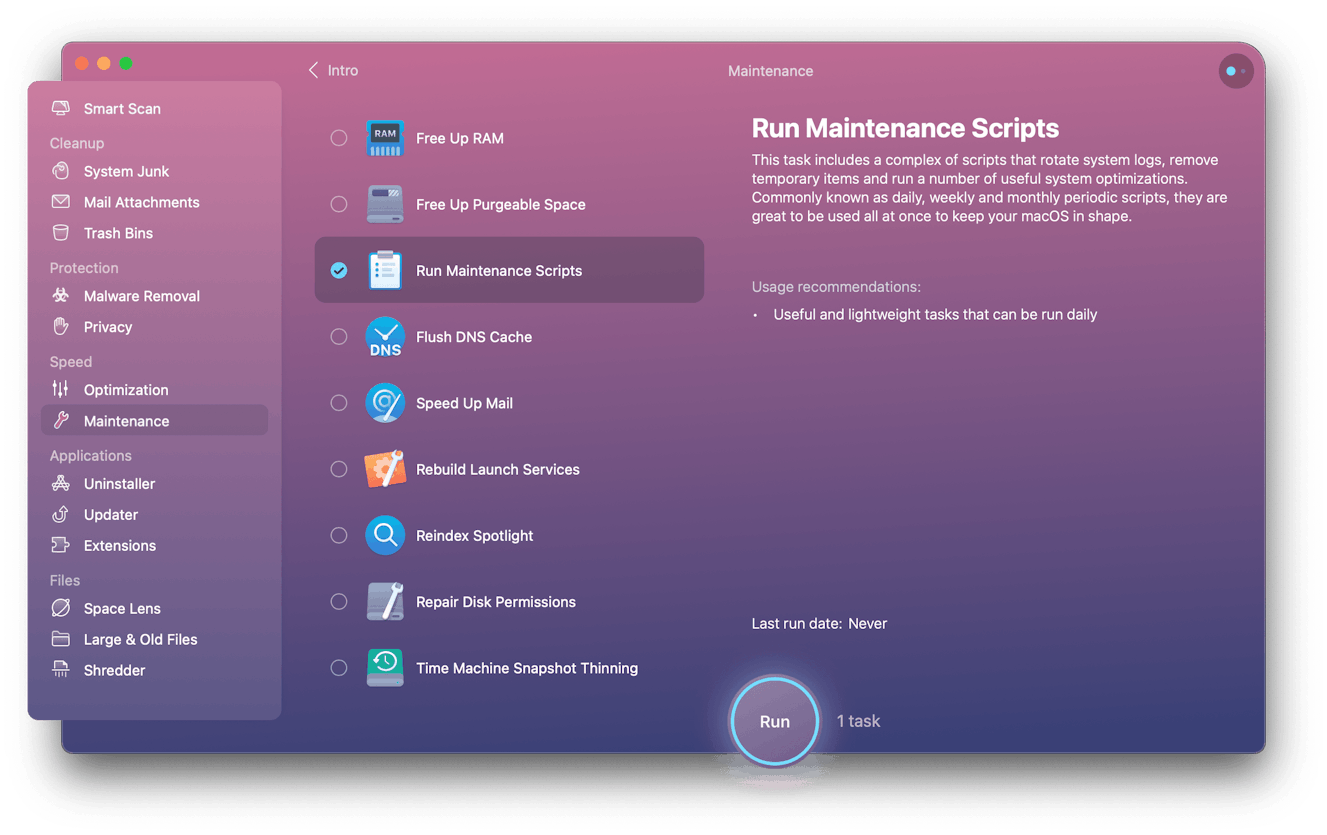
If you don’t have a regular maintenance plan, it’s time to build one. I personally like to use the Maintenance module from CleanMyMac X. Everything is in one place, and it makes the work of tedious manual maintenance tasks that usually take patience and time easy and effortless. Download the free version here if you haven’t already.
Here’s how to run important maintenance tasks the smart way:

-
Open the app and find Maintenance in the sidebar.
-
Click View All Tasks, then select the following:
Run Maintenance Scripts
Free Up RAM
Repair Disk Permissions
Free Up Purgeable Disk Space -
Click Run.
Now, head back to the Software Update in System Preferences/System Settings and try the refresh trick again (Command – R).
5. Use the Mac App Store to update
If running some restorative maintenance tasks didn’t do the trick, you can try to download the update directly from the App Store. Here’s how:

- Open the App Store from your device.
- In the search bar, type in macOS Ventura (or your current version).
- Click View > Get > Download.
You might need to wait for a few minutes for the download to start. From here, just follow the onscreen instructions to install the update.
6. Reload the software updater
If the previous tips didn’t work, as a final tip, you could try to reload the software updater from within Activity Monitor. Here’s how:

-
Open Activity Monitor from within the Utilities folder by going to Finder > Applications > Utilities. Alternatively, open it via Spotlight.
-
In the search bar top right, type in the following and press Return:
softwareupdate
-
Select all items from the list and Force Quit them by clicking the X button top left.
-
Finally, launch the Software Update once again from within System Preferences/ System Settings and try to install it.
The software update not showing on Mac error should now be fixed. If you’re continuing to have issues, it’s worth booking an appointment at your local official Mac service point for further support.


