
How To Install Presets In Lightroom Mobile – Step By Step
Mục lục bài viết
How To Download & Install Lightroom Mobile Presets
If you want a faster way to edit photos, presets are a great option. The only trouble is, how do you install presets into Lightroom Mobile? Whether you’ve created your own presets in Lightroom Desktop or recently purchased LR mobile presets online, it’s not immediately clear how to bring them into the app.
Luckily, there are several ways to install presets into Lightroom Mobile, with and without the need for a desktop computer.
To install a new preset into Lightroom Mobile, import the presets DNG file into the app. Once imported, bring them into the Edit Module, then create a new preset. You can do this by clicking the three dots in the upper right corner of the screen and selecting “Create Preset.” This will save the DNG file adjustments as a new preset that can be later applied to other images.
In this tutorial, I’ll walk you through the steps to download any preset in Lightroom Mobile. Whether you’re using the free version or are a subscriber of the Adobe Creative Cloud, the options you have are a bit different.
To start things off, let’s first discuss how to install Lightroom Presets without the need for a desktop. Afterward, we’ll talk about a slightly easier option if you already subscribed to the Creative Cloud and have a few presets you want to sync between Lightroom CC and Mobile.
Let’s get started!
How To Install Lightroom Mobile Presets WITHOUT A Desktop
The following steps are best if you’re only using the free version of Lightroom Mobile and don’t have access to the desktop apps. If you recently purchased Lightroom Mobile presets online, this will be the best way to install them as well.
Step 1: Unzip Your Preset File

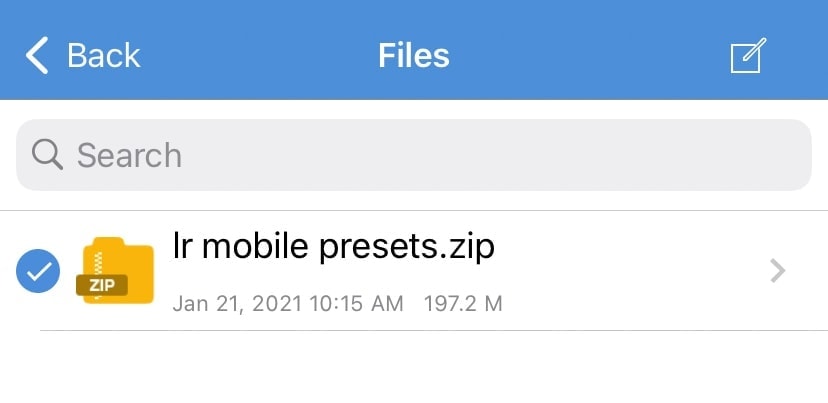
If you’ve purchased a preset pack, it will be in a ZIP file. On some mobile devices, you cannot unzip files without an app. Luckily there are a few great free apps for both iOS and Android.
The app I recommend and use is called iZip. This app is completely free and provides options to save the extracted presets to a specific location.

You can download iZip for both iOS and Android here.
Step 2: Save The Extracted Files To Cloud Storage
After you unzip your file, you’ll have access to all the DNG files inside. Since most people can’t directly save these to the camera roll, you’ll need to use a cloud storage option.
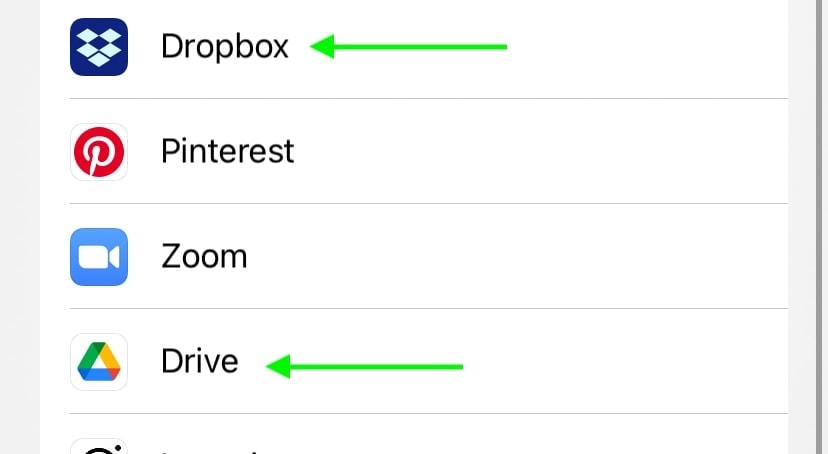
There are several free options out there, but the ones I like to use are Dropbox or Google Drive.
Each of these options provides enough free cloud storage for any preset importing needs. Better yet, they’re both easily accessible from the Lightroom Mobile app!
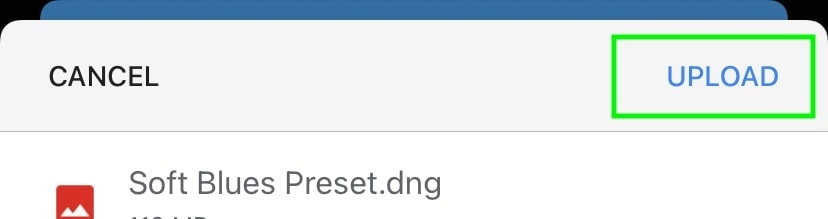
Simply create a new folder in your cloud storage provider and save all your preset files inside. The goal here is to make them easily accessible so you can find them later on.
Step 3: Open Lightroom Mobile & Import The DNG Files
Now it’s time to bring your presets into Lightroom Mobile. This process follows the same steps as importing any other image from your device into the app.
While in the Library Module, select the Add Photos button.
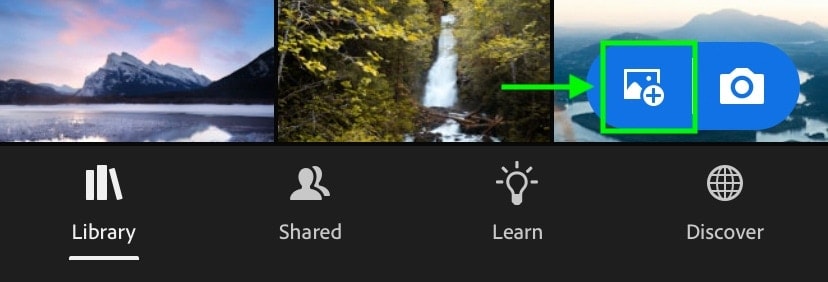
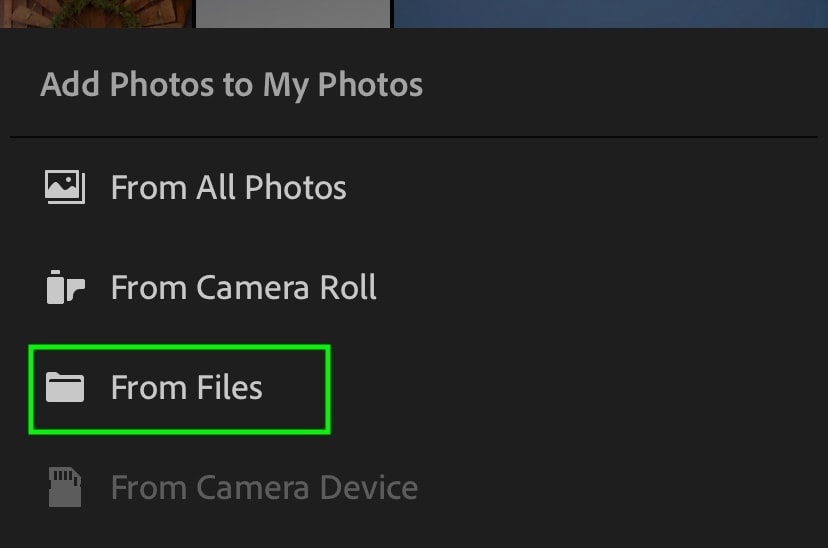
Since the presets are being kept in cloud storage, select the “From Files” option. This allows you to import photos from locations other than your camera roll.
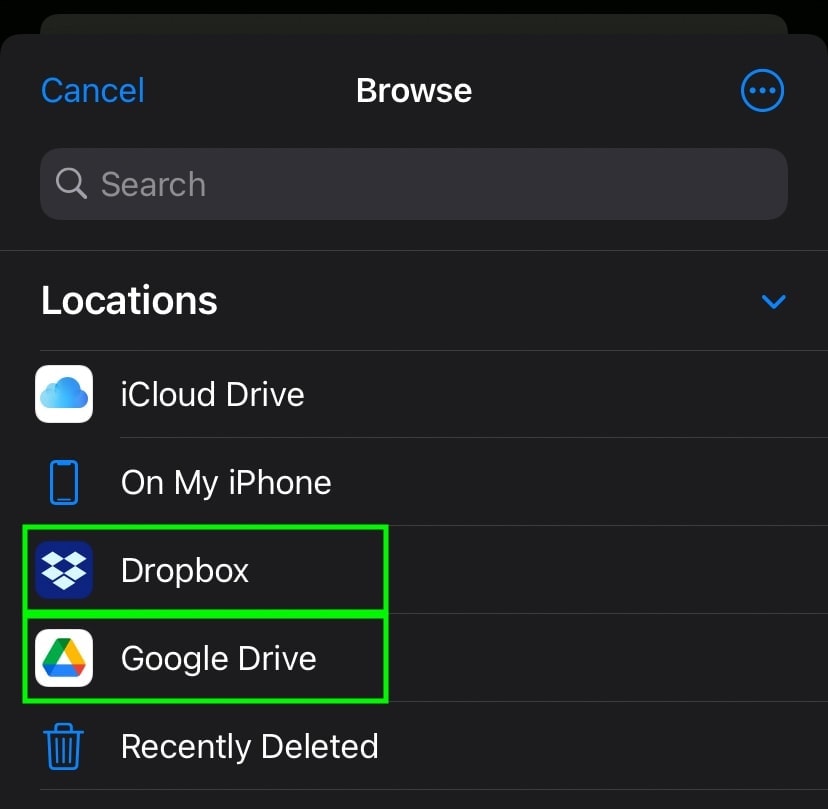
Under the locations tab, select the app you’ve saved your presets to. In this case, I’ve saved them to Google Drive, so I’ll select Google Drive. Keep in mind that this will only work if your cloud storage app of choice is installed on your device.
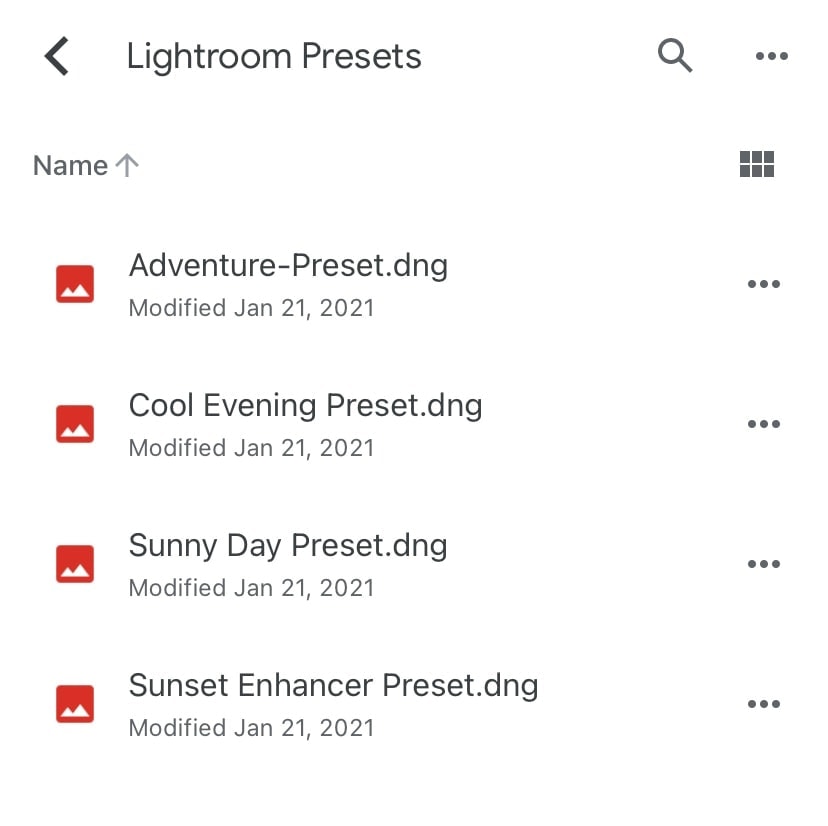
Browsing through your saved files, locate the folder where you saved the Lightroom Mobile presets.
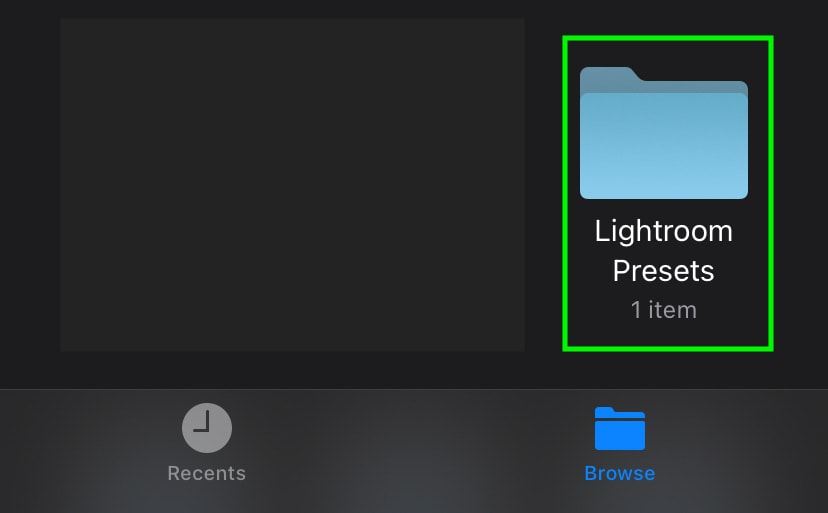
To import a file, click on it to bring it into the app. Now it will be saved among your other images in your Library.
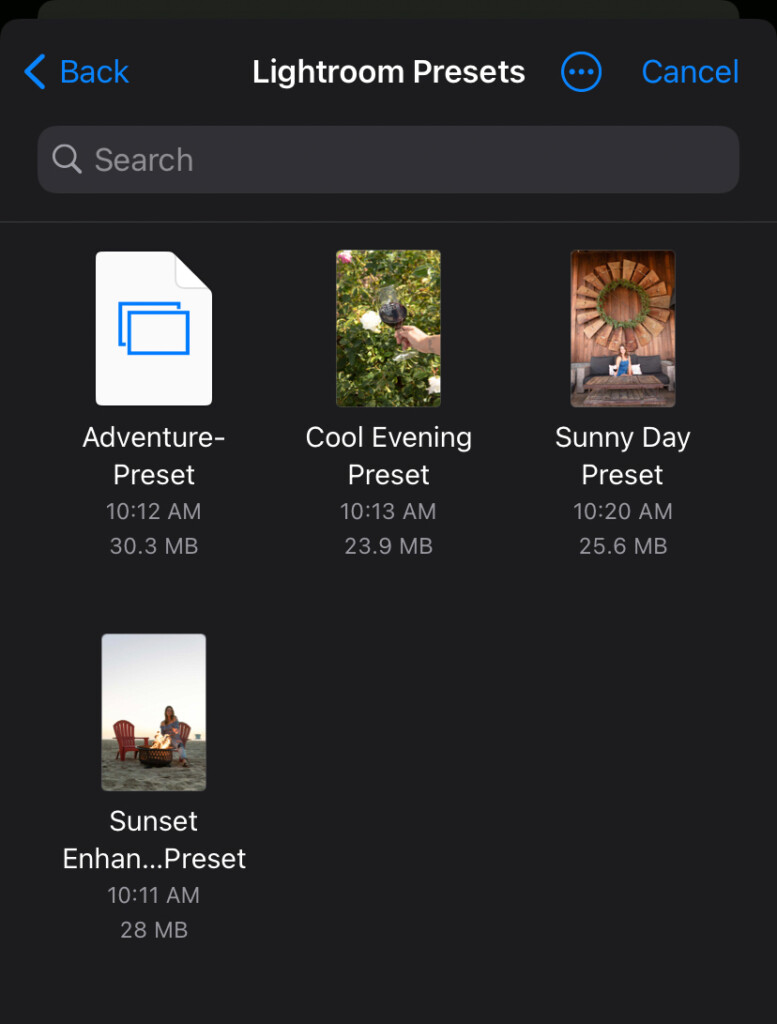
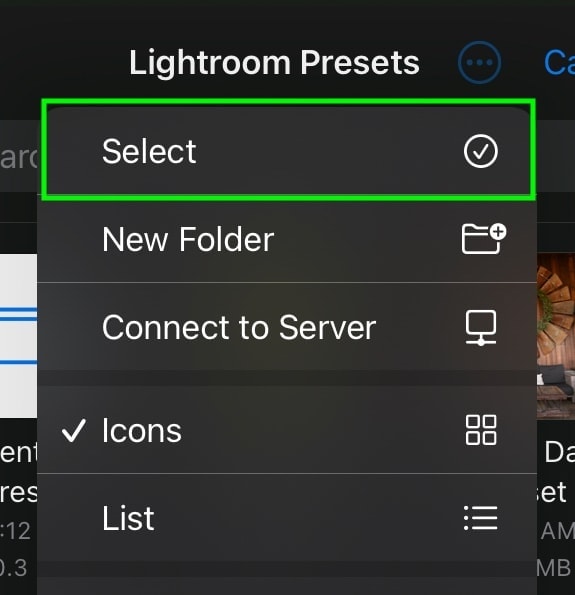
If you want to import multiple photos, click on the three dots at the top of the window and choose “Select.” Now you can import all of your LR Mobile presets at once.

![]()
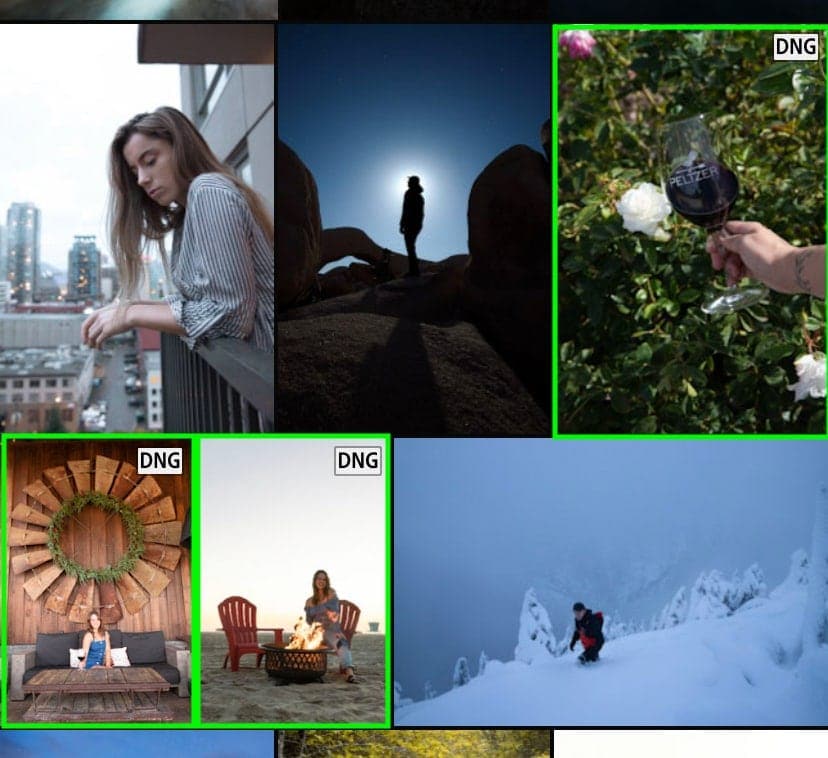
This may vary slightly depending on your device or the cloud storage option you use. However, most smartphones and tablets will provide some way to select multiple presets for import.
Step 4: Save The DNG Files As New Presets
With all your preset DNG files imported, select one to open it in the Edit Module.
Since these files will already have the presets applied to them, all you have to do is save these adjustments as a new preset to use later.
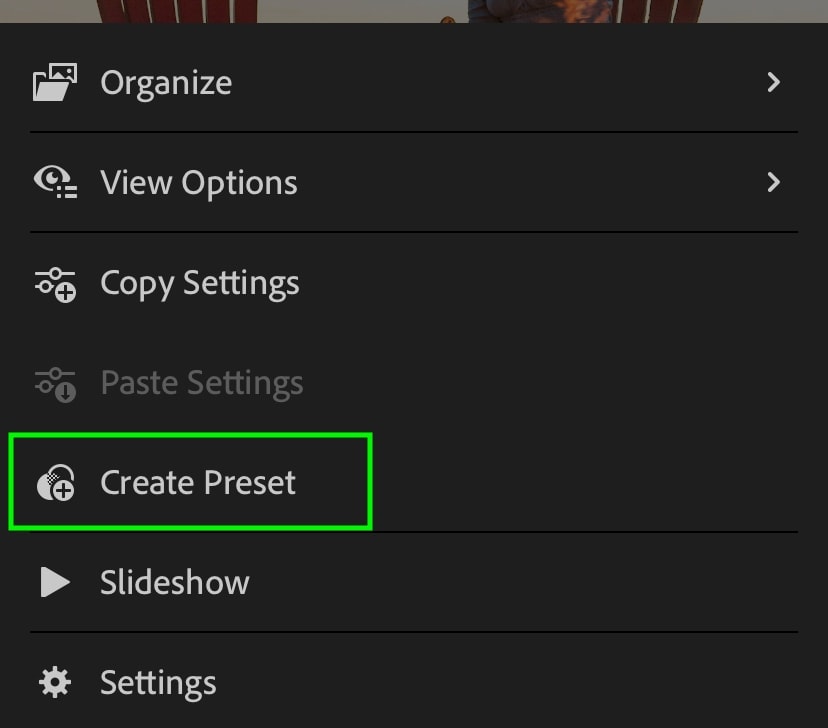
Looking to the upper right corner, click on the icon with the three dots.
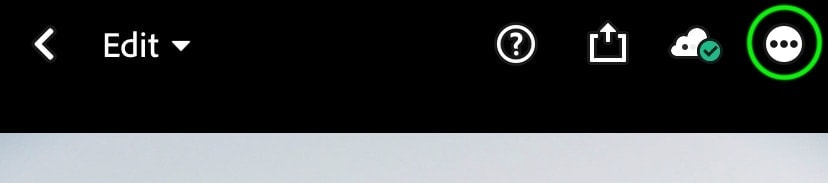
In the new window that appears, select “Create Preset.”
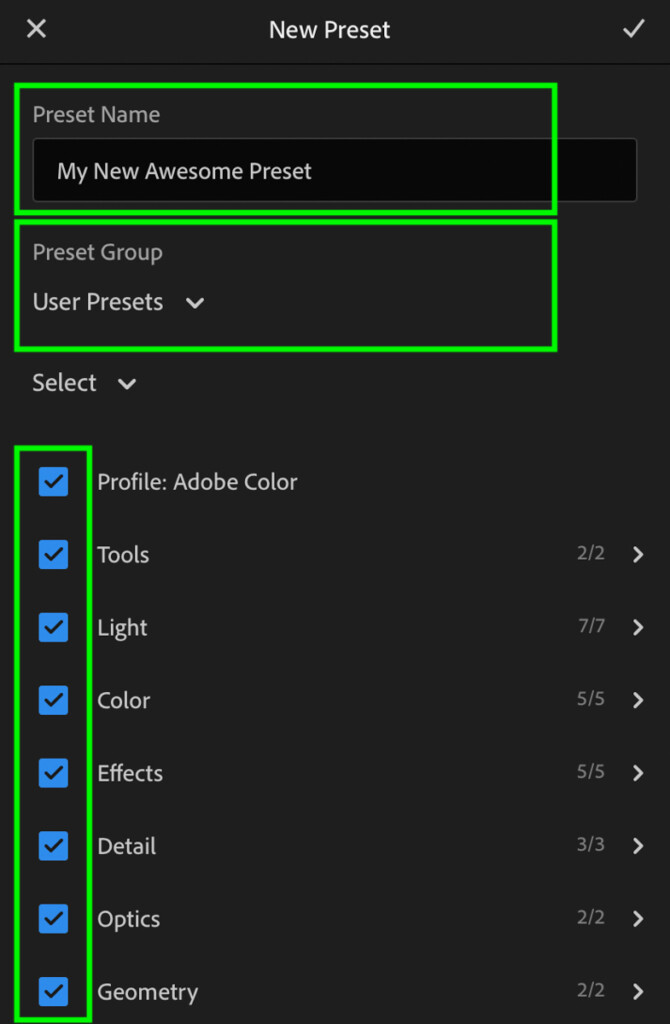
You can create a preset name, select where to group it, and what adjustments you want to include.
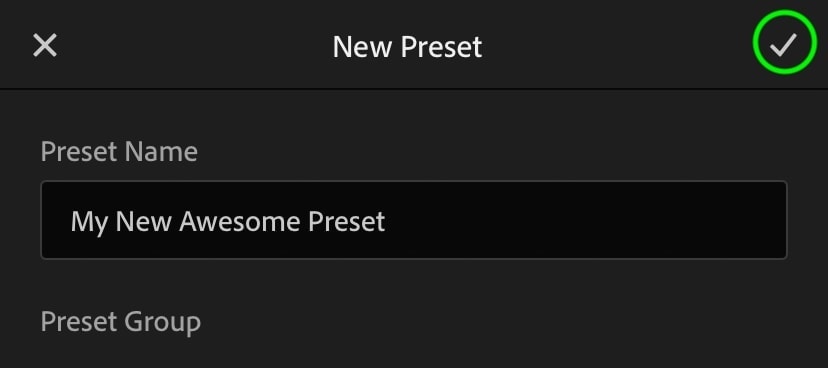
In most cases, it’s best to just select all the adjustment options, so you don’t accidentally exclude something from the preset. Once you’re happy, click the checkmark in the upper corner to save your preset.
Unfortunately, you’ll have to rinse and repeat these steps with all of the DNG presets you want to install. Especially if you’re installing a large preset pack, this might take a bit of time. On the bright side, though, you’ll only ever need to do it once!
Step 5: Apply Your Presets Onto Other Photos!
Now that all your Lightroom Mobile presets are installed, it’s time to start putting them to use!
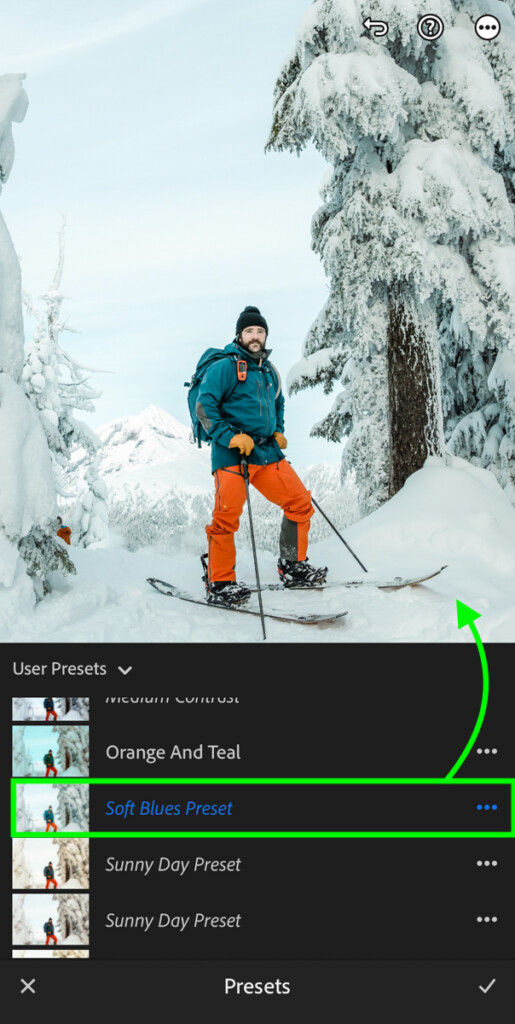
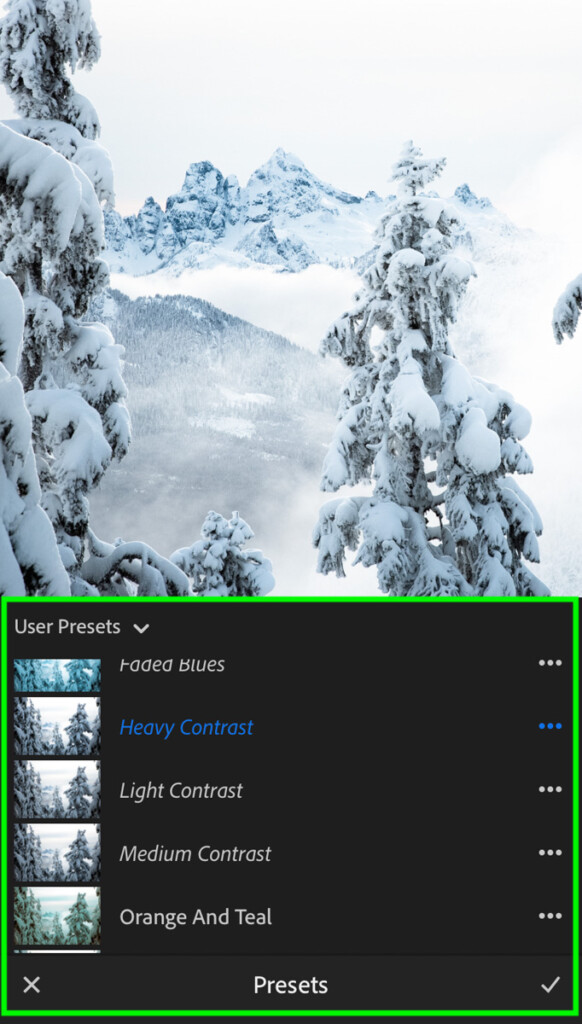
Select a photo you want to edit and bring it into the Edit Module. Look through the toolbar until you see the “Presets” option.
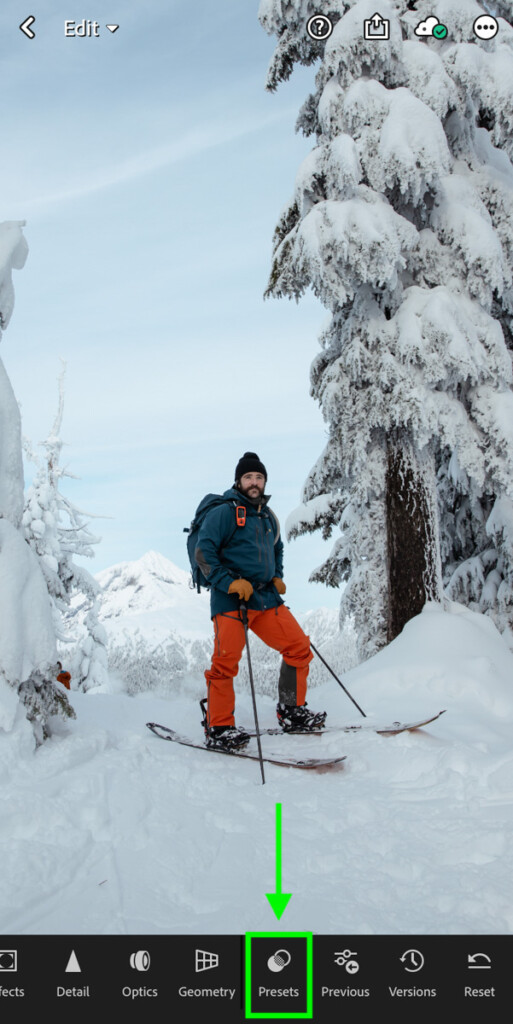
Here you’ll find all your installed LR mobile presets, including the ones you just saved.
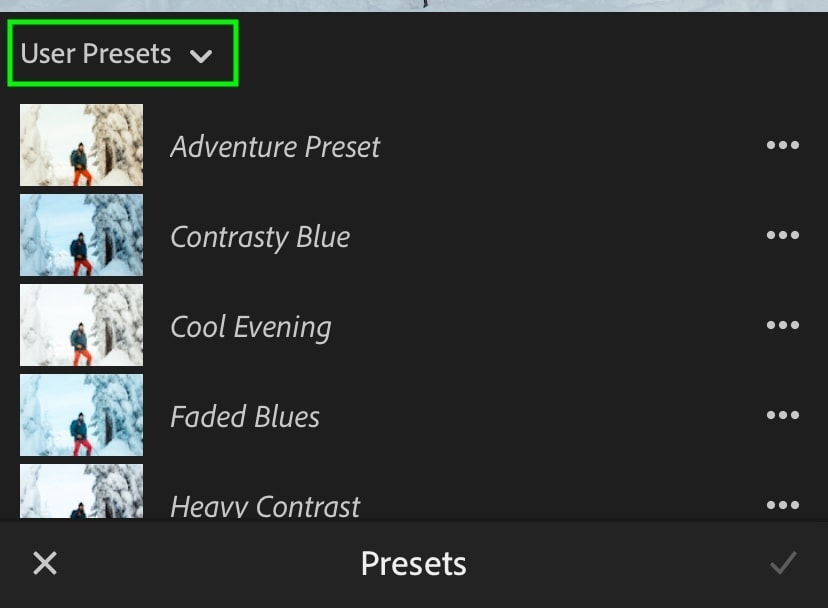
To apply one to a photo, just click on it! Once you’re happy with the preset, hit the checkmark to commit to your changes.

After the preset is applied, you can make further edits to your photo as needed. Sometimes a few subtle adjustments are the missing piece to really make a photo pop after applying a preset.
And with that, you can start editing pro-level photos in no time!
How To Sync Lightroom Mobile With Lightroom Desktop
For this secondary option, it’s significantly faster than the method we just went over. The only trouble is that you need to be a paid Adobe Creative Cloud subscriber.
With something like the Photography Plan, for example, you get more tools in Lightroom Mobile and access to Lightroom and Photoshop on desktop.
If you are not subscribed to one of Adobe’s plans, this option will not work for you.
Step 1: Import Profiles & Presets To Lightroom CC
Starting in Lightroom CC, you’ll want to ensure that all your presets are imported. Whatever you have available in Lightroom CC will become available on Lightroom Mobile once syncing is complete.
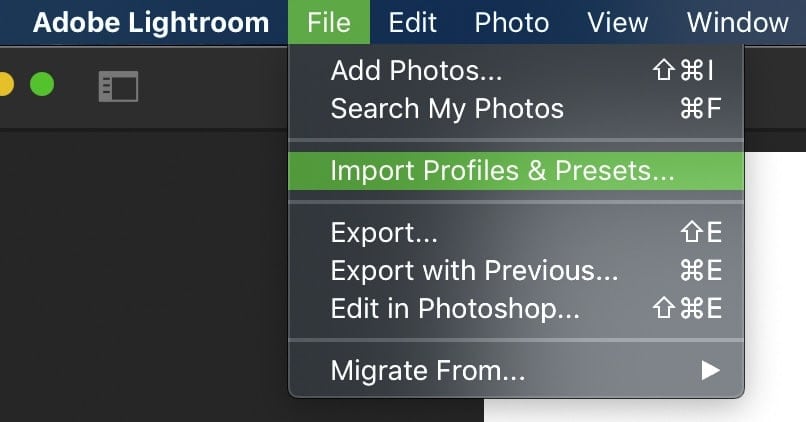
If you have new presets you’d like to add, simply go to File > Import Profiles & Presets.
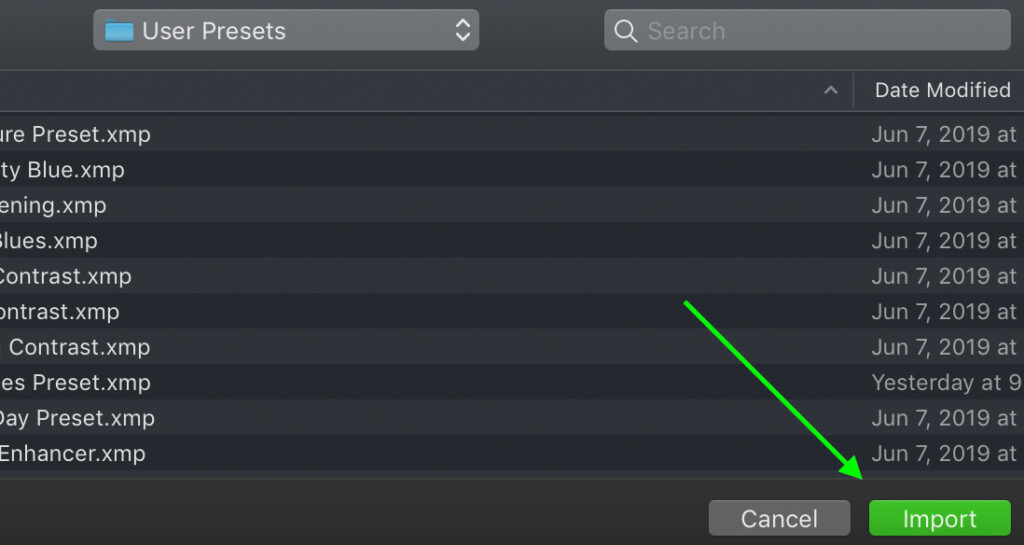
Navigate to the presets saved on your computer, and import them into Lightroom CC. When you’re working on desktop, preset files will be XMP files rather than the DNG’s we worked with earlier.
Step 2: Enable Sync
By default, Lightroom CC will have sync enabled to other cloud-based Adobe Applications such as Lightroom Mobile.
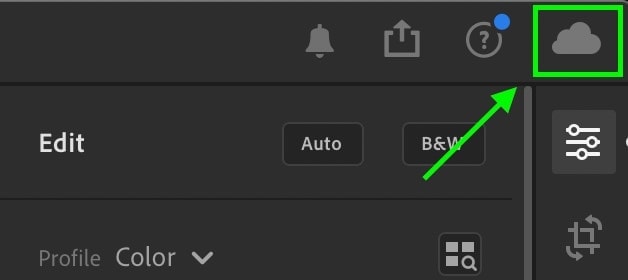
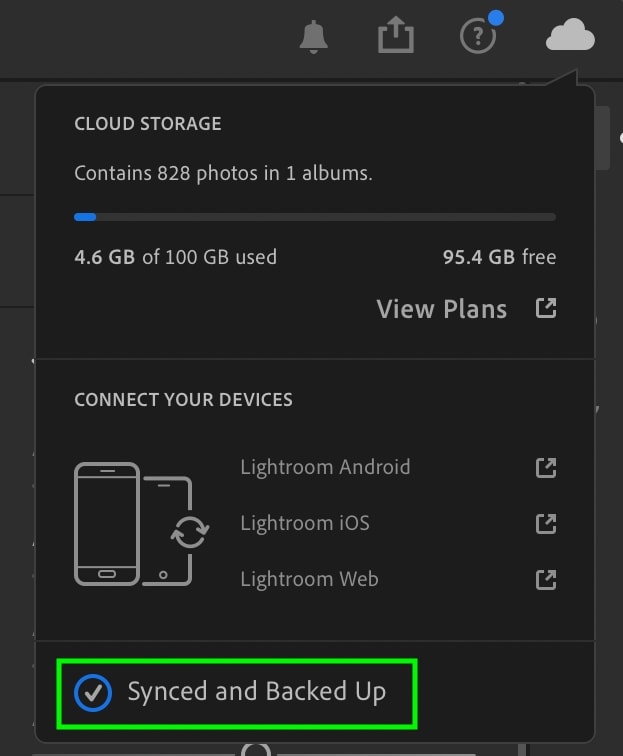
However, if you had paused it in the past, you’ll want to enable it again. Clicking on the cloud icon in the upper right corner of Lightroom CC, make sure syncing is enabled.
Step 3: Open Lightroom Mobile
Now that your work is done in Lightroom CC, open up the Lightroom Mobile app on your phone or tablet.
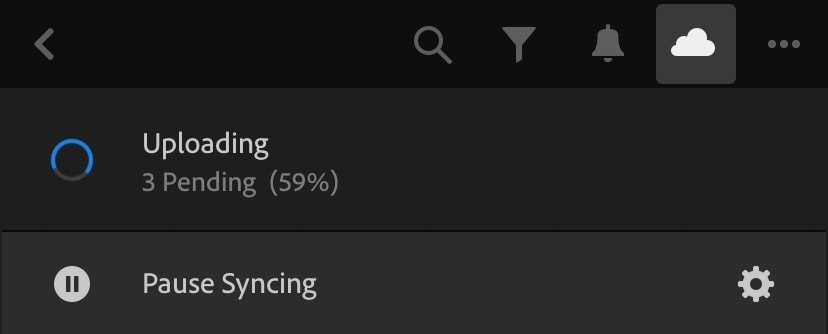
In the top part of your screen, you’ll see the same cloud icon as before. Click on it to reveal the syncing options.

After making sure that Lightroom Mobile has syncing enabled, now you just have to wait for the syncing to finish.
Once it’s complete, all your profiles and presets from Lightroom CC will be saved to Lightroom Mobile and accessible through the presets panel.
Can You Use Lightroom Mobile Presets On Desktop?
You can use any Lightroom Mobile preset in Lightroom CC by syncing the two apps. Once synced, all your mobile presets will appear on desktop and can be used right away. This is only available to those subscribed to one of the Adobe Creative Cloud plans that feature Lightroom. Otherwise, you won’t have access to Lightroom CC, therefore making it impossible to sync presets.

The sync features between Lightroom Mobile and Lightroom CC use Adobe’s cloud storage to transfer media between the two apps. Different types of Lightroom plans offer more or less cloud storage options.
If you’re syncing photos, you may quickly run out of space, but if you’re just using it to sync presets, it won’t be a problem. After all, one preset is usually far less than 1MB in size.
Depending on how many presets and photos you have, the syncing process can take several minutes or several hours. However, once the sync is complete, all your presets will appear in both Lightroom CC and Lightroom Mobile.
So that is how to download and install presets in Lightroom Mobile without a desktop, OR how you can sync your presets between LR Mobile and CC. Either way, the steps are very easy to follow, but importing presets to LR Mobile manually can be quite time-consuming. Even doing everything correctly, it’s going to take a few minutes to get all your presets ready for action.
The redeeming factor of it all, though, is that your presets will stay in the app indefinitely. So you only have to go through the whole process once!
If you’re already subscribed to the Adobe Creative Cloud (with something like the Photography Plan), having the option to sync is crazy convenient. Rather than having to do everything manually, this makes the process automatic. You can explore more of Adobe’s Photo Editing Plans HERE.
Now, if you’re new to editing photos in Lightroom Mobile, make sure to check out my previous tutorial on how to get the orange and teal look to help you get more creative!
Happy Editing,
– Brendan 🙂


