How To Verify Your WordPress Site Using Google Search Console
So, you’ve spent a lot of time designing and beautifying your site, and you even bought the domain. You are ready to start sharing your site with the world, but something is missing. Google still doesn’t know who the site’s owner is, thus you need to Verify Site with Google. You are about to learn all you need to know about Google site verification, how to get your website verification code.
Mục lục bài viết
Verify Site with Google – Getting Friendly With Google Search Console
The first thing you need to do is to open Google Search Console.
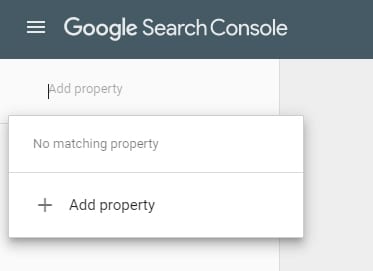
If you didn’t configure anything before, you will see a blank page with the splash screen like the one below:

You now need to click on a button on the upper left side of the screen called “Add Property”.
Now, depending on the situation, you can choose what method you want to use for this, accordingly. The Google verification doesn’t take long, but keep in mind that after a certain period Google checks to see if the google site verification is still valid. (for example, if the HTML file is still on the server, or if the meta tag is still located where it should be). If some problem occurs, like you somehow lost the ability to access the property, you should choose another owner.
Verify Site with Google – Domain Property Type
If you chose the domain option in your search console account, there is only one verification method you can use. (DNS provider verification) This is like it says on the picture below, available for all URLs across all subdomains (m., www. …) and across both protocols.
s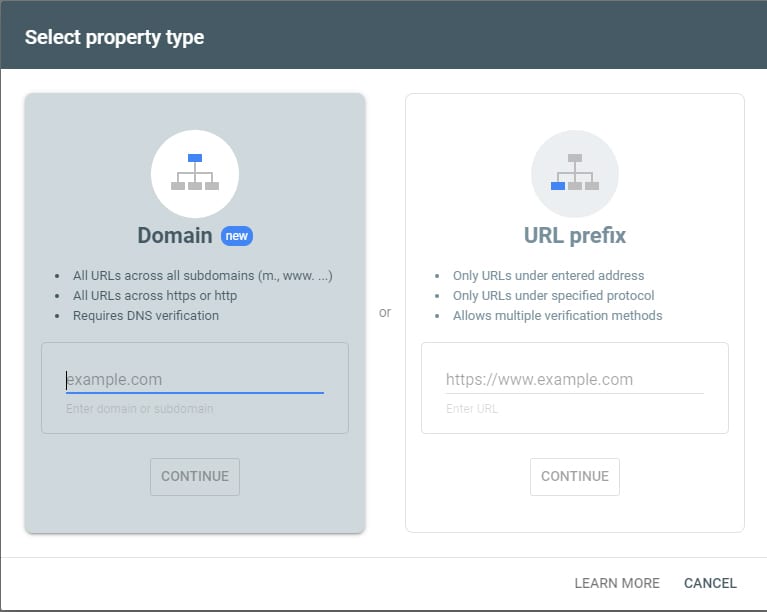
DNS Verification
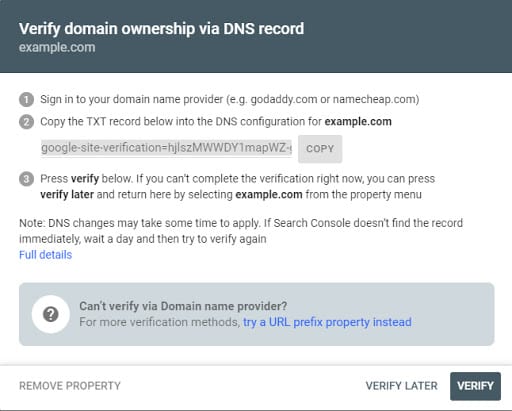
To verify your site using the DNS verification process you will have to sign in to your domain name provider (for example GoDaddy.com) and do the following:
-
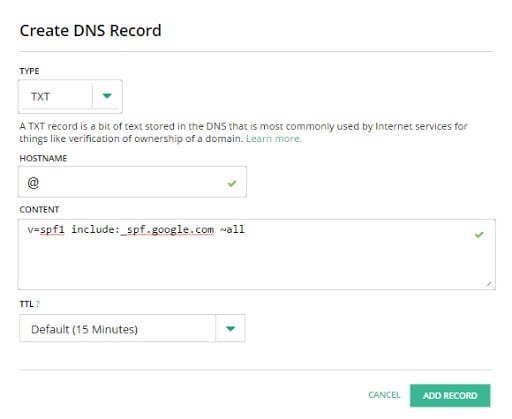
After you chose to “verify ownership using DNS record”, you were provided with a string known as TXT record.
-
Having that string, you must now add it to your domain provider’s DNS records. This step should look similar to the image below.
-
Finally, all you need to do is click verify.
There could be some problems while using this method:
-
If you’ve just added the TXT record wait a few minutes and then try to verify your domain because sometimes it takes some time for it
to become visible
to Google.
-
“
Your TXT record did not match
” means you didn’t copy the exact thing google search console provided you with. Be sure to check that.
Verify Site with Google – Prefix Property Type
For this option, there are multiple verification methods. It is available for URLs under the entered address and specified protocol only.

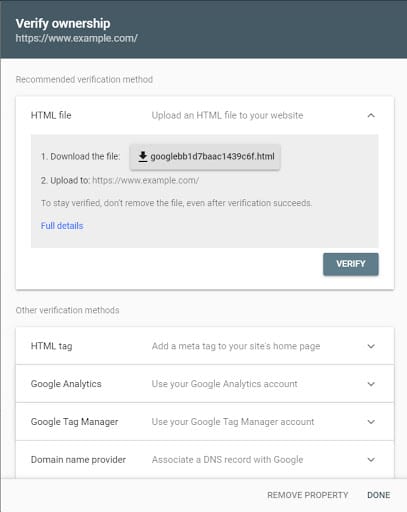
Google Site Verification Using the HTML file upload method
This method allows you to verify your website as easy as possible and all you have to do is to upload a specific HTML file to your site. It’s important to note that the file ties itself to a specific user. To verify it this way you just need to choose this method on the verification details page, download the file and upload it to your site. Remember that if for some reason you remove it, the site loses Google verification.
There is a possibility that some errors specific to this method could occur:
-
If your
verification file is not found
, go to the verification page, download the file
once more
and upload it. Again, don’t make any modifications. If the file is not an exact match of the one provided, google won’t verify your site.
-
Your
site can show a weird behavior
, which means there is a chance the file was hacked . (or you modified the verification file) In this situation, the verification attempt could fail. To fix it learn more about how to detect and fix hacked sites.
-
The verification file can
redirect to another site
. In this case, it’s best for you to use
meta tag verification
.
Verify Site with Google Using an HTML tag method
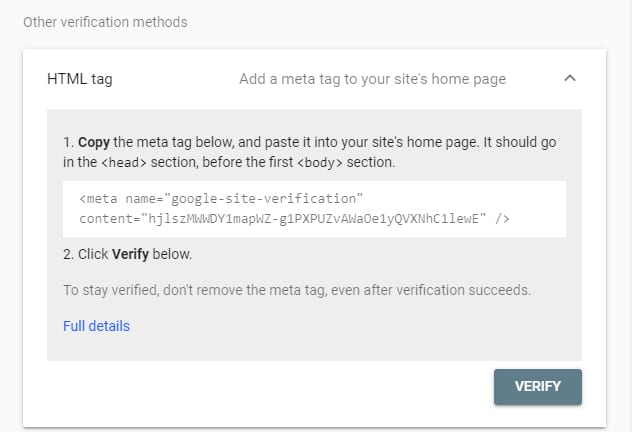
By simply adding a specific meta tag (<meta>) to your homepage, your site can quickly and painlessly be verified. After you add it, the Google algorithm will check if the verification meta tag exists in the correct location. If it doesn’t, you will get the information on the error it encountered. Like in the HTML file method, this tag is also tied to a specific user. The image below shows this process.
Some situations can prevent the site from being verified.
-
The
meta tag is not found
. This tag needs to be in the <HEAD> section of the page. Check your code to see if it is placed correctly.
-
You haven’t placed it in the
correct HTML file
. The tag needs to be on the site’s home page. (the page your server returns when your site is opened)
-
Your meta tag is
not correct
. Google can find your tag but its content is not correct. To fix it, copy the exact text you got using Google Search Console.
Using the Google Analytics Account method
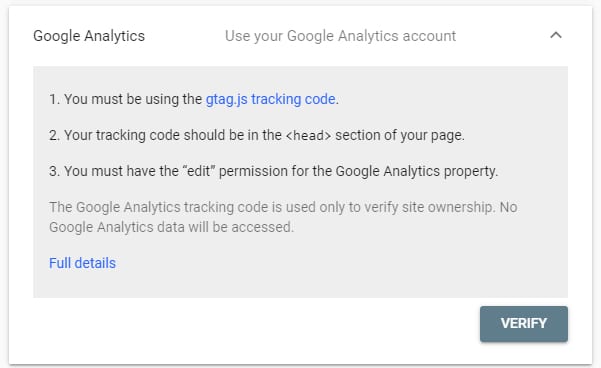
If you already configured Google Analytics with google account connected to your site, this method will be the fastest one. What you need to do is to open your google search console and choose the option “Use your Google Analytics account” from available verification methods.
Then you just click verify.
Google Site Verification with Yoast SEO
If you are using Yoast SEO, you can verify your site with Google Search Console. To do this, open your WordPress dashboard and go to SEO >> General. Next select “Webmaster Tools” to complete the verification process.
Now, paste your Google website verification code in the box provided.
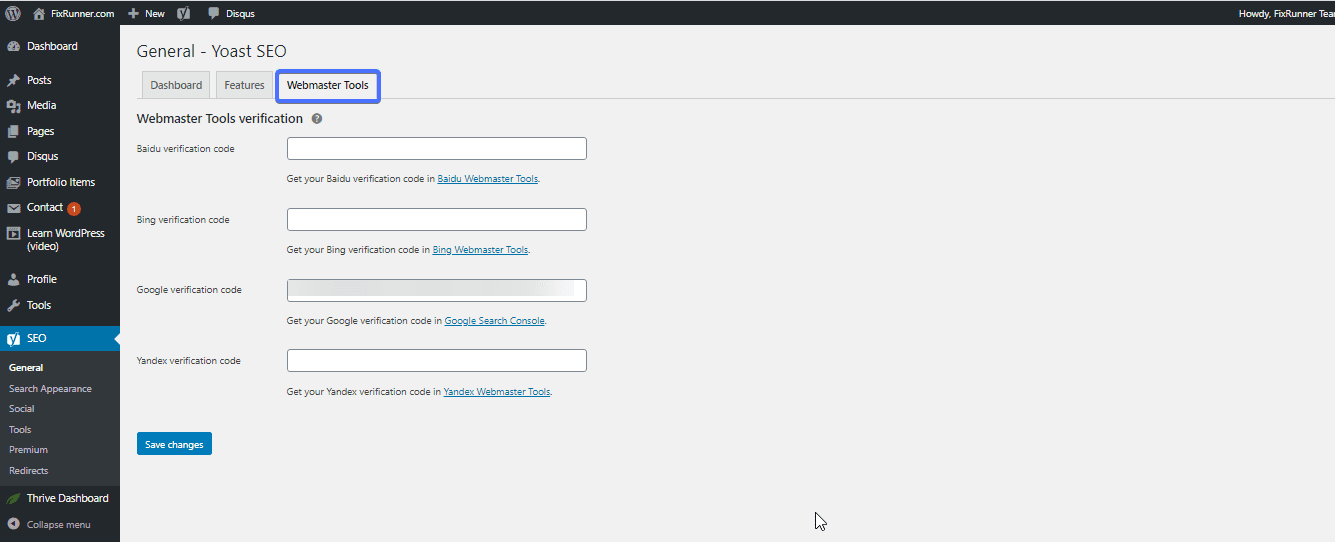
If you don’t know how to find your Google website verification code, here is what to do:
- Open Google Search Console, and click on “Alternate methods”.
- Click “HTML tag”, and copy the tag.
- Open the Yoast SEO interface and paste the tag. The plugin does the rest of the job for you. It extracts the verification code leaving out the other parts of the tag.
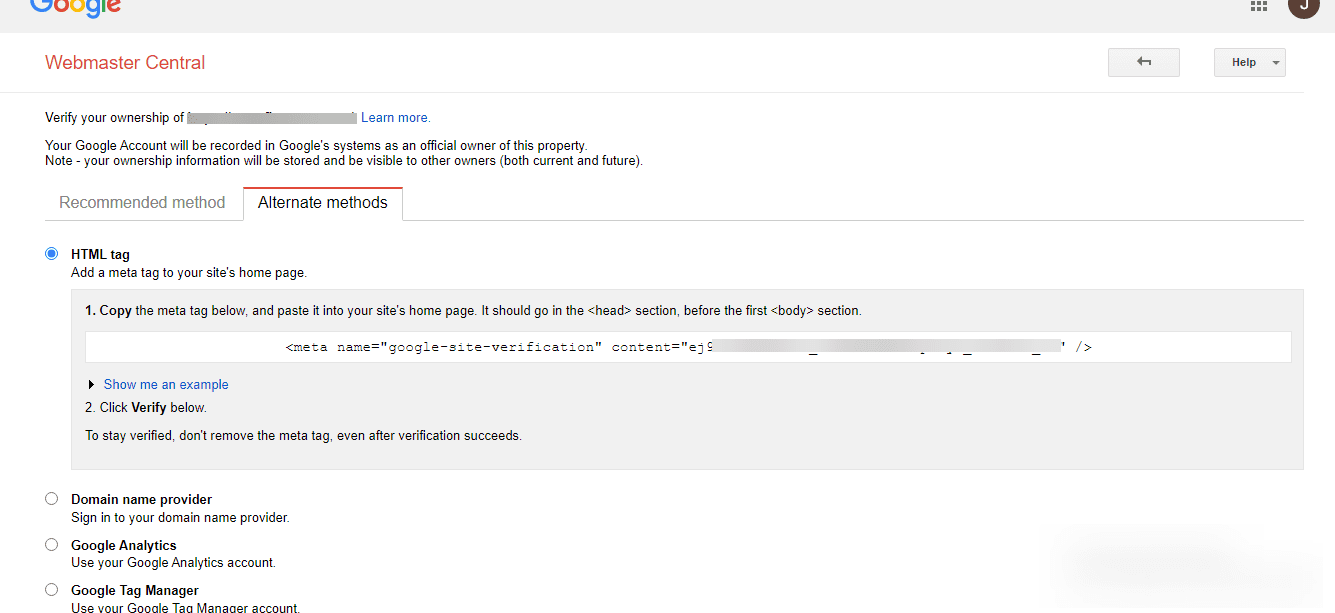
Finally, hit “Save changes” in the plugin’s interface .
Potential Verification Errors With Any Chosen Method
These errors can happen in all verification methods:
-
This one should be obvious, but you must use the same string value, tag, or file provided to you when you chose the proper verification method. By doing that you will prevent
incorrect tag/snippet/file errors
from happening
.
-
There is also a risk of
server timing out or being down
and therefore prevent google from verifying your site.
-
A
DNS error
can occur when the server is down or there is a problem with DNS routing.
-
Your URL can have problems like the infinite loop, so
the download request is redirected too many times
.
-
Your server can require password authentication, certainly, that would return an
invalid response
.
-
If your
site stops responding
to google’s requests, you should confirm that it is responding and try again.
-
Supposing
Google can’t find your domain
, you should check if you provided the correct URL.
If you are looking for WordPress professional help our team is available for any request you have.
More Resources


