How to Download & Install Power BI Desktop – Step-by-Step Guide
In this article, we will guide you on how to download and install Microsoft Power BI Desktop in Windows OS in simple & easy steps.
Before we are proceeding to download the Power BI desktop, you must be aware of the following system requirements.
The following are the minimum requirements for installing Power BI Desktop:
-
Microsoft Power BI Desktop supports – Windows 7, Windows 8, Windows 8.1, Windows Server 2008 R2, Windows 10, Windows Server 2012, Windows Server 2012 R2.
-
Supports both 64-bit(x64) and 32-bit(x86) platforms.
-
Requires Internet Explorer10 or a new version of IE(Internet Explorer).
-
Requires .Net Framework 4.5.
-
Our CPU must have at least 1 gigahertz(GHz) speed.
Want to build your career as a Power BI Developer? then Enrol in to our Power BI Online Certification Training

Well, let’s discuss downloading Power BI desktop in detail.
Mục lục bài viết
How to Download Power BI Desktop – Step-by-Step Guide
Step 1. To download the Power BI Desktop application, first, go to the Official Power BI Website. The following image shows you a download page from the official website and also the Download or Language Options.

Step 2. Once you click the Download or Language Options, you will notice the following dropdown box.

Step 3. Next, you can select any one of the languages as per your need in the dropdown box.

Preparing for Microsoft Power BI Interview? Here’s Frequently Asked Microsoft Power BI Interview Questions

Step 4. Once a language is selected, it will dynamically change the content to that language. Please click the Download button.
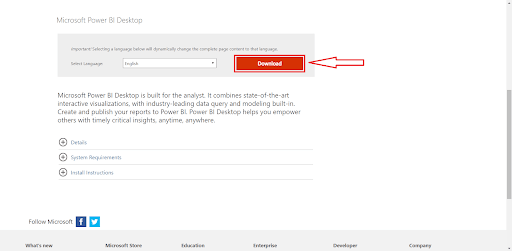
Step 5. The download button offers you to choose a downloadable OS file either 32Bit or 64Bit ( depending upon your system architecture).

Visit here to know about Power BI Architecture
Step 6. The Next button will be enabled once you select either of the FileNames. Now, Click the Next button to download it on your device.

Do you Know–
What is Power BI Slicer is?
Step 7. Once you open the downloadable file on your system, you will notice the following dialog box.
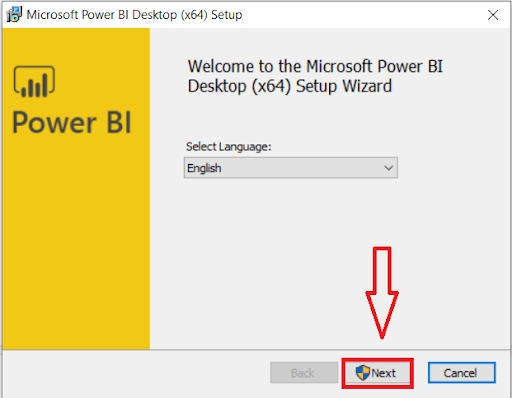
Step 8. Once you click the Next button, you will be asked to click the Next button to continue or the Cancel button to exit in the dialog box.

Step 9. The license agreement dialog box is displayed once you click the Next button. Now the Next button will be enabled after you click the checkbox.

Step 10. Click the Next button to open the Destination folder. The folder allows you to either leave the default C location or use the Change button to alter your desired location for installing Power BI Desktop Application in your device.
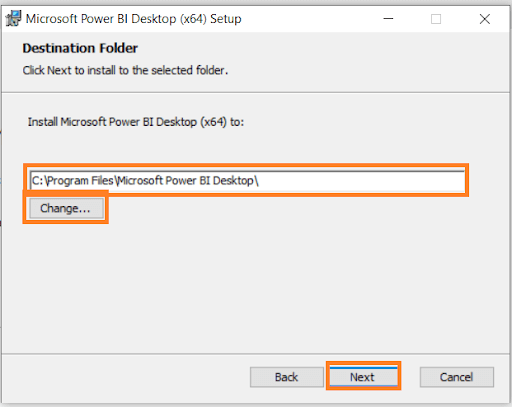
Step 11. Please, click the Next button to give you the following alternatives.
Also Read Power BI Gateway
Step 12. Are you ready to Install? If, yes click the Install button (or) Do you want to review or change any of the installation settings? If yes, click Back Button. Next, click the Install button for installation.

Step 13. Please, wait until the installation is finished.

Step 14. Click the Finish button to initialize the process.
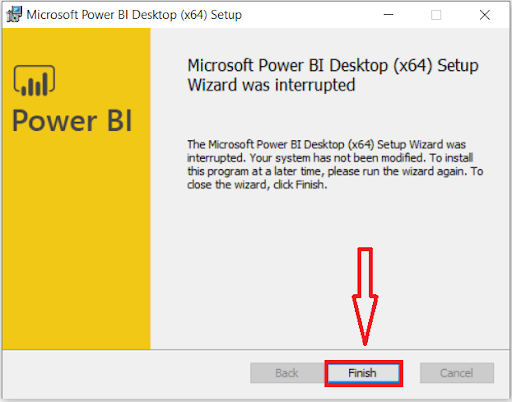
Step 15. Please, Wait for a few seconds to start Power BI Desktop.

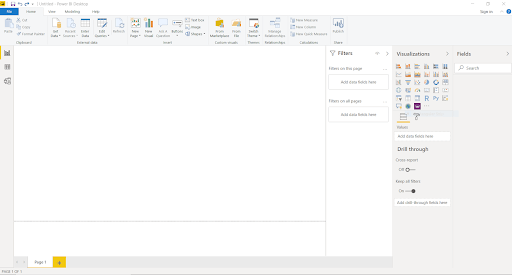
Step 16. Here you can see the installed Power BI Desktop Page. Let me Close the start page.

- That’s it. Power BI Desktop is now ready for analytics or report development! From there, you can begin creating data models or interactive reports.
- When Power BI is installed, it generates a welcome screen.
- This screen is used to launch different options related to getting data, enriching the existing data models, creating reports as well as publishing and sharing reports.
So, this was all about installing a Microsoft product Power BI Desktop. Hope you like our explanation.
Final words
Hence, in this guide, we saw how easy it is to install the Power BI Desktop on your computer. It does not take more than 5 minutes in the best case.
Still, If you have any confusion, drop a query on the below comment tab. Got any questions? Leave a comment below and we will get back to you


