
How to Download and Install Apache JMeter on Ubuntu 20.04
Apache JMeter is a desktop application to perform load testing and measure the performance of a variety of services. It is completely free and open-source. JMeter is an Apache project and written in Java.
Apache JMeter may be used to test performance on static and dynamic resources. It started as a way to test web servers but developed to a lot more protocols like SOAP, FTP, Mail servers, or Database servers. JMeter can be used to simulate a heavy load on a server, group of servers, network, or object.
In this tutorial, we learn how to install Apache JMeter on Ubuntu 20.04. You can follow the same steps for other Linux distributions.
Prerequisites:
- A Ubuntu Desktop 20.04 Desktop
- A user with sudo access
Mục lục bài viết
Install Apache Jmeter on Ubuntu
Installing Apache JMeter is quite simple on Ubuntu and other Linux Distributions. JMeter requires java installed. You can either use JRE or JDK.
JMeter is available in the default Ubuntu repository but it has a very old version. The recommended way is to download from the Apache JMeter website.
01. Install Java
First, make sure java is installed or not. Run the following command to check the java version.
$ java --versionTo install the default java on Ubuntu, type:
$ sudo apt install default-jreOn Ubuntu 20.04, this will install OpenJDK 11 version.
02. Download Apache JMeter
Visit Apache JMeter download to find the latest version of JMeter. Here I am downloading JMeter 5.4.1 zip file.
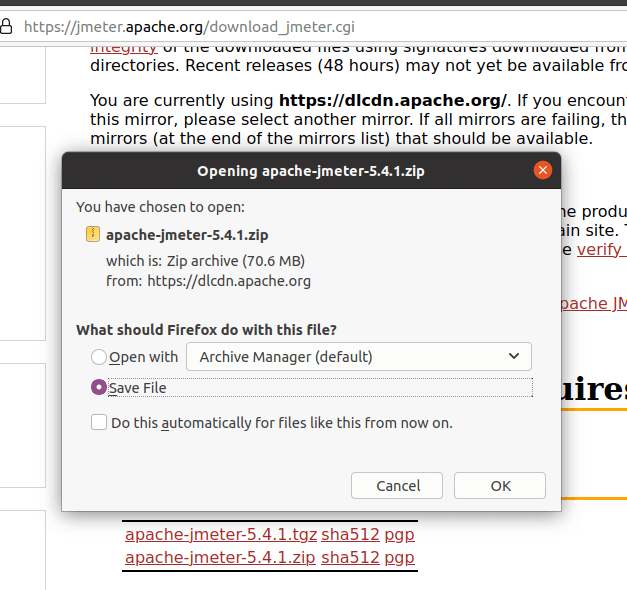
Alternatively, you can download JMeter using terminal:
$ wget https://dlcdn.apache.org//jmeter/binaries/apache-jmeter-5.4.1.zip03. Extract Archive file
You can find a .zip file under the Downloads directory. To extract, right-click on the .zip file and from the menu choose ‘Extract Here’.
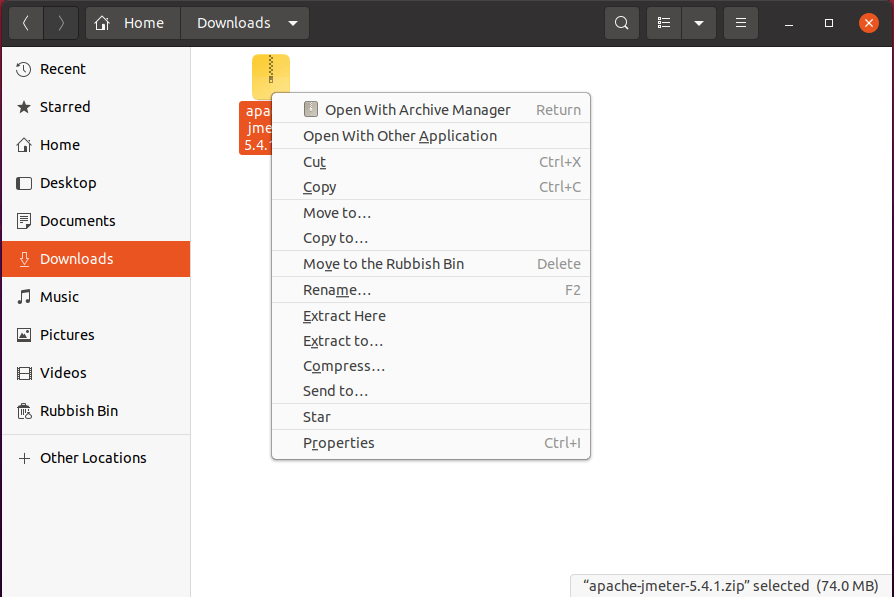
The same you can perform from terminal using:
$ unzip apache-jmeter-5.4.1.zipYou can check JMeter version using the following command:
$ ./apache-jmeter-5.4.1/bin/jmeter --version04. Run the Jmeter
To run the JMeter you need to change the directory as follows:
$ cd apache-jmeter-5.4.1/binNow run the JMeter using the following command:
$ ./jmeterThis will open the JMeter interface and all good to set up your Test Plan.
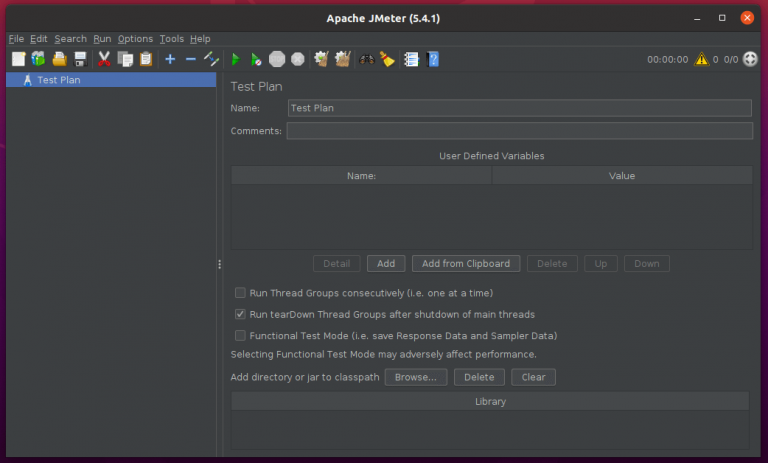 Add test plan
First, add a name to your Test Plan ( here I kept the default name) and then create a Thread Group by right-clicking on the Test Plan and selecting from the menu Add > Threads (Users) > Thread Group
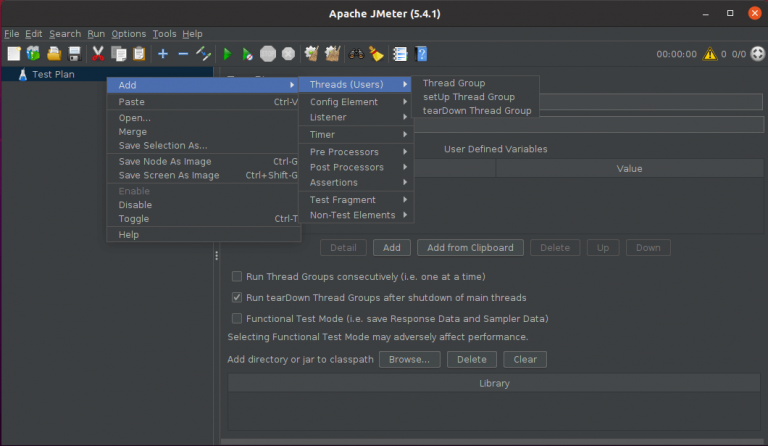 Add thread group
In the Thread Group settings, you will have 3 important fields you will have to setup:
 Add thread properties
Number of Threads (users): This is the number of connections the application will use.
Ramp-Up Period (in seconds): The ramp-up period tells JMeter how long to take to “ramp-up” to the full number of threads chosen. If 10 threads are used, and the ramp-up period is 100 seconds, then JMeter will take 100 seconds to get all 10 threads up and running. Threads number can also be greater then ramp-up if you wish to load concurrent threads.
Loop count: How many times the process will repeat.
Next right click on the thread group and click Add > Config Element > HTTP Request Defaults.
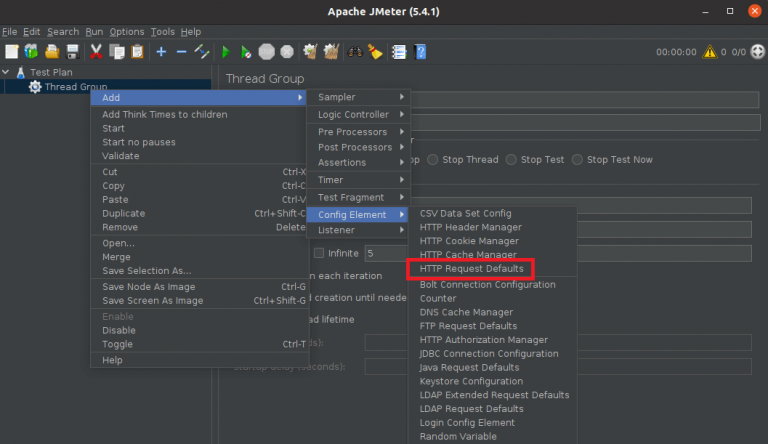 Add HTTP request defaults
And enter the IP or hostname of the webserver you wish to test in the Server Name or IP field.
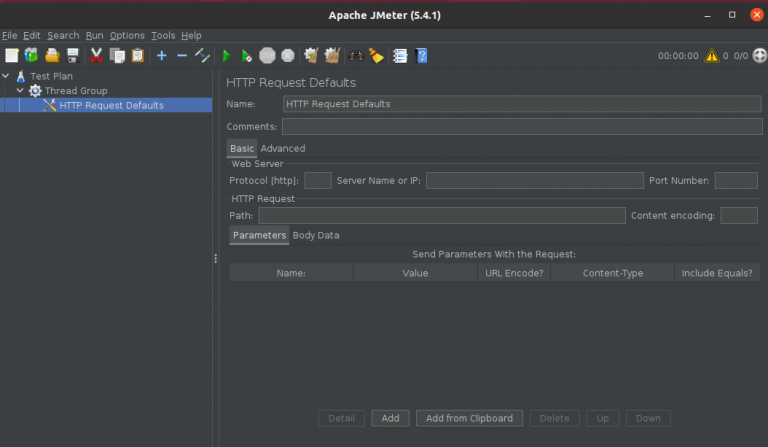 Add webserver name or IP
Now you can add HTTP requests to the Thread Group by right-clicking on it and selecting Add > Sampler > HTTP Request
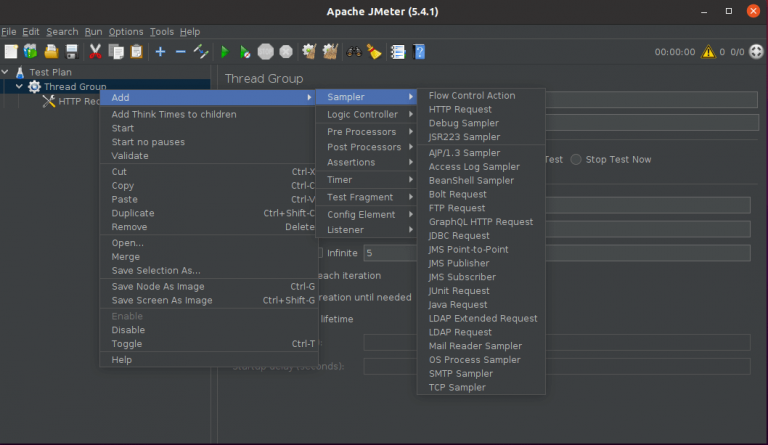 Add HTTP request
And just add the path of the page you want to load. You can add multiple HTTP requests for example “/” (the root of the website), “/about.html” (about page), “/download.html” (download page) and so on.
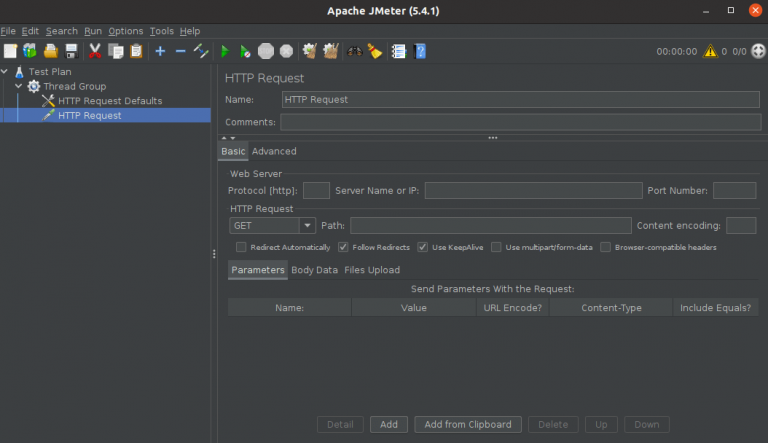 Add HTTP request path
Finally, add a Listener to the Thread Group – Add > Listener > View Results in Table.
You can run the Test Plan using the green Start button in the toolbar and the results will be shown in the table.
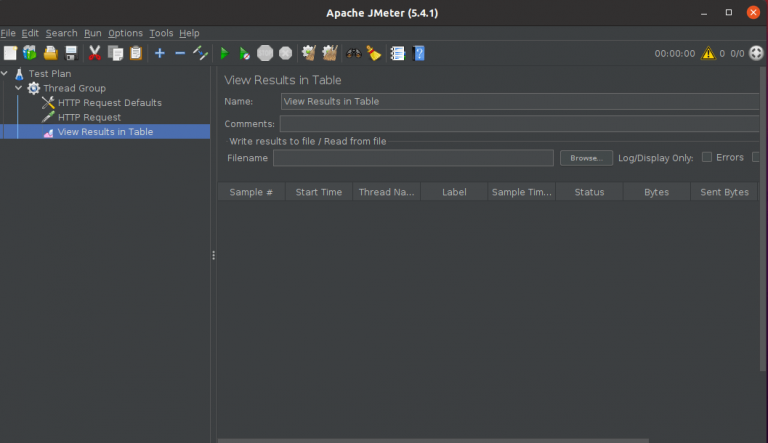
You can pick from various graphs and tables. You can also choose various Threads and ramp-up numbers to stress the web server as much as you wish.
Conclusion
In this tutorial, we learned how to install Apache JMeter on Ubuntu 20.04. Thanks for reading, please provide your feedback and suggestions in the comment section.
Did you find this article helpful?


We are glad you liked the article. Share with your friends.
Sorry about that.
How can we improve it?
About The Author
Bobbin Zachariah


Bobbin started his career in IT in the year 2000 as a computer science instructor and worked as a Linux system engineer and senior analyst roles. Currently working in DevOps environments to increase efficiency and improve delivery time in AWS Cloud infrastructure. He is certified in RHEL, CCNA, and MCP and holds a Masters’s in computer science. When in his free time love playing cricket, blogging, and listening to music.


