How to Fix AMD Software Not Opening
AMD Software manages the AMD GPU installed on your system, whether it is a dedicated GPU or an integrated one. And, if your system fails to launch the AMD software, you are restricted to several GPU configurations that the application offers.
Usually, the application fails to start when there is a complication with the AMD GPU. But an outdated application or a corrupted profile folder could also cause the issue that you currently face. Regardless of the reason, here are a few things you can do to fix the issue with AMD software.
Delete AMD Profile Folder
Any changes you make to the AMD software are saved in a specific folder named CN. It also saves settings in the application for specific games and profile settings. These files can get corrupted and might cause issues with the AMD Software.
You can try deleting the entire CN folder and the application will automatically create a fresh folder—getting rid of the corrupted file.
- Open Run by pressing the Windows and R key simultaneously.
- Type
appdataand press Enter.
- Go to Local > AMD.
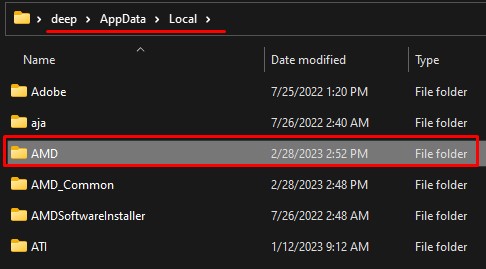
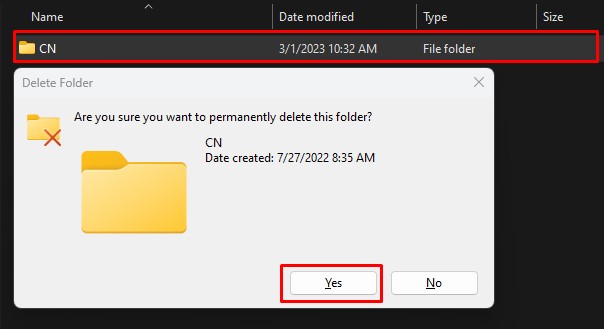
- Select the CN folder and then press Shift + Delete to permanently delete said folder
- Click on OK if it asks for any confirmation.
- If Windows says AMD software is open, check Do this for all current items and then click on Skip.
- Try opening the AMD software. The application will create a new CN folder fixing any previous issues.
Reinstall Radeon Software Package
Users across the AMD community forum reported that reinstalling Radeon Software Package fixed the issue. When you reinstall the Radeon software package, it creates a fresh batch of AMD files located in the C drive, removing any bugs or errors in the application.
- Open File Explorer by pressing the Windows + E key.
- Navigate to
C:\Program Files\AMD\CNext\CNext - Scroll down and search for a file named RSXPackage with extention
.msix.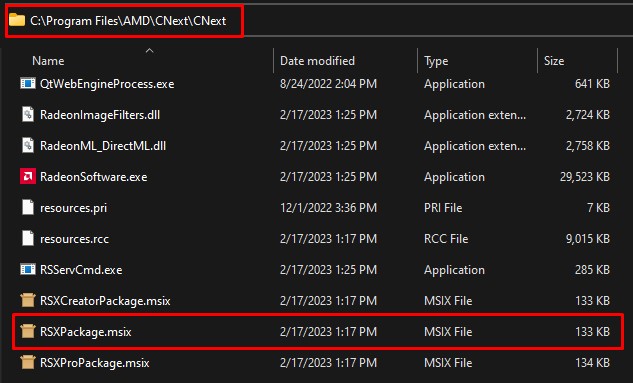
- Double-click on this file, and select Reinstall. Windows should notify you saying the new AMD software is ready.
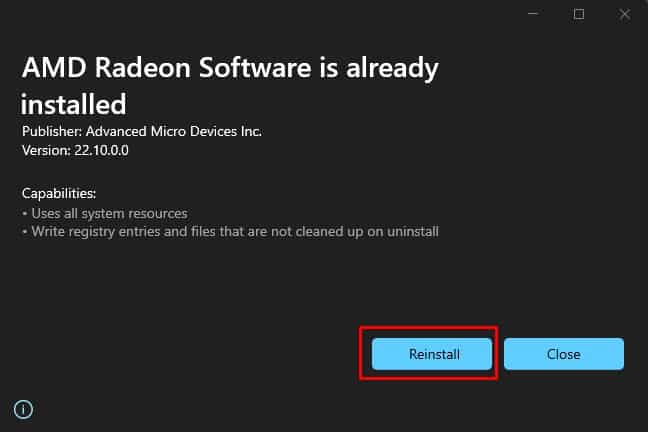
- Try opening the AMD software.
Reinstall AMD Software/Driver
The problem you face with AMD Software could be due to an error in the driver. These complications could be anything from a corrupted driver file to minor bugs in the AMD Software itself.
First, you need to uninstall the AMD software on your PC.
- Open Run, type
appwiz.cpl, and press Enter.
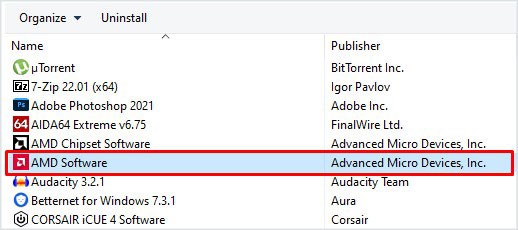
- Here, double-click on AMD Software and click on Yes.
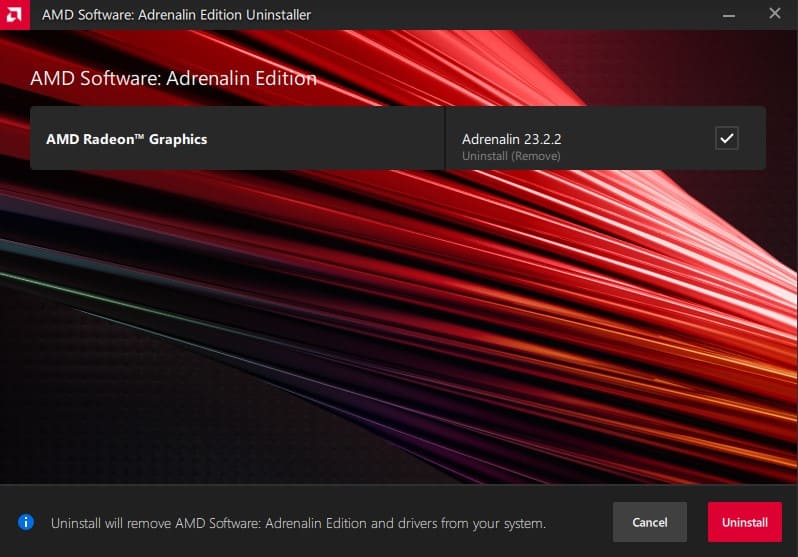
- Select Uninstall.
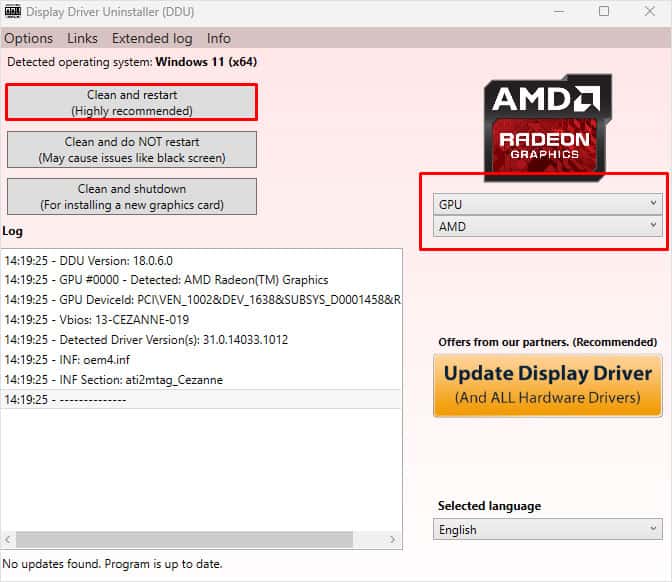
- Once the uninstall process is complete, download Display Driver Uninstaller and install it.
- Boot the PC in safe mode and Run Display Driver Uninstaller.
- Set Select device type to GPU and Select Device as AMD.
- Click on Clean and restart.
- Now once the system boots to Windows in normal mode.
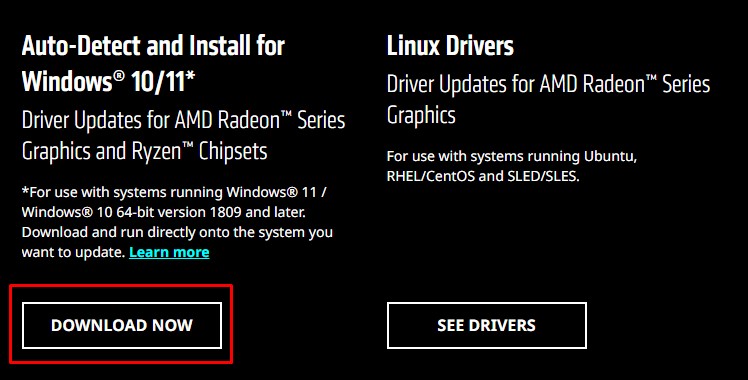
- Open the browser and go to the official AMD Software download center.
- Click on Download now.
- Open the downloaded file to start the installation.
- Now, follow the installation process.
- After the installation is complete, open AMD Software to see if it starts.
Alternatively, you can also use AMD Cleanup Utility to uninstall any AMD display driver on your system instead of the DDU.
Enable Integrated GPU
If you are using an AMD CPU with an integrated GPU, the AMD software may refuse to launch if you have disabled it. So, you can try enabling the integrated GPU in your system.
- Press Windows and X keys simultaneously.
- Select Device Manager.
- Expand Display adapters.
- Right-click on the integrated GPU and select Enable Device.
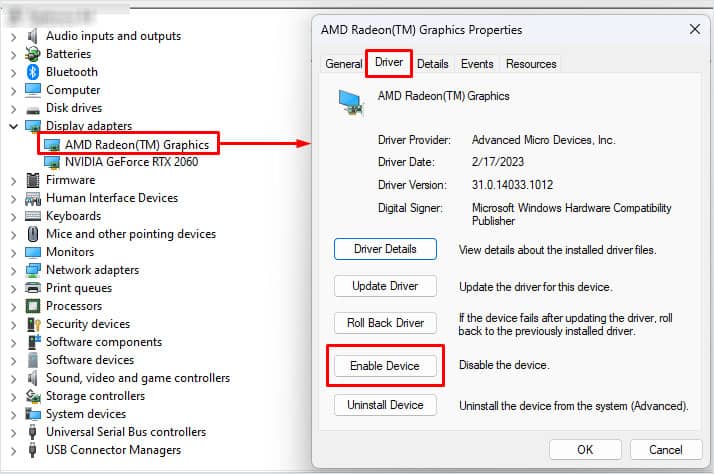
- Click on OK.
If your CPU has an iGPU but does not display in the Display adapter, it might be disabled from the BIOS.
- Restart the PC and repeatedly press the BIOS key to Enter the BIOS.
- Here, search for settings named Integrated GPU or CPU graphics and enable it.
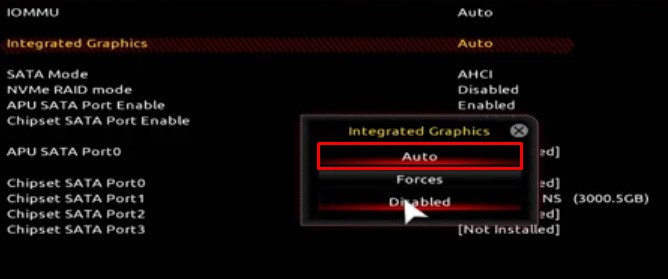
- Save and exit the BIOS and boot into Windows.
- Now, launch AMD software.
Mục lục bài viết
Update Windows
If your system is running an older version of Windows, it is possible that AMD Software runs into issues while launching. Try updating Windows to see if it fixes the problem with AMD software.
- Press Windows and I key simultaneously. This will open Windows Settings.
- Go to Windows update.
- Click on Download and install or Check for updates.
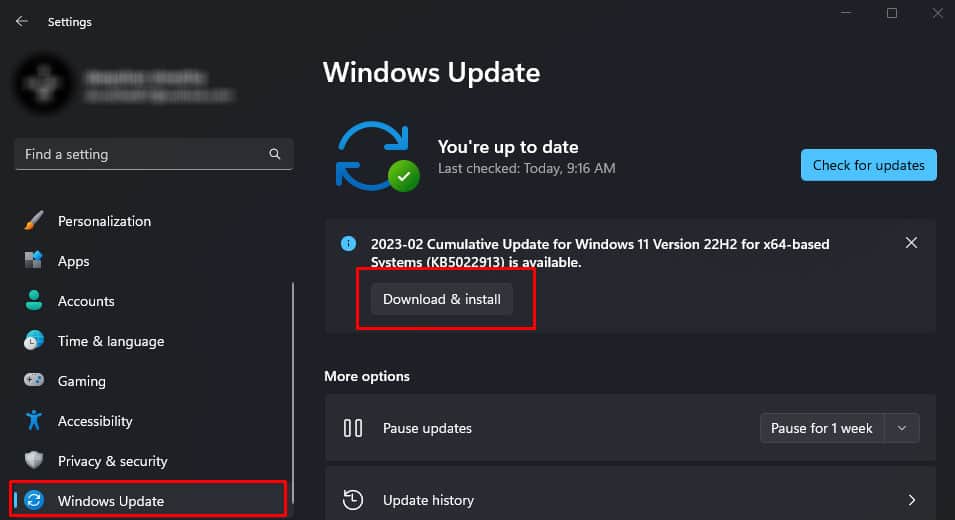
- Once the installation is complete, restart the PC.
Uninstall Hidden Devices
If enabling the integrated GPU does not work, it could be that the hidden driver is what’s causing the issue. Sometimes, Windows may download incorrect drivers through a driver update. In our case, an incorrect display adapter driver is known to cause issues with the AMD software.
- Open Device Manager.
- Click on View, and check Show hidden Devices.
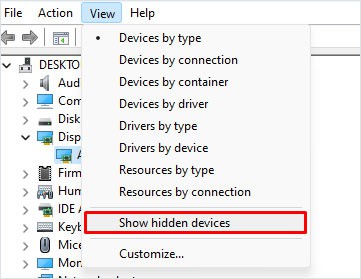
- Expand display adapters.
- Double-click on the grayed-out graphics driver.
- Go to the Driver tab and click on Uninstall.
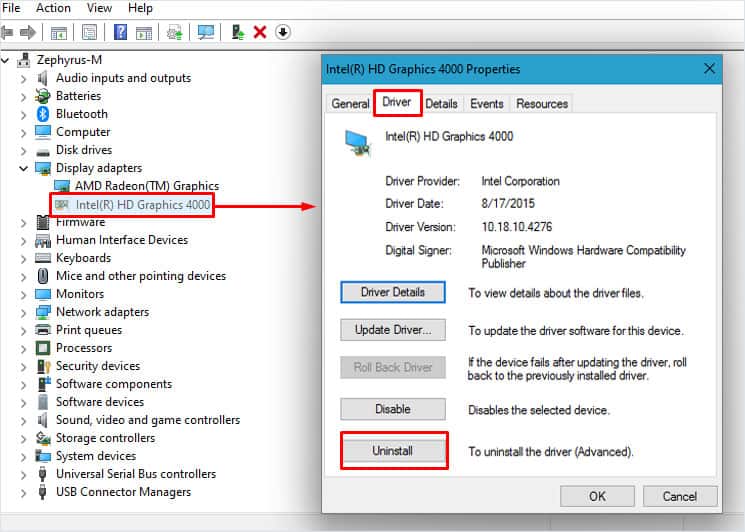
- Select Uninstall.
Windows could again download these unwanted drivers from Windows update, so it is best that you disable driver auto-update. However, take this as a temporary solution, as you are required to update your Windows at a certain point in time.
- Open Run and type
gpedit.mscand press Enter.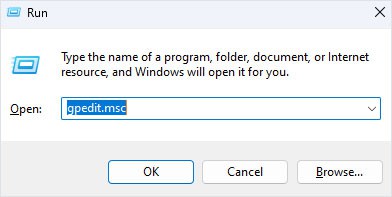
- On the left panel, navigate to Computer Configuration > Administrative Templates > Windows Components > Windows Update.
- Now on the right panel, double-click on Manage updates offered from Windows Update.
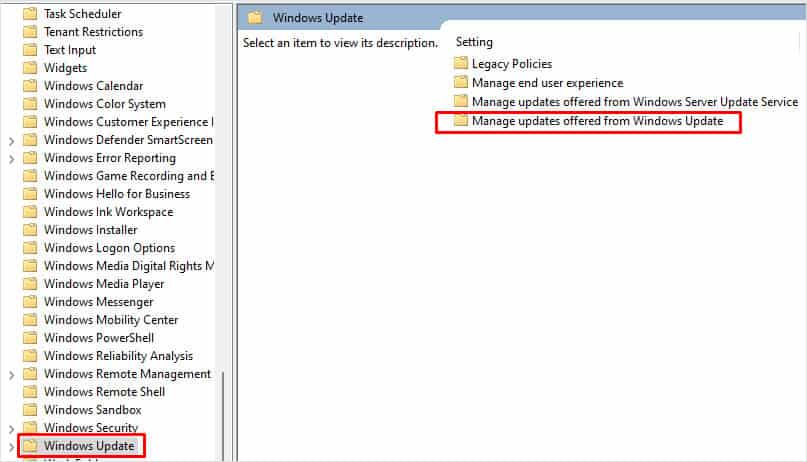
- Open Do not include drivers with Windows Updates.
- Check Enabled.
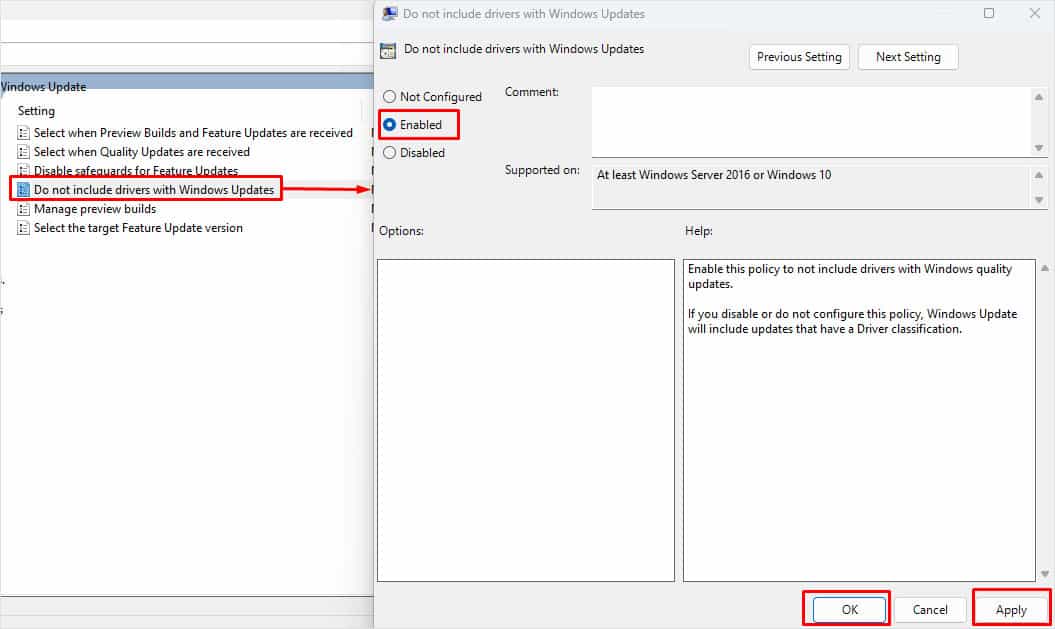
- Click on Apply, then OK.
Note: Local Group policy is only available on Windows Pro and Enterprise edition.


