
How to Get Started with Git Bash on Windows
Did you know you can access Linux utilities directly on your Windows operating system? Perhaps you’re looking for a separate terminal to run Git and Linux commands. If so, give it a shot to learn about Git Bash (Bourne Again Shell).
Not a reader? Watch this related video tutorial!
Not seeing the video? Make sure your ad blocker is disabled.
Not a reader? Watch this related video tutorial!
In this tutorial, you’ll learn what Git Bash is, install it on Windows, and run some basic commands on Git Bash terminal.
Prerequisites
The demonstrations in this tutorial are on a Windows 10 PC version 1909, but any other version (7-8.1) of Windows PC will work.
What is Git Bash?
Before you look at what Git Bash is, let’s go over what Git is. Git is a version control system for controlling changes in software development. Like macOS and Linux, operating systems already have a command-line terminal where you can run Git and Linux commands directly. But for Windows, you have the Windows command prompt, which is a non-Unix terminal.
How can you run Git and Linux commands in Windows? Git Bash will do the trick. Git Bash is an emulator that provides an emulation layer for Git to run Linux commands on Windows PCs. An emulator enables one specific system to behave like another computer system.
Downloading and Installing Git (Bash)
Now that you know a little about Git Bash let’s see how you can download and install it. There are three different ways of downloading the Git software for Windows OS, as shown below.
- Through Git’s official website
- Through a separate project on GitHub called Git for Windows.
- Through a software package manager like Chocolatey
Download Git with any of the three ways you prefer, but this tutorial will use the official website.
After downloading Git, let’s start installing it on your Windows PC.
1. Launch the installer you downloaded and click Next through the steps until you get to the Select Components screen.
2. Now, check the boxes of additional components you want to include in the installation. Leave the ones selected by default, as shown below, and click Next.
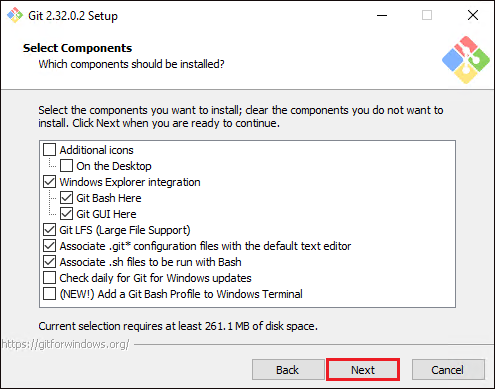 Selecting Additional Components To Install
3. Leave the default for creating a shortcut in the start menu folder, and click Next.
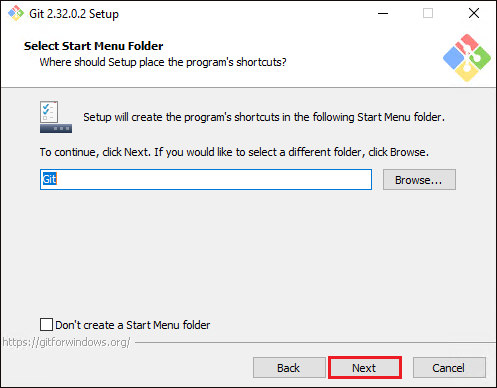 Selecting Start menu folder name
4. Select Use Notepad as Git’s default editor from the drop-down list as a default editor to use with Git, and click Next. Now Git files like ~./gitconfig will open in Notepad by default.
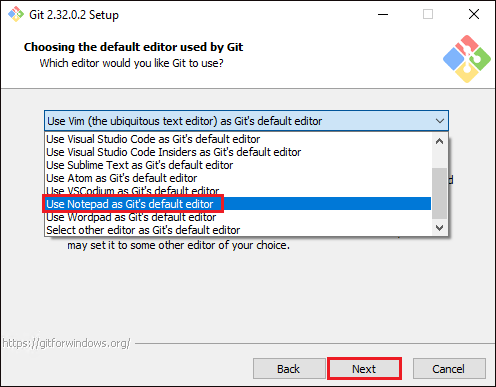 Selecting Git’s Default Editor
5. Select the Override the default branch name for new repositories option as the default branch name (main) for Git to use. When you initialize a Git repository, Git will use this branch name by default.
The default branch name used to be “master” for Git repositories. But many people found “master” an offensive word. So GitHub followed the Software Freedom Conservancy’s suggestion and provided an option to override the default branch name when initializing a Git repository.
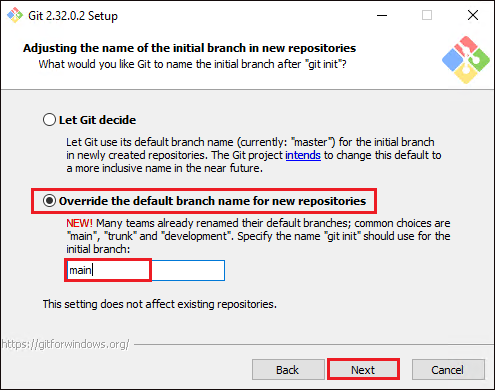 Selecting Default Branch Name
6. Now, select Git from the command line and also from 3rd-party software option so that Git command can be executed from different tools. Some of those tools are Command Prompt, PowerShell or any other 3rd party software tools, along with the Git Bash console.
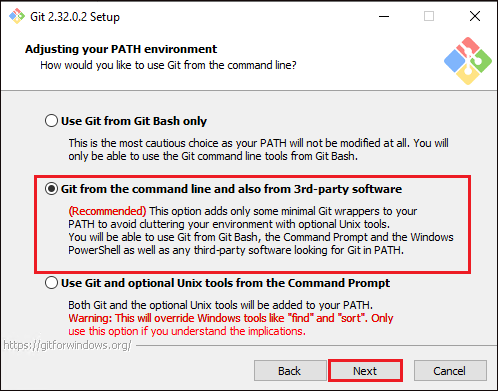 Selecting a Console Where Git Commands Can Run
7. Select the Use the OpenSSL library option to let Git validate certificates with OpenSSL, and click Next. OpenSSL is a cryptographic library that contains open-source implementation of SSL and TLS protocols.
If you are using Git in an organization with enterprise-managed certificates, select the User the native Windows Secure Channel library option instead.
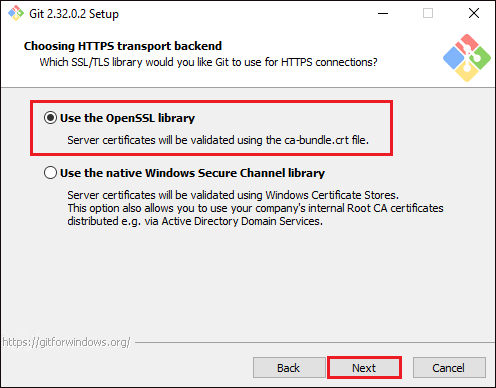 Selecting SSL/TLS library for HTTPS connections
8. Leave the default Checkout Windows-style, commit Unix-style line endings option selected, and click Next.
If you configure “Windows-style” line ending conversions, when you hit return on your keyboard after executing a Git command, Git will insert an invisible character called line ending. When different contributors make changes from different operating systems, Git might produce unexpected results.
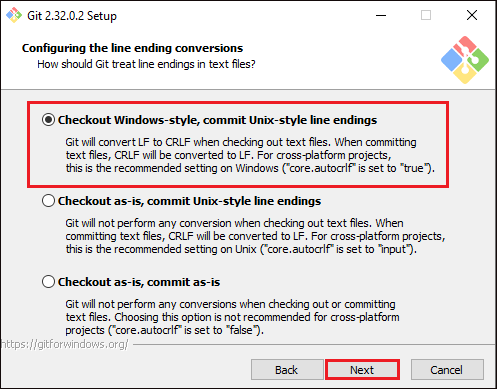 Selecting line endings option
9. Select the Use Mintty (the default terminal of MSYS2) option as the default terminal emulator to run commands, and click Next. Mintty is the default terminal of MSYS2. MSYS2 is a collection of tools and libraries that provides a Unix-like environment for software distribution and a building platform for Windows.
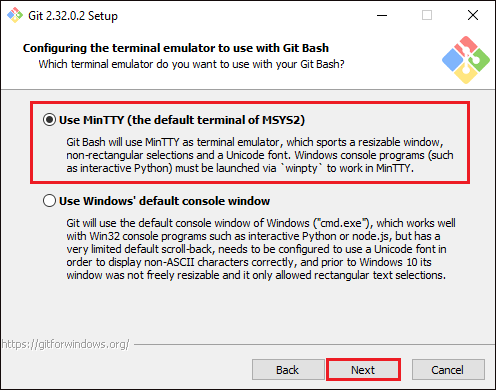 Selecting a default terminal emulator
10. Select the Default (fast-forward or merge) option below as git pull command’s default behavior. The git pull command is the shorthand for git fetch and git merge, which fetches and incorporates changes from a remote repository into the current branch.
Perhaps you want to merge a new branch to the master. If so, Git would directly merge using fast-forward without going through git fetch and git merge commands. The merge is only possible if there are no commits on master from when you’ve created the new branch.
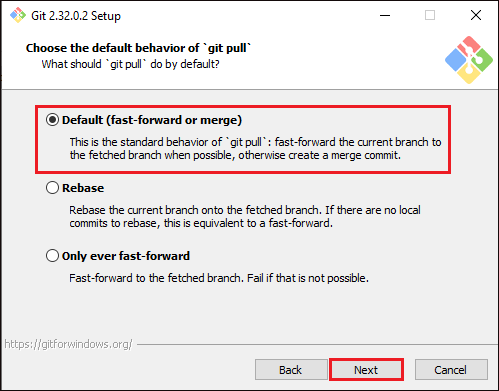 Selecting Default Behavior for
 git pull Command
11. Select the Git Credential Manager Core as the default Git credential helper, and click Next. Git credential helpers are external programs that Git can prompt for input data, like usernames and passwords. These input data can be stored in memory for a limited time or stored on the disk.
Git Credential Manager Core is based on the .NET framework and will provide multi-factor HTTPS authentication with Git.
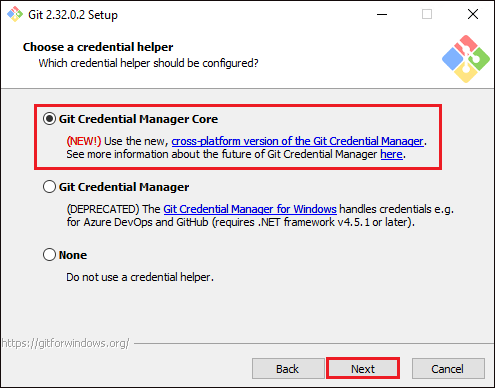 Selecting Default Credential Manager
12. Leave the extra features on default, as shown below, and click Next. The Enable file system caching option is checked to provide quick results when executing Git commands.
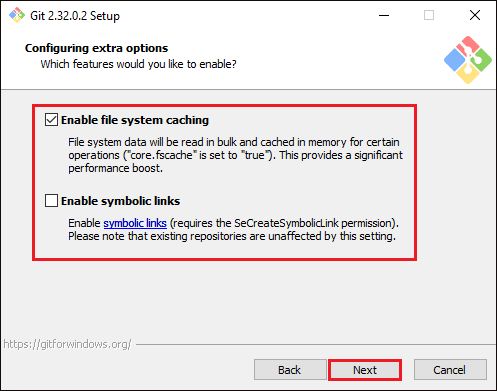 Enabling extra options
13. Ensure to leave both options below at default (pseudo console and built-in file system monitor) as they are still in an experimental stage, and click Install.
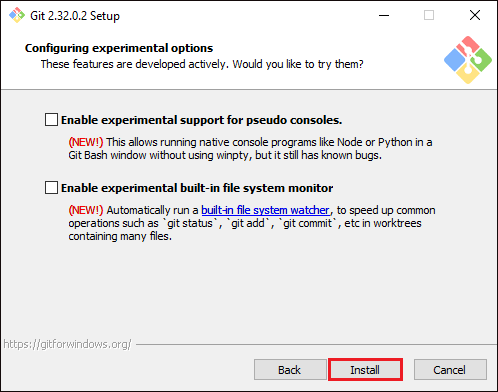 Experimental options support
14. Complete the installation and close the installation wizard by clicking on Finish.
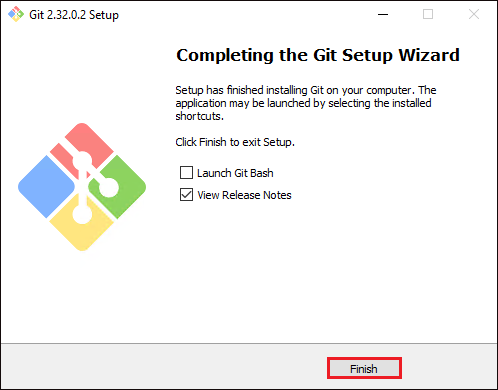 Git setup wizard complete screen
15. Finally, right-click on your desktop and select Git Bash Here from the context menu, as shown below, to launch Git Bash terminal. Launching Git Bash from your desktop is one of the quickest ways to do so, but the same process goes when you right-click on a folder.
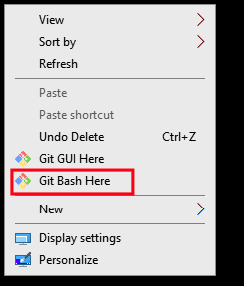 Launching Git Bash from Desktop Context Menu
16. Run the git command below to verify Git Bash is installed and its current version (--version).
git --versionYou can see below the current Git version in this tutorial is version 2.32.0.windows.2.
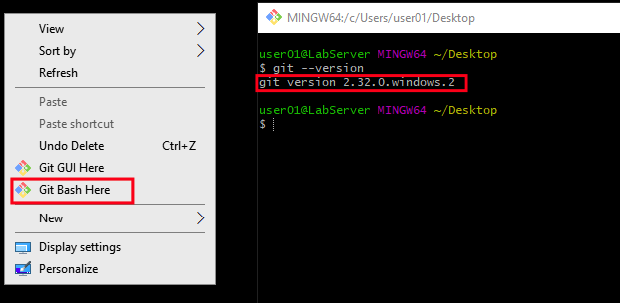 Verifying Git Bash installation
Running Git Commands in Different Terminals
Now that you have Git Bash on your PC, it’s time to learn some Git commands. Running Git commands isn’t limited to Git Bash console only. Did you know you can run Git commands in the command prompt too? Yes!
Let’s run Git commands both on Git Bash console and command prompt to declare variables accessible in both terminals.
1. Launch Git Bash console by clicking on the Start button, type git, and click on Git Bash.
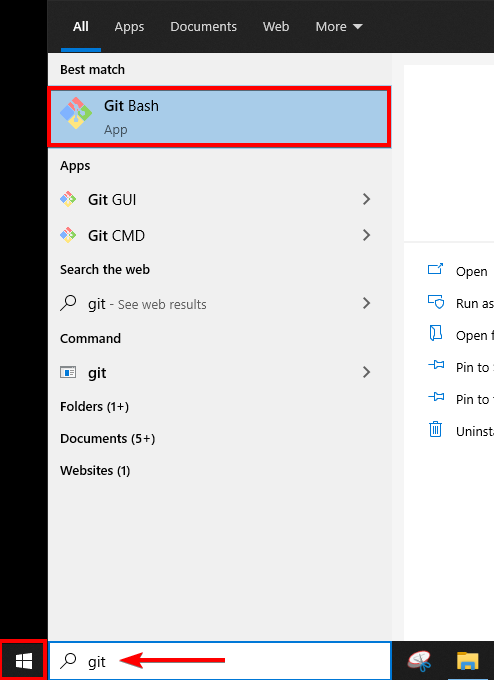 Launching Git Bash from Start Button
2. Run the below git config command to add your name (YourName) as your git username (user.name). The git config command administers configuration variables that control how Git looks and operates.
Pass the --global option to the git config command to define the configuration variable (YourName) in the ~/.gitconfig file specifically.
git config --global user.name "YourName"3. Now open the command prompt and run the below git config command to add your email ("[email protected]") as your git user email (--global user.email) in the ~/.gitconfig file.
4. In the same command prompt window, run the below git config command to list (--list) all the configuration variables in Git.
git config --listYou can see below that even though you’ve added variables in the ~/.gitconfig file via different consoles, the variables are accessible and displayed in the command prompt.
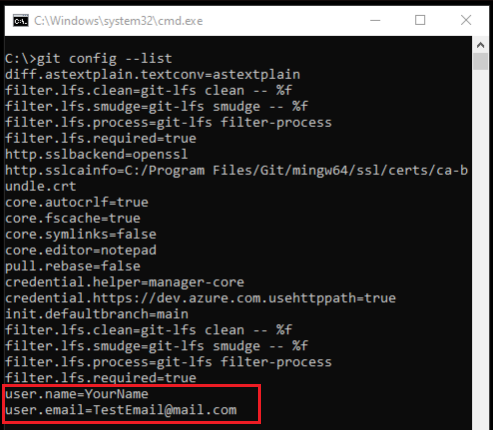 Viewing Global Variables Added via Different Consoles
Running Linux Commands in Git Bash
As you can tell, all Git commands work in both Git Bash and the command prompt. And since Git is delivered as a Unix-style command-line environment, let’s try running a Linux command on the Git Bash console!
Run the ls command both in Git Bash console and command prompt to list the files and folders in the working directory.
In the screenshots below, you can see that the Git Bash console returns an output, while the command prompt throws an error, saying the ‘ls’ command is not recognized.
 Running Linux Command in Git Bash Returns a Result
 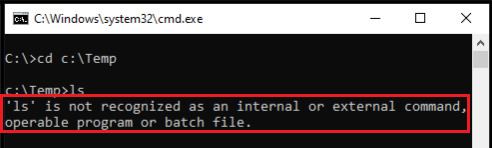 Running Linux Command in Command Prompt Returns an Error
You can run Linux commands on the command prompt so long as you change the directory to C:\Program Files\Git\usr\bin first.
In the command prompt, run the commands below to change the working directory to C:\Program Files\Git\usr\bin and run the ls command.
cd C:\Program Files\Git\usr\bin # Change directory to where Linux utilities are stored
ls # Linux command that lists all files and folders in the working directory
Below, you can see that you didn’t get an error after running the ls command this time, but the command returned results instead.
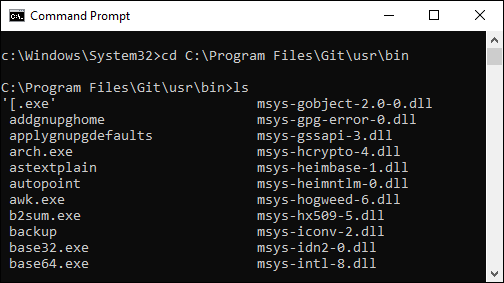 Running Linux Commands in Command Prompt
Conclusion
This tutorial aims to explain what Git Bash is and the steps for Git software installation. You’ve learned what Git Bash is and that running Git commands both on Git Bash and command prompt is possible.
Next time when you have to run Git commands, which console would turn to?


