How to Install Presets in Lightroom Mobile

Advances in mobile phone camera technology over the past few years have opened up a new world of possibilities for creatives. Getting professional quality photos in this content hungry world is now possible with just the device in your pocket. To achieve a high level of quality and refinement with mobile photography, creatives are turning to the same tools and apps they are accustomed to using for their desktop editing, such as Lightroom Presets. In this guide, we’re going to walk you through how to install presets in Lightroom Mobile.
Mục lục bài viết
For Lightroom Desktop Users
For those of you using Lightroom on your desktop, simply install the presets on your desktop and log in to your Adobe account on your Lightroom Mobile App. The presets will automatically sync between the desktop and the mobile app and your installation will be complete.
With Visual Flow presets, do this by simply using the installer that you downloaded from the DVLOP website.
For Lightroom Mobile Only Users
For those of you who purchased mobile only presets, such as our dedicated Modern Pack Lightroom Mobile Presets, follow the steps below to install the presets on your phone. You can find a video of this tutorial (and a demonstration of the presets in action) here.
The steps should be similar for ANY preset pack, whether you’re installing one of ours or a pack from another company or creator.
Use the complete the following steps to install your Lightroom presets in Lightroom Mobile:
- Download Lightroom Mobile on Your Phone
- Download the DNG Files We Provided You With Your Purchase
- Import the DNG Files to Lightroom Mobile
- Create Presets From Each DNG File
We’ll review each of the steps in detail, with screenshots below:
Step 1: Download Adobe Lightroom Mobile
First, download Lightroom Mobile. It’s free, and incredibly powerful as an image editor. You can choose later if you wish to upgrade to its extra features, but it’s not needed to use the presets.
Go to the appropriate app store for your device and download the Lightroom App. It’s 100% free.
Once downloaded, create your Adobe/Lightroom account and login.
Step 2: Download the Preset DNG Files to Your Phone
Currently, Adobe doesn’t have a way for us to automatically install mobile presets. Not to worry, the process is simple. Step one is to download the Preset DNG files to your phone. These Preset DNG files have all of the preset settings saved into them.
Depending on your device and operating system, you may see a slightly different result on each device. Please see the examples below:
From here, download a single preset DNG by simply clicking its link. Depending on your device and operating system, you may see a slightly different result on each device. Please see the examples below:
2.1 Download a single preset DNG by simply clicking the links below:
Depending on your device and operating system, you may see a slightly different result on each device.
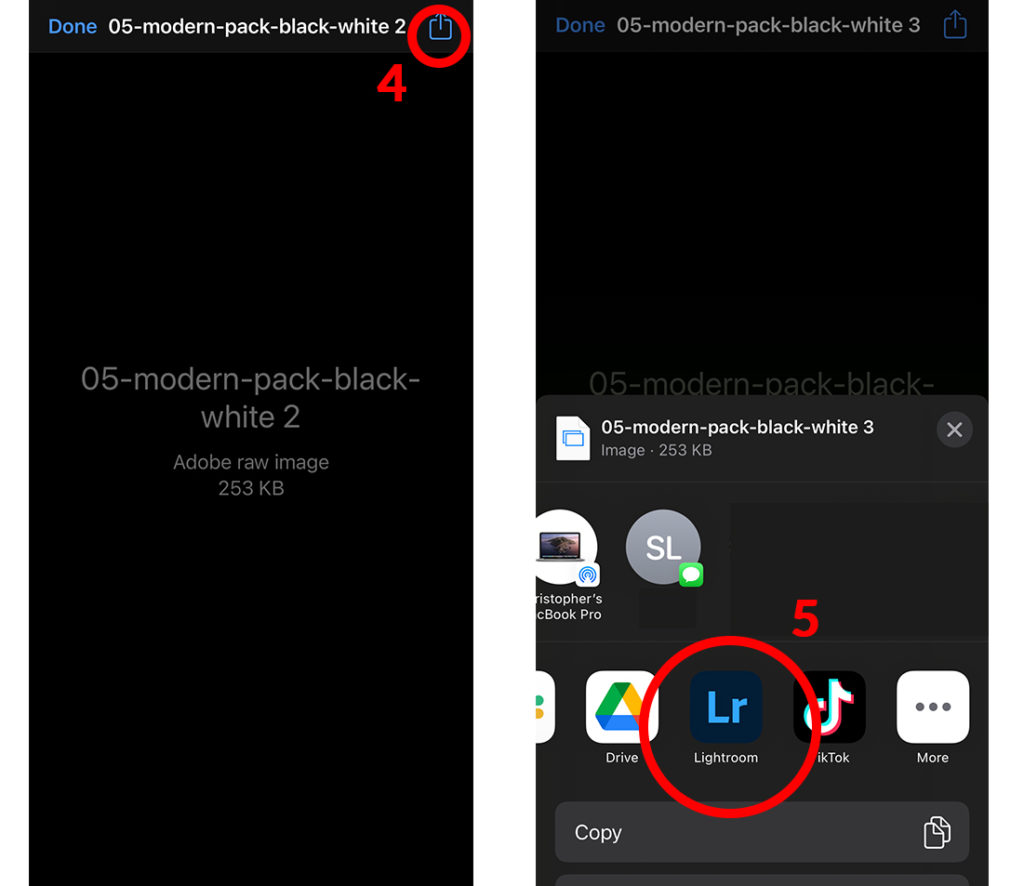
2.2 – Select Download, 2.3 – Tap the Download Icon, 2.4 – Tap the filename
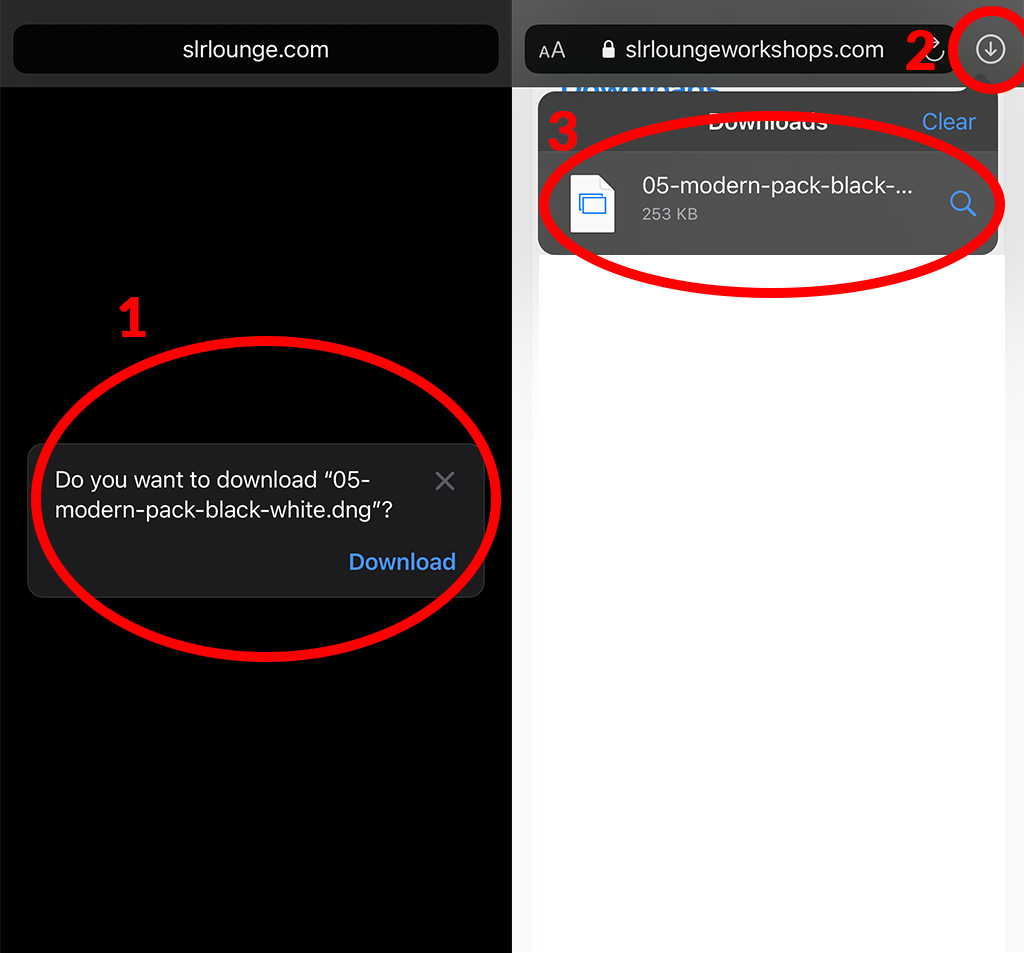
2.5 – Tap the share icon and 2.6 – Select the Lightroom App
This will send the selected Preset DNG into Lightroom Mobile.
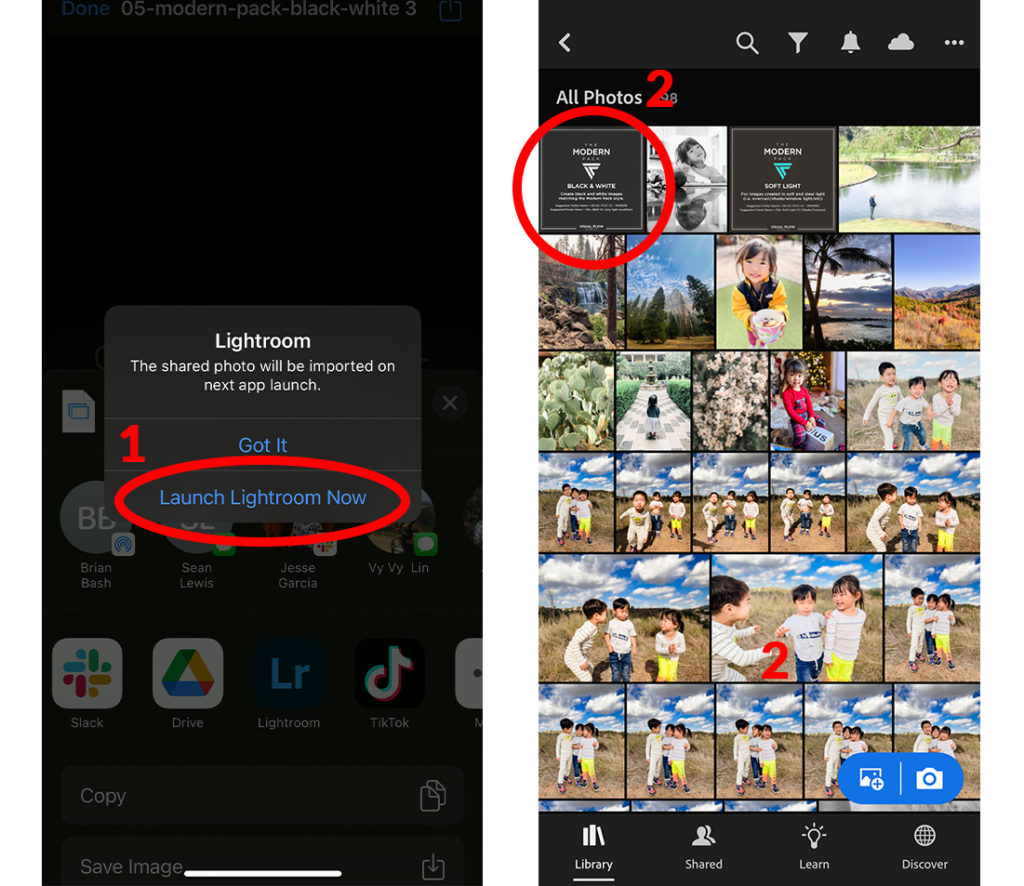
Step 3: Open The Lightroom Mobile App
3.1 – Select “Launch Lightroom Now” and 3.2 – Select the Newly Imported File
Step 4: Create Presets From Each DNG File
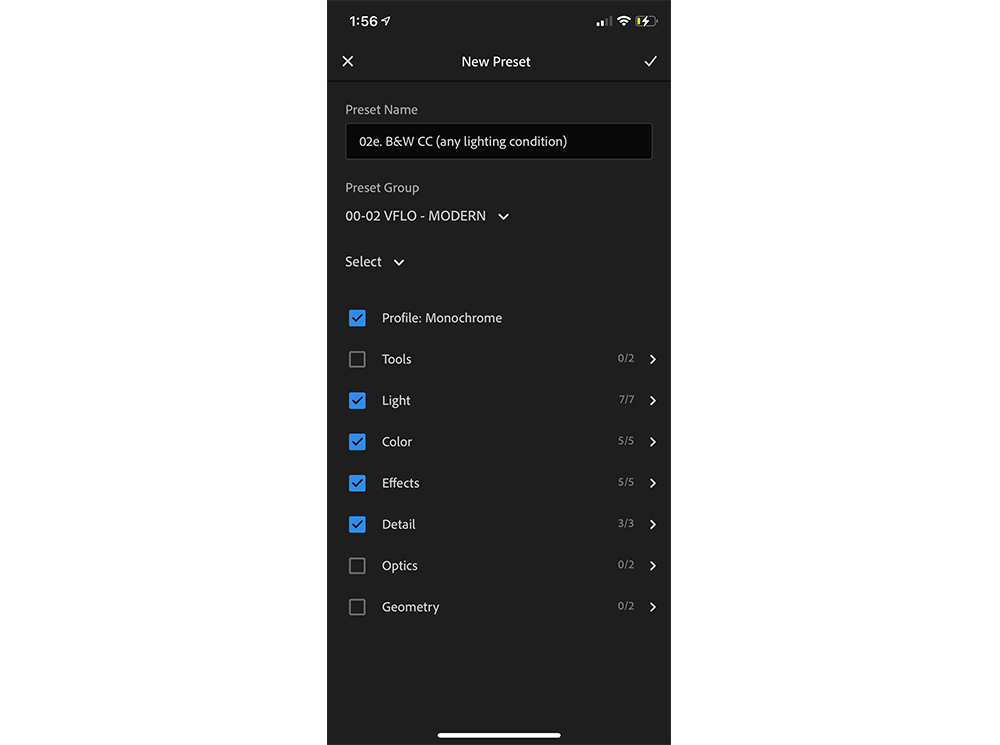
4.1 Click on the Menu Icon, 4.2 – Select “Create Preset”
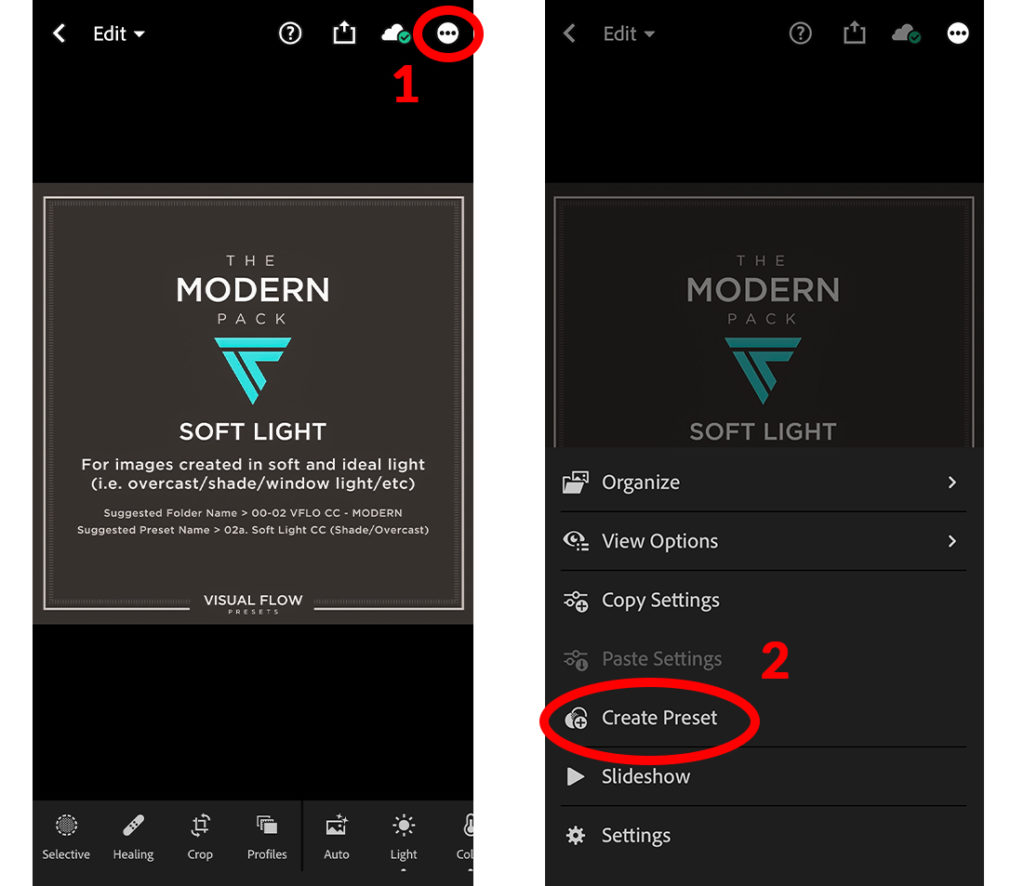
4.2 Name Your Preset – You’ll notice each Preset DNG has a suggested preset and folder name. We’d suggest using these names so that you can follow along easily with our education, tips, and community.

4.3 Create a New Group For Your Presets – Again, we’d suggest using the suggested name shown on the Preset DNG.
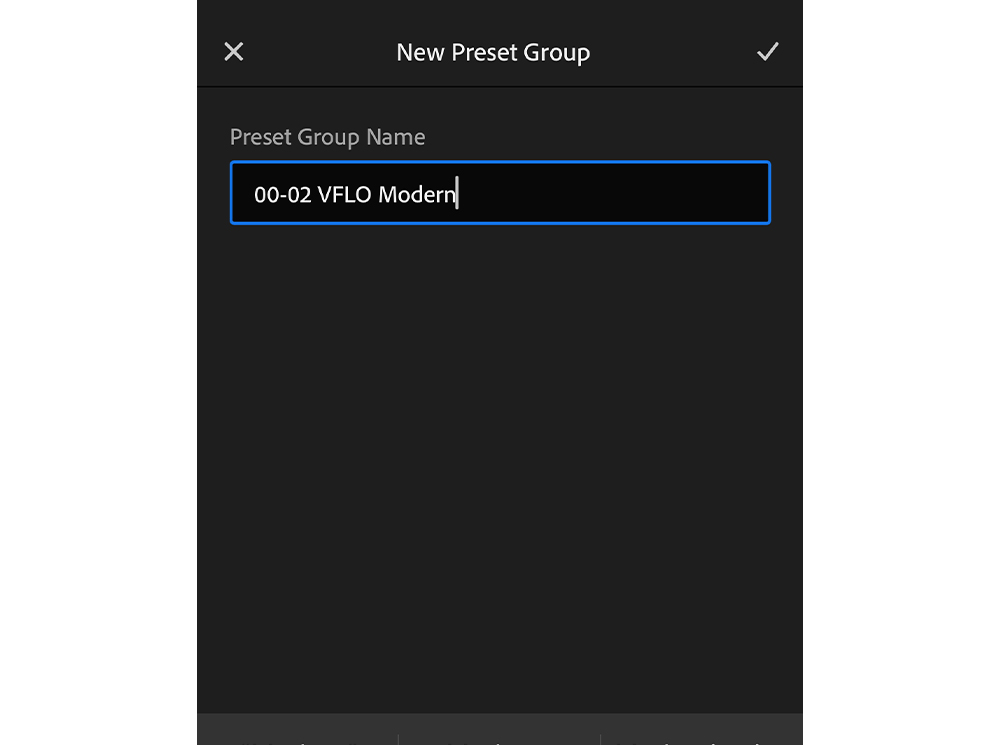
4.3 Leave the Default Checkboxes Checked
4.4 Repeat these Steps for Each of the Presets
Repeat steps 1-3 for each of the 5 presets. Please use the same “Preset Group” for each of the presets.
Step 5 – Use the Presets
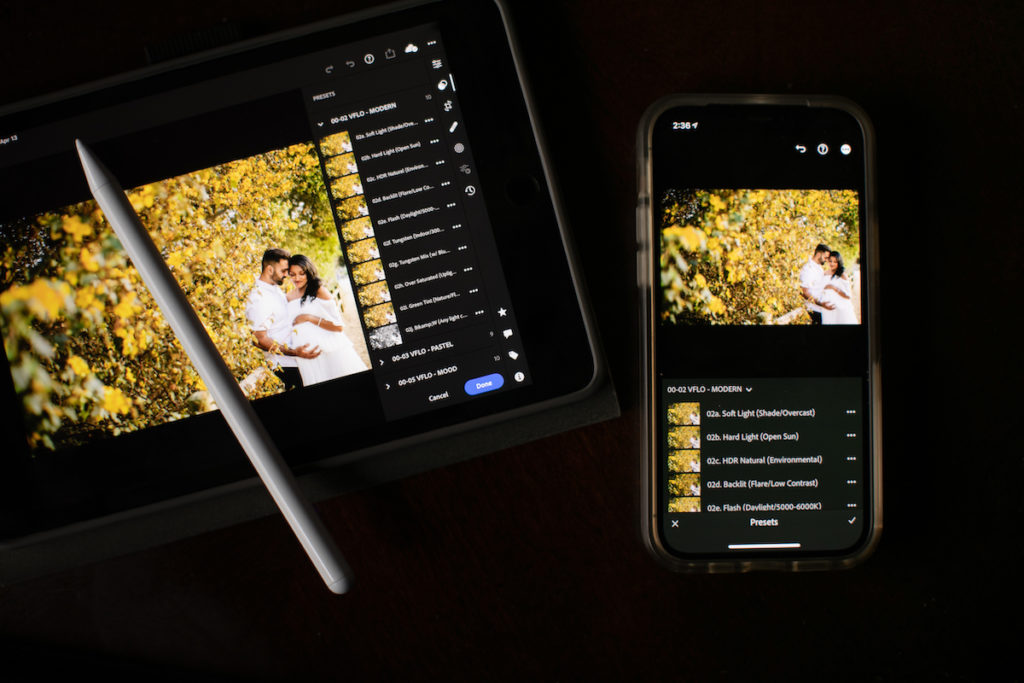
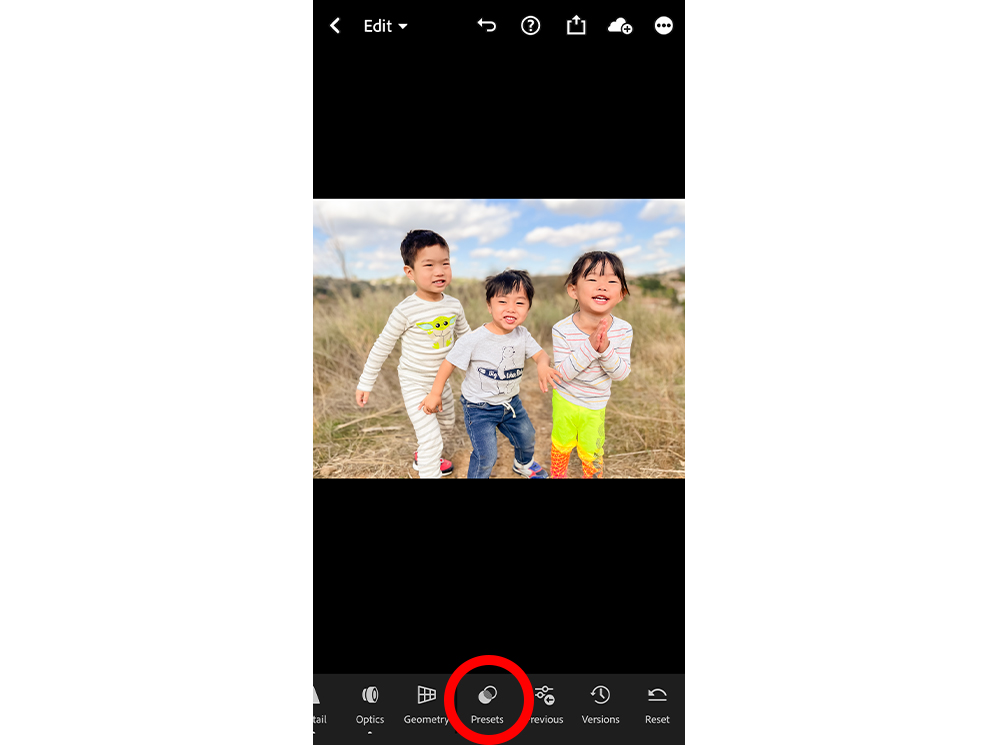
5.1 – Select an Image and Scroll to “Presets” in the Bottom Menu
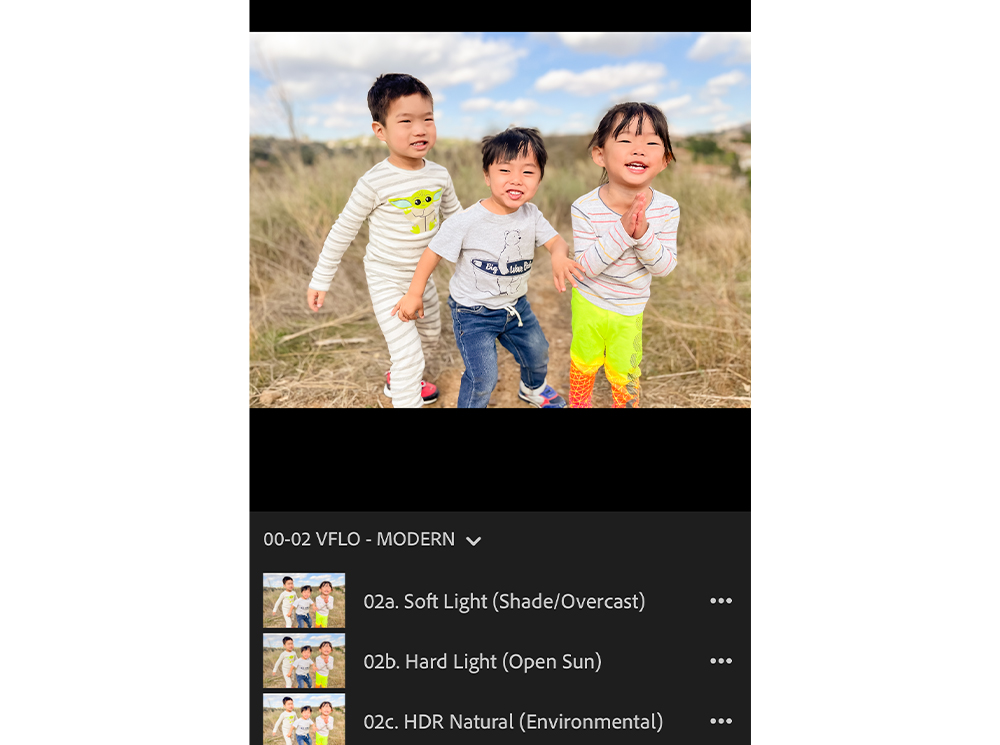
5.2 – Apply your desired preset based on the Lighting Condition
Soft Light – Soft and ideal light like shade, overcast, or window light.
Hard Light – Hard and unflattering light like direct sunlight.
HDR Natural – Scenes that have a deep range from shadows to highlights like when shooting into the sun.
Tungsten – Indoor lighting with warm tungsten/orange tones.
B&W – Black and White conversion for any lighting condition.
5.3 Make Additional Adjustments (Optional)
Once your preset is applied, we’d suggest making adjustments in the following order: Exposure > Temperature/Tint > Contrast
Feel free to make whatever additional adjustments you like. Lightroom is a powerful application for making additional adjustments. For more information about using Lightroom Mobile, please refer to the other videos.
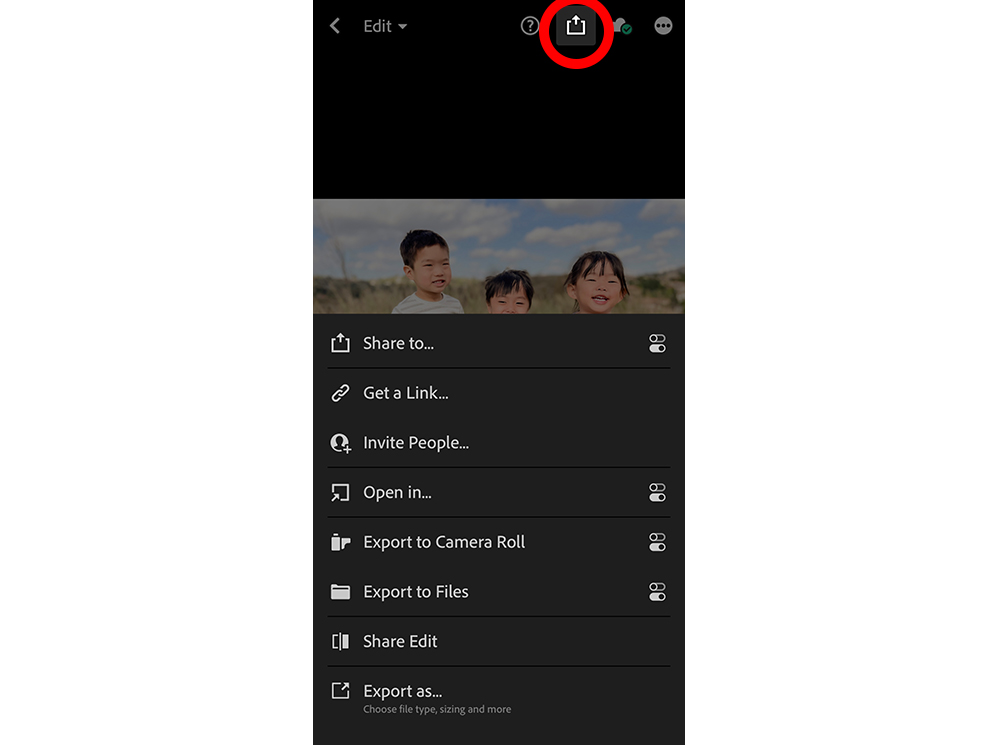
5.4 Export When Finished
After you’re happy with the image, click the export button and choose where you would like to save the file. You can share it directly to an app or export it to your camera roll or files.