
How to Quickly Upload Videos to YouTube from WordPress
If you are a small business or solopreneur looking for ways to expand your business and haven’t thought about YouTube, you should.
Mục lục bài viết
Why it’s good business to let users upload videos to YouTube from your WordPress website
YouTube is a great way to improve your search engine optimization allowing you to expand your brand to untapped markets. After all, YouTube is the second-largest search engine in the world.
One easy way to harness this awesome power is by collecting video testimonials.
You can do this by creating a contest for users to upload videos using your product/services, and the video with the most likes wins the competition. Letting you promote your company, increase your connections, and improve search engine optimization, all in one fell swoop.
How to add uploaded videos to YouTube from your WordPress forms with Zapier
To get started, you will first need to create a YouTube account. If you need help, see Google’s Youtube Help guide on creating a Youtube channel.
Second, sign up for Zapier. Third, install and activate our free Ninja Forms plugin. And last but not least, install, and activate the Zapier and File Upload add-ons for Ninja Forms.
Step 1. Set up your WordPress form
YouTube requires that all video uploads must include a video title, video description, and video file. This means you will be adding a minimum of three fields to your form.
Navigate to Ninja Forms > Add New. Select the Blank Form template. Add form fields by clicking the blue/+ icon at the bottom right. Add two Single Line Text fields, one for the video title and the other for the video description.
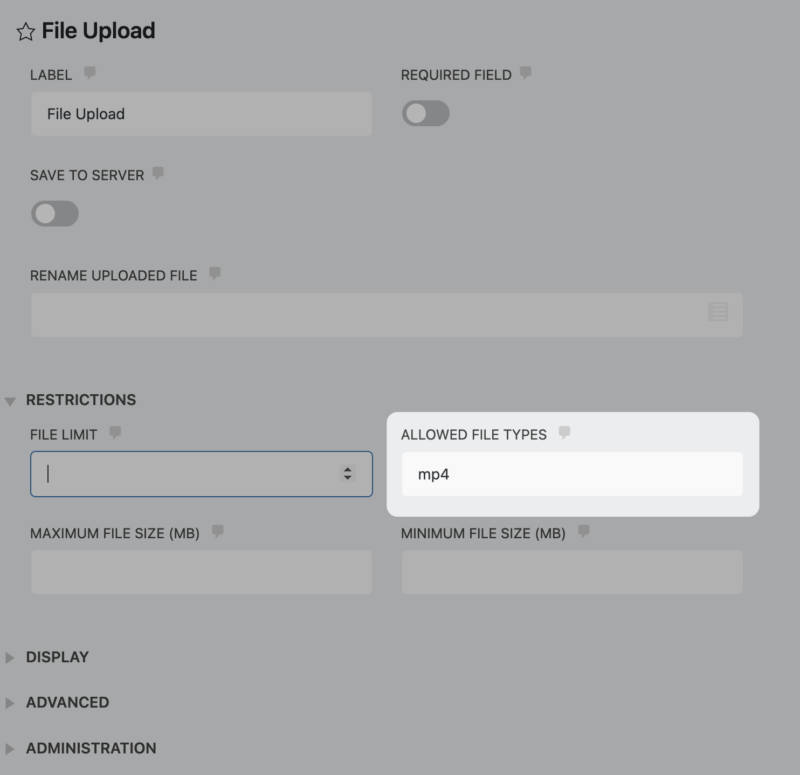
Next, add the File Upload field and set the Allowed File Type to MP4, MOV, MPG, WMV, or all of the above. These are the suggested file types for Ninja Forms. Here is a list of the complete file types acceptable to YouTube and WordPress.
Other restrictions include the File Limit and Max/ Min file upload size. These features will give you more control over dictating what your user can upload—preventing users from uploading unnecessary files.
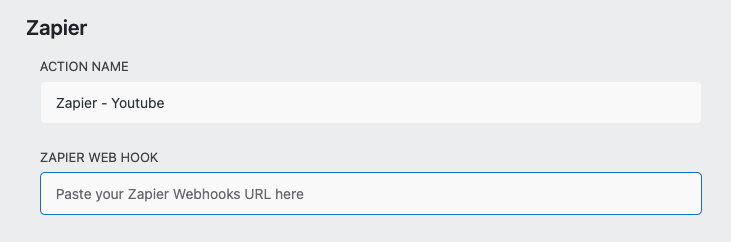
Add any other form fields you desire. Next, click on the Email & Actions tab, and add the Zapier action. We will come back to the Zapier action and add the webhook later.
Save your changes.
Step 2. Start the Zap workflow!
Integrations between applications handled by Zapier are called Zaps. We’ll be creating a Zap that will connect Ninja Forms with YouTube. It’s super simple.
Log into your Zapier account at https://zapier.com/app/login, and click “Dashboard.”
You will see Create your own workflow text box. In the “Connect this app” field, type Ninja Forms. In “with this one!” type YouTube. Doing so will trigger two additional fields called “When this happens... “and “then do this!“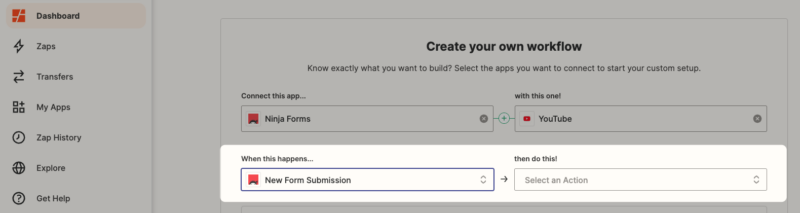
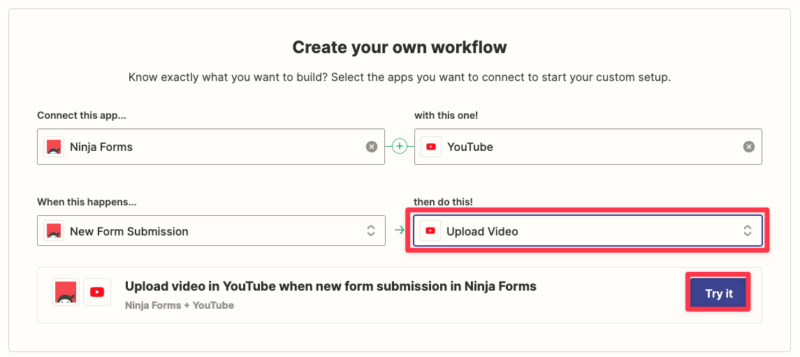
In the When this happens field, select New Form Submission. In the ‘then do this!‘ field, select Upload Video. Click, Try It
3. Configure the Zap
Next is to connect your WordPress form submissions with YouTube by building your zap.
Trigger – 1. Upload video in YouTube when new form submission in Ninja Forms
To begin, click Trigger 1. Upload video in YouTube when new form submission in Ninja Forms to access the webhook URL.
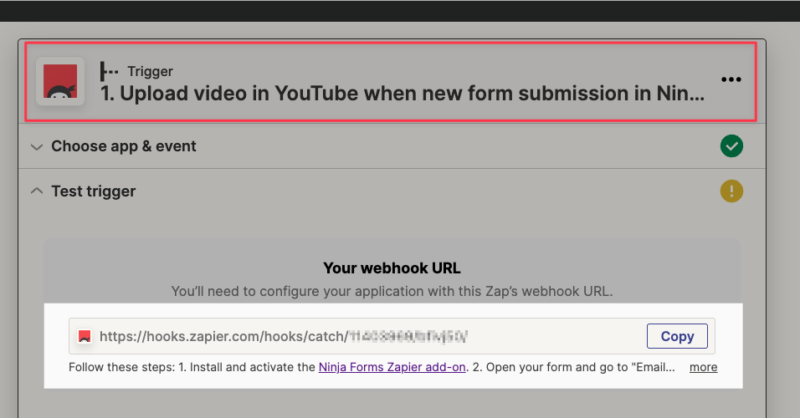
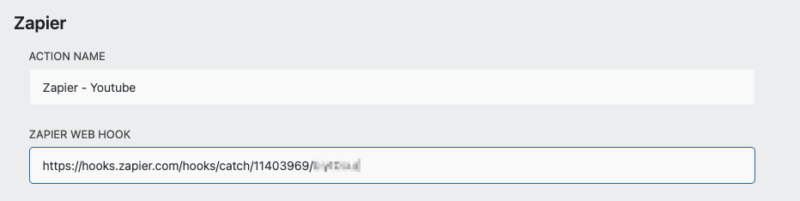
Copy the webhook URL and head back to your form. Paste the hook into the Zapier WebHook field of the Zapier action ( form > Email & Actions ).
Save your changes and publish the form. Before returning to your Zap, complete a test submission of the form. The submission data is what Zapier uses to test the trigger.
I’ve forgotten this step, and it has caused a lot of headaches. It is usually the number one reason why your Zap isn’t working.
Return to Zapier, and click Test Trigger. If the test is successful, you should see data from your form submission. If not, that is because you forgot to complete your form test submission. 🤓
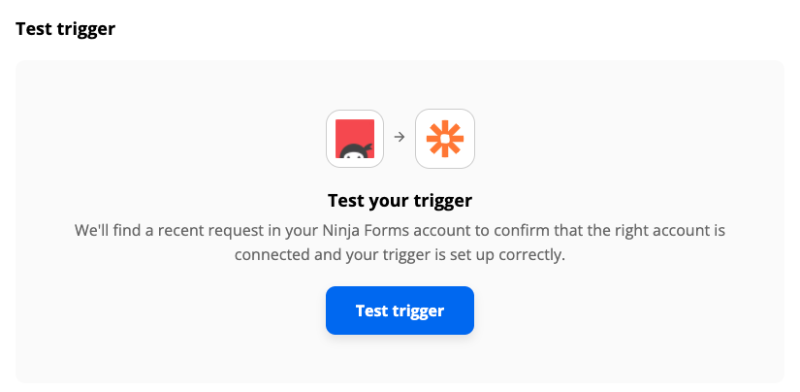
Click Continue to move on to the next step.
Action – 2. Upload Video in Youtube
Click on the Upload Video in Youtube action and insert your Ninja Form submission data into the Title, Description, and Video fields.
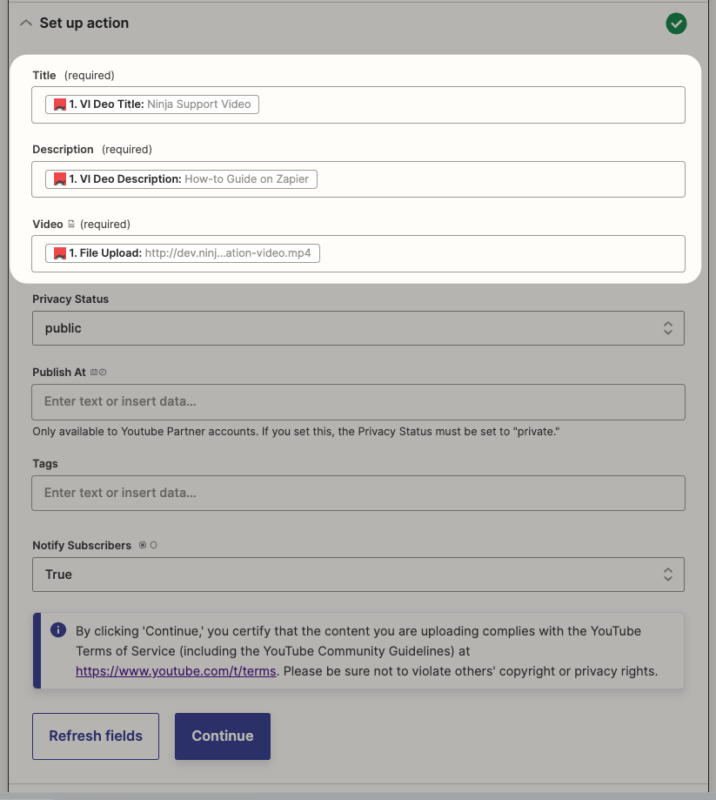
Next, set the Privacy Status to public. In order for your video to be uploaded to YouTube, you need to list the video as public.
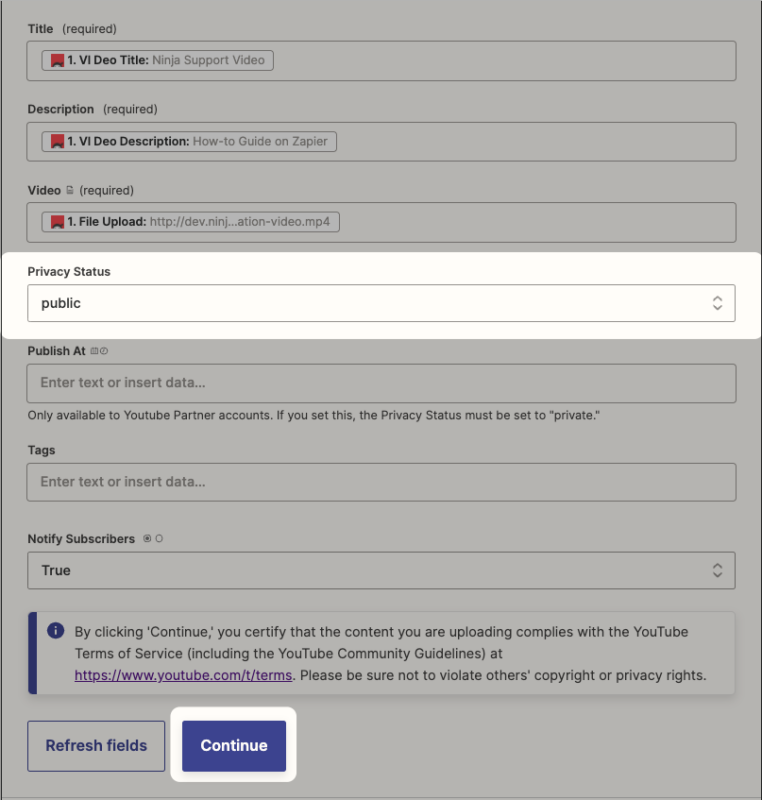
Click Continue, and Test the action. Congrats! Publish Zap. Publish your form and start collecting those video testimonials!
⚠️ If you are using a local site for testing keep in mind that the newly uploaded YouTube videos won’t be accessible. So be sure to test on your live site to make sure the uploaded videos are showing up on YouTube
Bonus – How to add the video testimonials to your website
Now that you know how to upload user-submitted videos to YouTube, let me show you how to add them to your website. To begin, all you need is the Front-End Posting add-on and a few extra minutes.
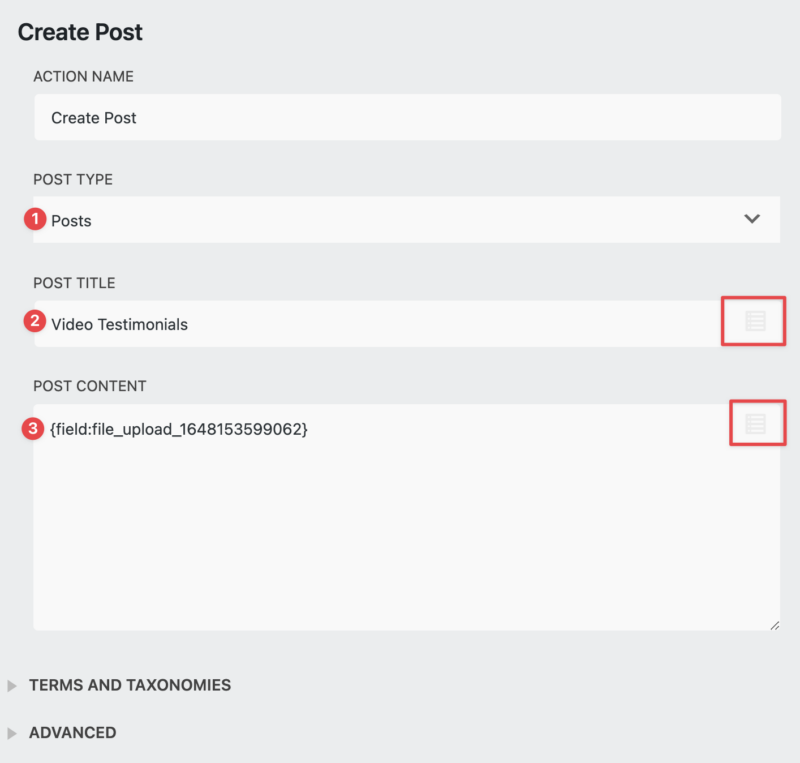
- Install and activate the Front-End Posting add-on.
- Add the Create A Post action to Email & Actions.
- Choose your Post Type from the Post Type dropdown.
- Add a Post Title. You can do this by entering a title or selecting one using the merge-tag selector.
- Append the file upload to the Post Content field using the merge-tag selector.
That’s it! Painless, wasn’t it? Once you save and publish your form you are on your way to collecting video testimonials for your website. For a complete guide to post creation add-on, refer to our Front-End Posting documentation and blog post How to Enable User Submitted Posts and Content.
Yippee uploading Youtube videos with WordPress is easy!
Congrats! You now know how to upload videos to Youtube with WordPress. You even learned a quick way to add those videos to your website with Front-End Posting. So what are you waiting for? Give Zapier and File Uploads a try!
After all, Zapier comes with a plethora of integrations. Allowing you to do things with WordPress forms that you might not have considered. Like sending messages to Discord, automating webinar registration, or collecting digital signatures.
Unlike our competitors, we give you the option to purchase add-ons without requiring you to sign up for a membership. On top of that, we offer single-site, 5-site, or 20 sites licenses as well. With our 14-day money-back guarantee what do you have to lose?
BE THE FIRST TO KNOW
Get exclusive content, tips and offers delivered straight to your inbox.
Notice: JavaScript is required for this content.


