How to Upload Images and Display them on Flutter
How to Upload Images and Display them on Flutter
Hello everyone, back again at porkaone. On this occasion we will learn how to
upload images in flutter. Curious?, let’s follow in full below.
In this tutorial, we will create a simple image viewer application,
where previously images were uploaded via the gallery or smartphone camera. In
this tutorial we have not used a database, so the image will disappear when the
application is stopped. To run the image upload function in flutter we need the
image_picker library.
Mục lục bài viết
How to Upload Images and Display them on Flutter
1. Create a new flutter project with the name
practice_upload_image. Or with a free name
2. Open the pubspec.yaml file. Then add the
image_picker library, for more details, follow the image below. Then
save the file to download the library.
Download Library
3. Open the main.dart file, then replace its contents
with the script below.
import
'dart
:io';import
'package
:flutter/material.dart';import
'package
:image_picker/image_picker.dart'; void main() => runApp(MaterialApp
( home:Home
(), debugShowCheckedModeBanner:false
, ));class
Home
extends
StatefulWidget
{ _HomeState createState() => _HomeState(); }class
_HomeState
extends
State<Home>
{XFile
? image;final
ImagePicker
picker =ImagePicker
();Future
getImage(ImageSource
media) async {var
img = await picker.pickImage(source: media); setState(() { image = img; }); } void myAlert() { showDialog( context: context, builder: (BuildContext
context) {return
AlertDialog
( shape:RoundedRectangleBorder
(borderRadius:BorderRadius
.circular(8
)), title:Text
('Please
choose media to select'), content:Container
( height:MediaQuery
.of(context).size.height /6
, child:Column
( children: [ElevatedButton
( onPressed: () {Navigator
.pop(context); getImage(ImageSource
.gallery); }, child:Row
( children: [Icon
(Icons
.image),Text
('From
Gallery
'), ], ), ),ElevatedButton
( onPressed: () {Navigator
.pop(context); getImage(ImageSource
.camera); }, child:Row
( children: [Icon
(Icons
.camera),Text
('From
Camera
'), ], ), ), ], ), ), ); }); }Widget
build(BuildContext
context) {return
Scaffold
( appBar:AppBar
( title:Text
('Upload
Image
'), ), body:Center
( child:Column
( mainAxisAlignment:MainAxisAlignment
.center, children: [ElevatedButton
( onPressed: () { myAlert(); }, child:Text
('Upload
Photo
'), ),SizedBox
( height:10
, ), image !=null
?Padding
( padding: constEdgeInsets
.symmetric(horizontal:20
), child:ClipRRect
( borderRadius:BorderRadius
.circular(8
), child:Image
.file(File
(image!.path), fit:BoxFit
.cover, width:MediaQuery
.of(context).size.width, height:300
, ), ), ) :Text
("No Image"
, style:TextStyle
(fontSize:20
), ) ], ), ), ); } }
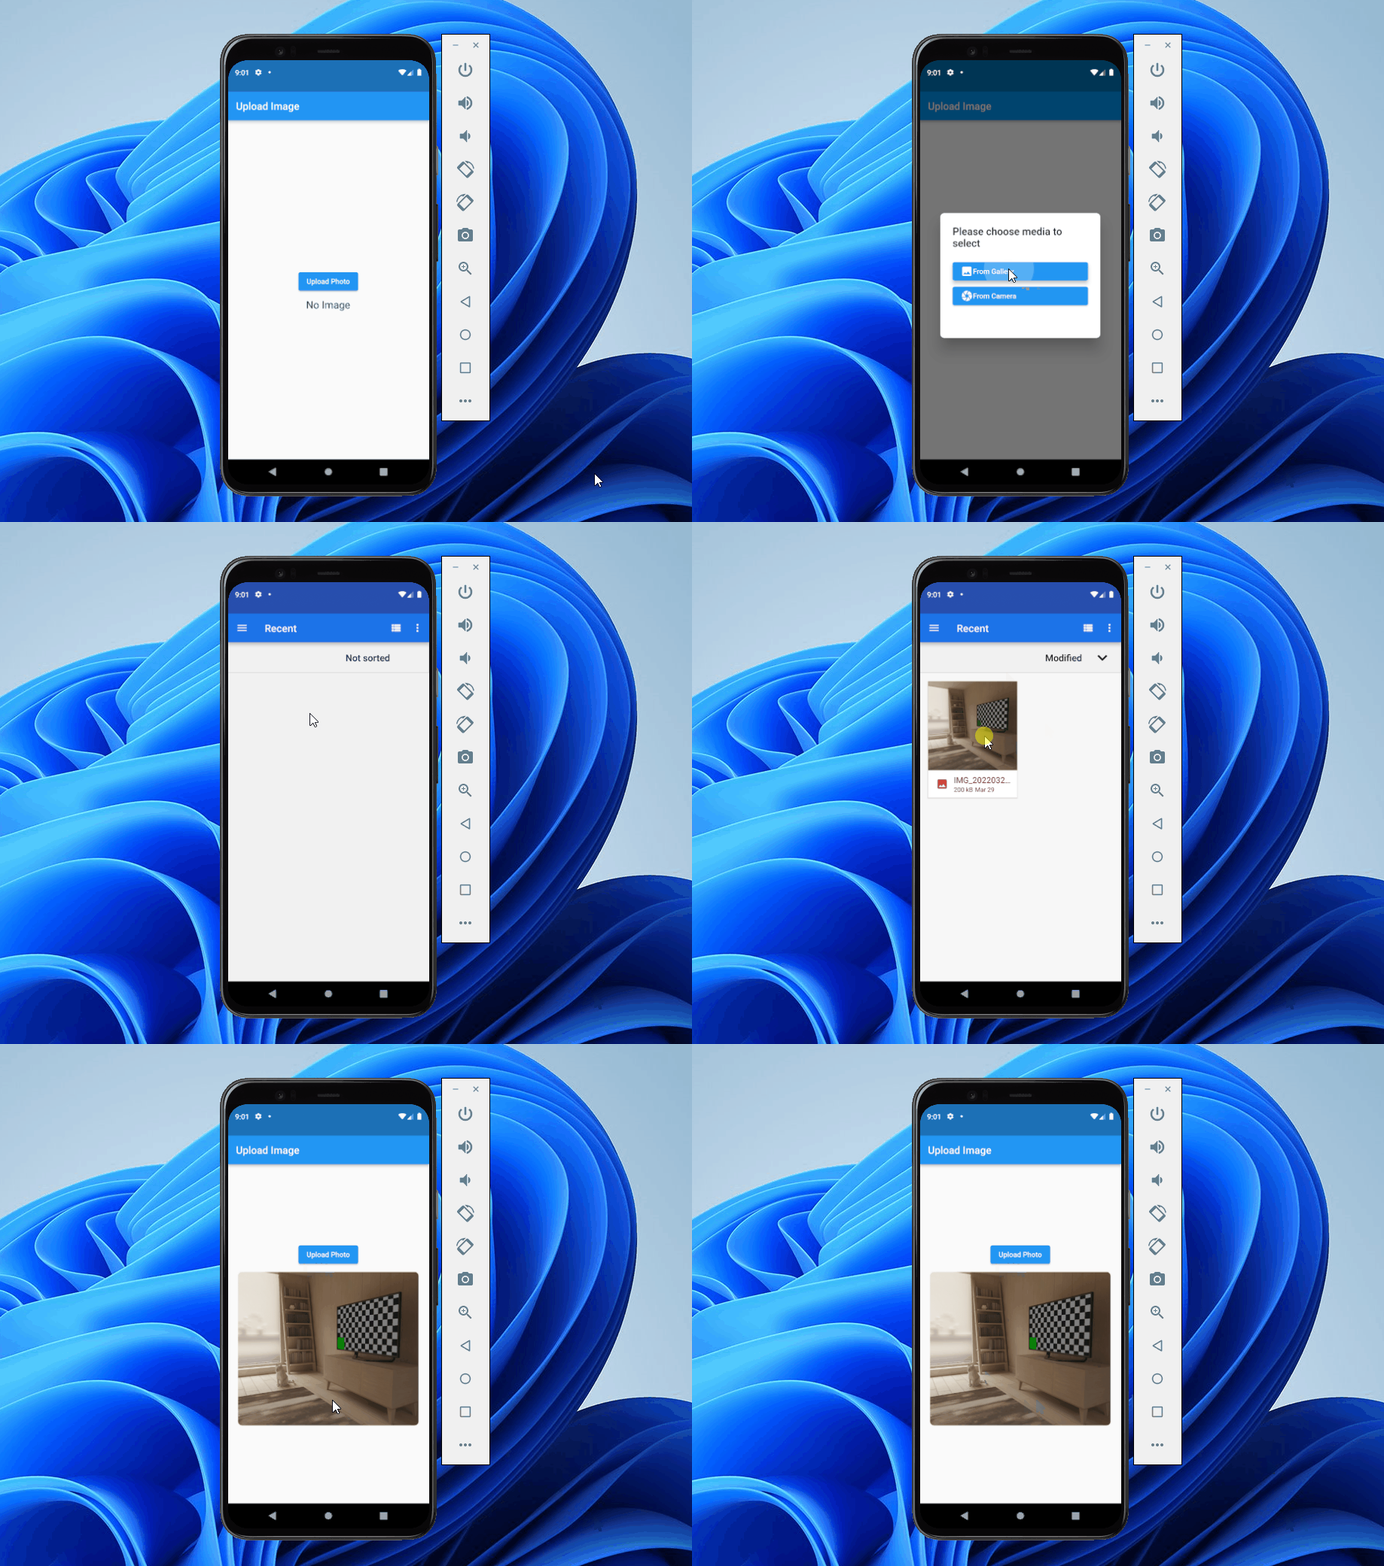
4. Now run your application, if successful then it will
look like the image below.
Now run your application, if successful then it will look like the image below.

Final Result
Ok, now you have succeeded in making the upload feature and displaying
images in flutter. Next you need to improvise by saving the images into the
database.
So this tutorial is about how to upload and display images in flutter. May
be useful. If there are difficulties, please ask in the comments column.
That is all and thank you.
In this tutorial, we will create a simple image viewer application, where previously images were uploaded via the gallery or smartphone camera. In this tutorial we have not used a database, so the image will disappear when the application is stopped. To run the image upload function in flutter we need thelibrary.Create a new flutter project with the name. Or with a free name


