How to add songs to Smule
Your favourite song isn’t in the Sing! app yet? Then maybe add it yourself! It’s pretty easy! All you need a desktop computer and a karaoke version of your song. I don’t want to recommend any copyright violations, so for this article we assume that you created the karaoke version yourself, e.g. by recording yourself playing an instrument or by arranging a MIDI song in an app like GarageBand. So you should now have a lossless audio file of your song as .wav or .aiff for example. Now let’s go through the process of preparing the song and uploading it to Smule.
Mục lục bài viết
Preparing the Audio File
To upload a song to the Smule community songbook you need an .mp3 or .m4a file which is smaller than 20 megabytes and shorter than 10 minutes. So you can usually upload your live recording or arrangement straight away, but it’s often useful to optimize it first with an audio editor. A popular choice is Audacity, since its free and available for all major operating systems.
There are a few things we want to check and optimize now.
1. Normalize the Song
As you might have noticed, songs in the community songbook can have very different volume levels. In an audio editor you can manually change the volume, but you should at least normalize the song. This brings the average or peak amplitude to a target level (the “norm”). In Audacity, just pick the Normalize filter from the effects menu to normalize the entire song.
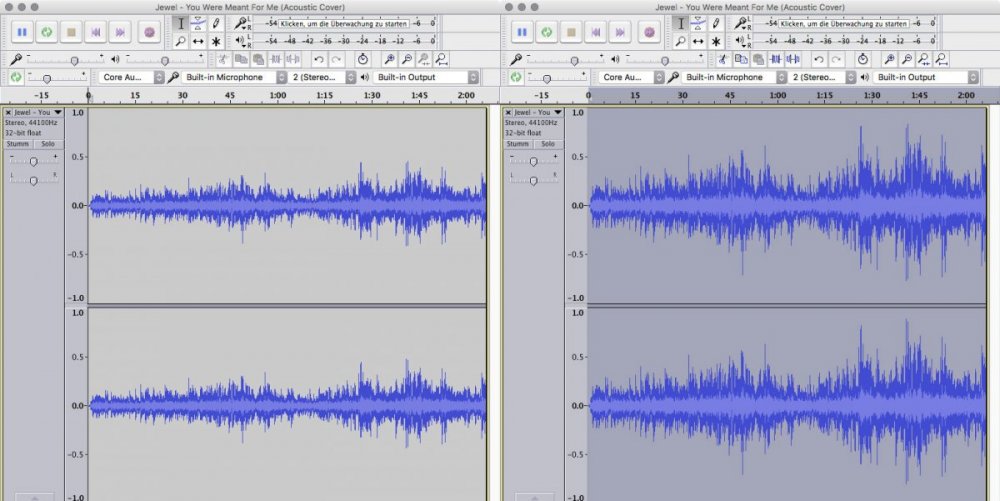
Guitar recording before (left) and after normalization (right)
2. Remove Silence
Don’t you hate it when community songs start and/or end with several seconds of silence? It’s especially annoying with video OCs. So make sure you remove that silence before uploading a song to the songbook!
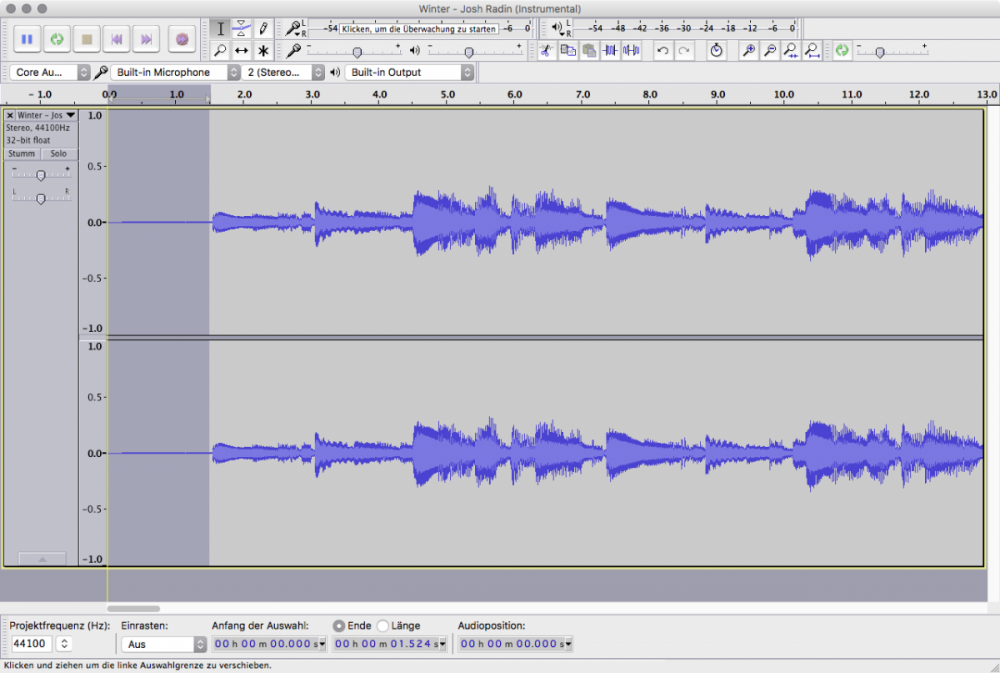
In Audacity just zoom in to the beginning and end of the song, select the area where no music is playing and hit backspace to delete the silent parts.
3. Fade in and Fade out
If the volume jumps abruptly at the beginning or end of the song, it won’t sound very good. Even just a little bit background noise coming from your microphone can create this unwanted effect. To remove this problem, you can add a fade in effect at the beginning of the song and a fade out at the end. Select a part of the beginning or end and select “fade in” or “fade out” from the effect menu.
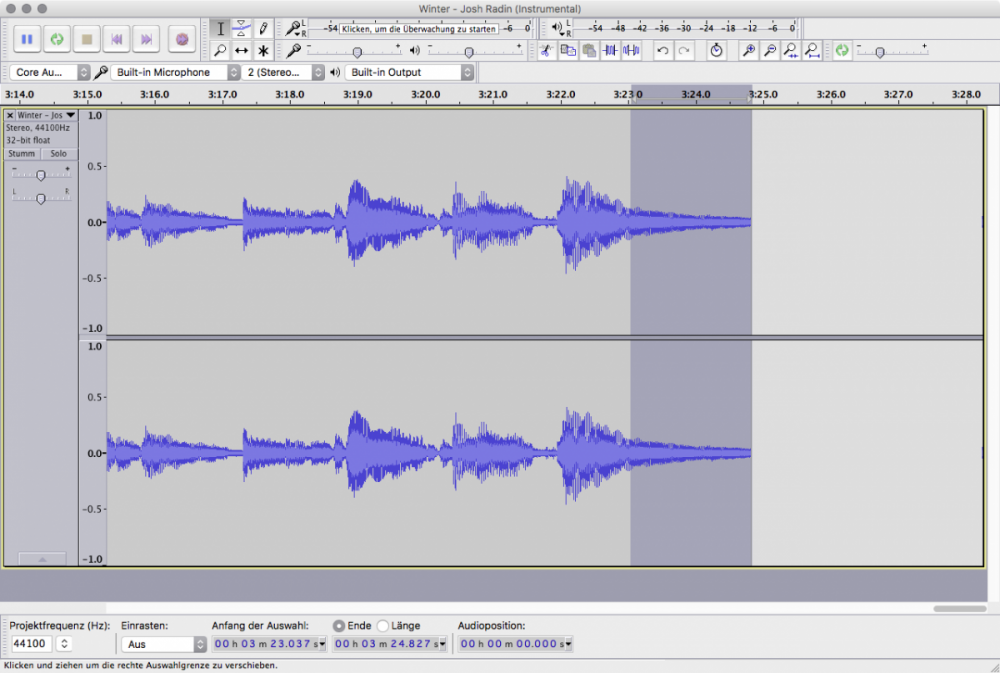
See the volume jump at the end where the music stops abruptly? We should add a fade out effect to the selected part to improve the recording.
When the song is ready, we export it as .mp3 or .m4a file. Feel free to pick a high bitrate for better quality, since a small file size is not important for the use of a song in the Smule app.
Song Upload to Smule
Now open http://www.smule.com/s/upload/ in a desktop browser and pick “Songbook” to create a new karaoke song available to everyone.
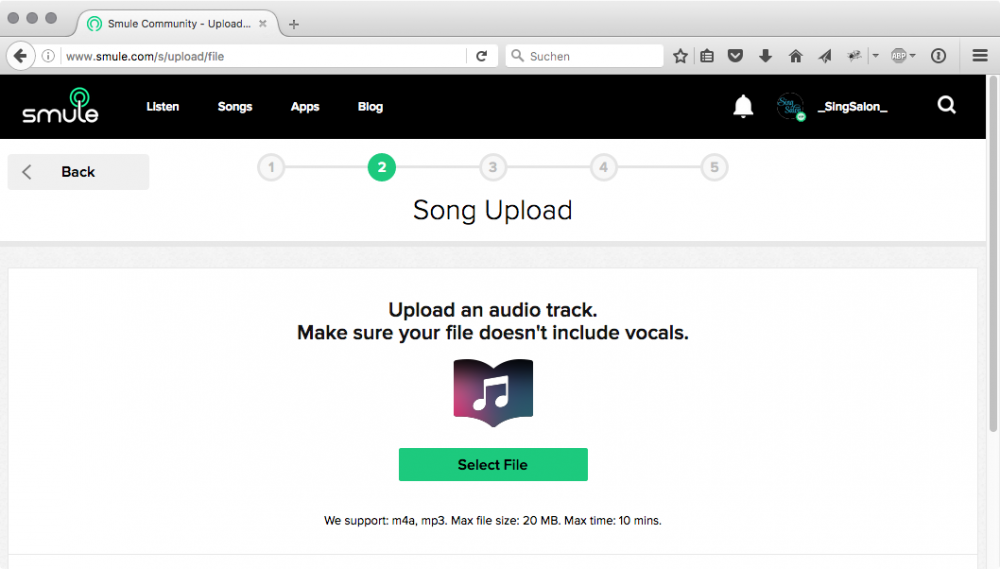
Select the .mp3 or .m4a file you just created.
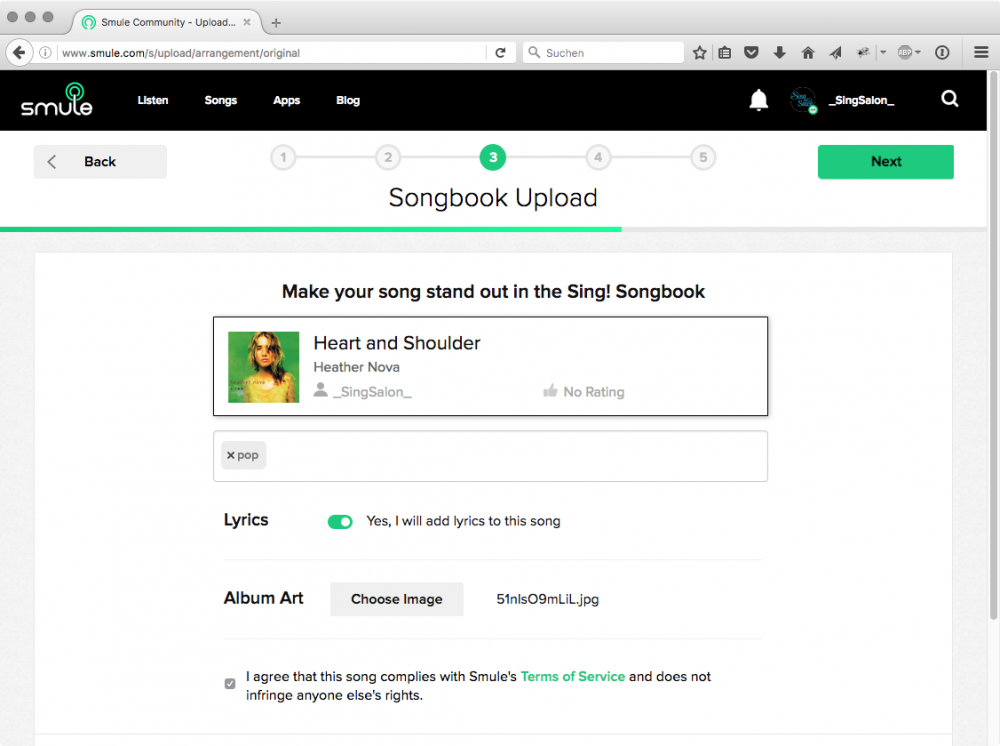
Add the song title, artist, a cover image and tags. You could skip the last part where the lyrics are added, but it is highly recommended that you add them.
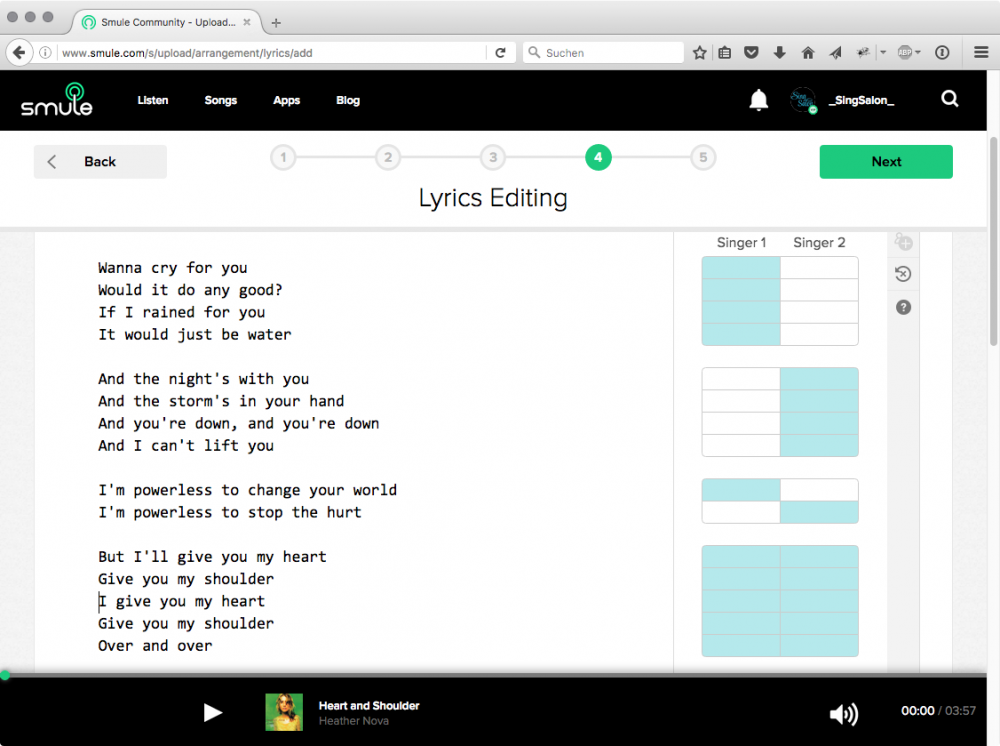
So write down the lyrics or just copy and paste them from another site. Make sure the line-breaks make sense, so the singers can easily follow the lyrics. Assigning the lines to singer 1 and 2 is optional, but also highly recommended. To assign a part to a singer just click the button next to the line of the song.
If the original song is divided among two singers, e.g. there is a male and female part of a musical song, then replicate this separation. For most songs it is totally up to you how you divide the parts. In general, you want to try to keep a good balance. Don’t let one singer sing alone for too long—but also don’t switch between the singers too fast or too often. And don’t assign the lines randomly. Make sure there is a pattern to it, e.g. switch every second or fourth line of the verses and then let them sing the chorus together. Often the pattern gets reversed after a while (e.g. after the first chorus), so every singer gets a chance to sing all melody parts of the song.
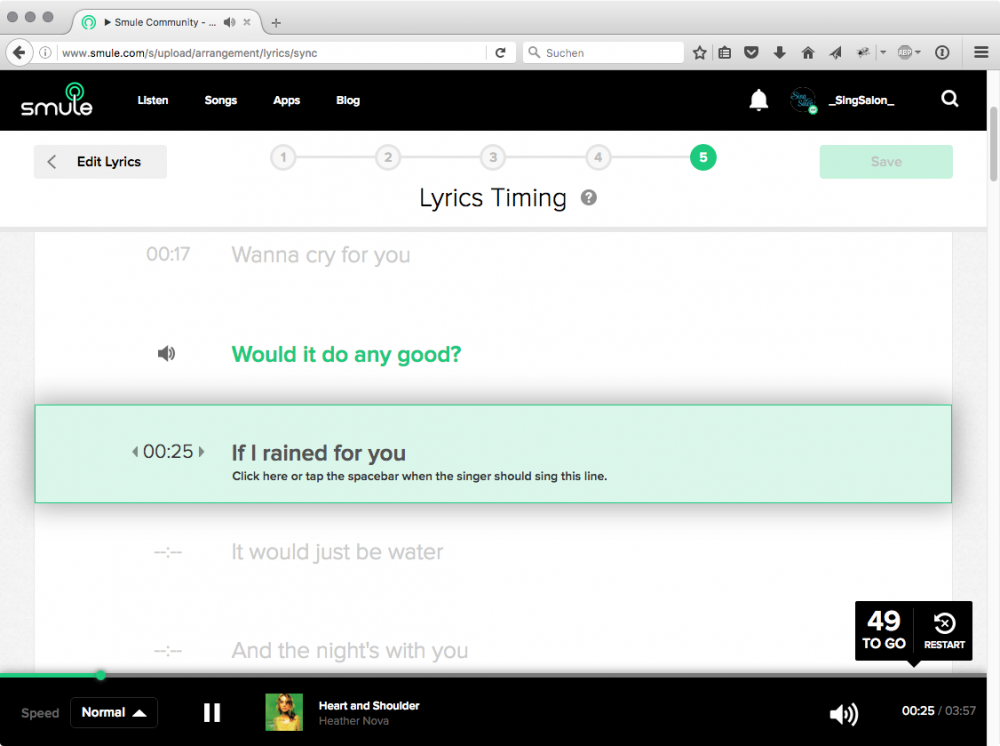
After you have assigned the parts, you need to set the timing of each line. For this the song is played for you in the browser. You only need to hit the space bar, once the next line (the one below the speaker symbol) is supposed to be sung. You continue this process throughout the song for each line. It’s simple, but you can easily make mistakes if you don’t hear the original voice to guide you. If you made a mistake, you can jump back to specific lines or just start over. But please don’t upload a song with mistakes in the timing of the lyrics. Tens of thousands of people might want to sing your song and they will all struggle, just because you wanted to save 3 minutes and didn’t restart the timing after a mistake.
When you have set the timing for every line, you can play the song again to make sure everything is correct. It helps to sing the song aloud as you would sing it in the app. When you save then song now it gets published immediately in the app and everyone can create solos and collabs. Be aware that there is no delete option at the moment. So make sure you are really happy with the result before saving/publishing.
If you have additional questions about song uploads, feel free to ask!


