How to install or upload a WordPress plugin (the ultimate guide) | WP Runner
Plugins are the essential building blocks of any WordPress website. Plugins help you add functionality to your website that you never would have had before.
Here is our ultimate guide to installing a WordPress plugin. Our video guide is also included at the bottom of this post if you prefer to watch and learn!
Mục lục bài viết
Method 1: Installing a WordPress plugin (easy way)
The easiest way to install a plugin is through the WordPress admin area:
- Login to WordPress
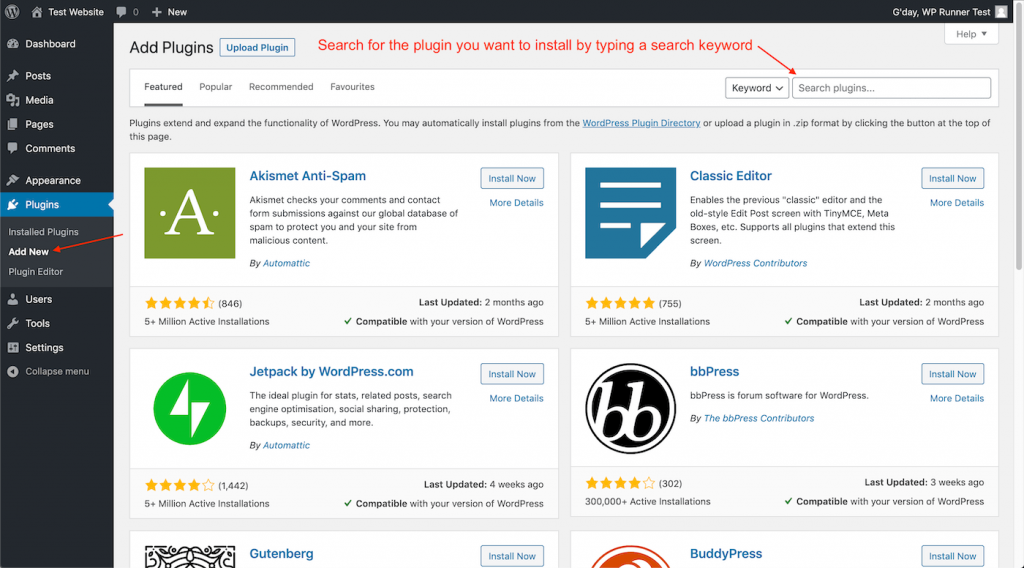
- Navigate to “Plugins” and click “Add New”
Once you click “Add New” you will arrive at the “Add Plugins” page:

You can use the search box to search for the plugin you wish to install and then click “Install” and then “Activate” the plugin:

And that’s all you need to do! Once you activate your plugin you might need to tweak your plugin settings depending on what plugin you are installing.
Method 2: Uploading a WordPress plugin (hard way)
Uploading a WordPress plugin is the way to install custom plugins that do not appear when searching the WordPress plugin store. This is common with premium plugins.
You may also need to upload a plugin when your server settings restrict upload sizes or if there is an error with your plugin installation.
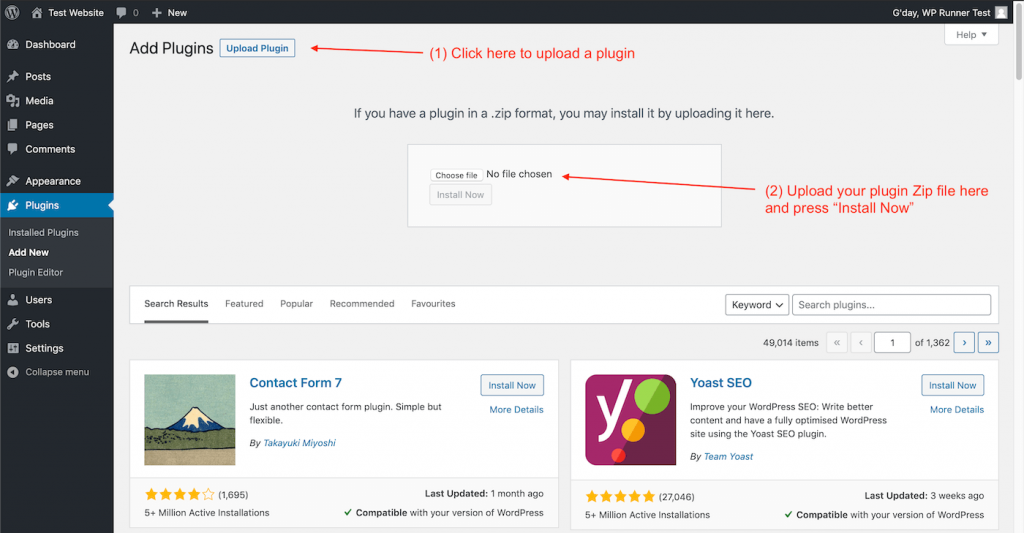
You can upload a plugin from inside the WordPress admin area by clicking “Upload Plugin” from inside the “Add New” plugin page.
- Login to WordPress
- Navigate to “Plugins” and click “Add New”
- Click “Upload Plugin”
Then from there you can upload the “zip” file of any plugin you have downloaded:

Uploading a plugin to your server or hosting
Sometimes uploading a plugin inside WordPress does not work, either because the file you are uploading is too large or your website is not configured correctly. In this situation the only way to proceed is to (a) upload the file to your server or (b) contact a developer to get them to review your server and fix the issue.
Today we’ll be discussing how to upload the file to your server using cPanel, which is the most common type of hosting.
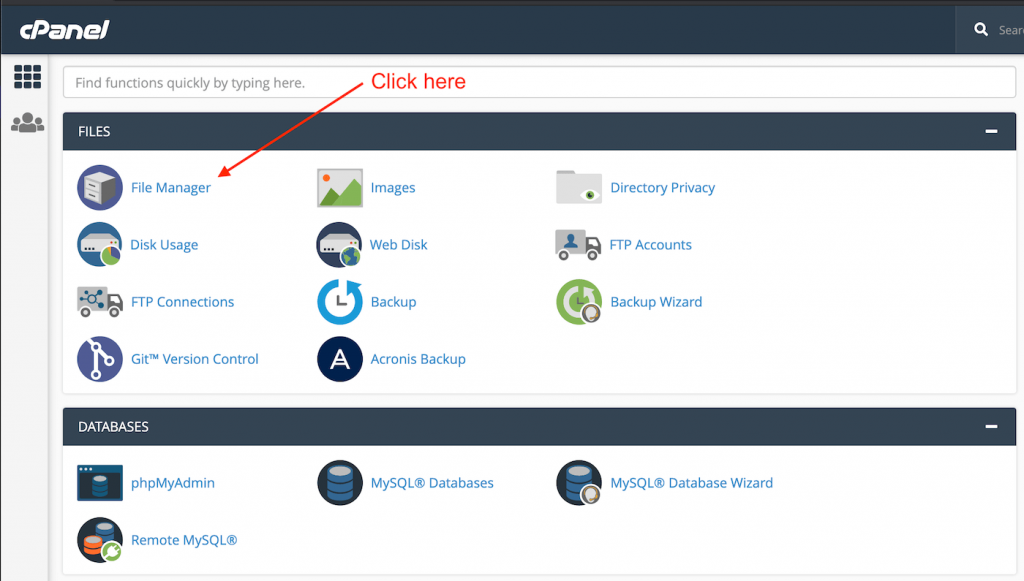
Start by logging in to cPanel. When you login you will see the main cPanel dashboard page with a menu item called “File Manager”.
If you have non-cPanel hosting then you can always try to contact your hosting company and ask them if they have a similar file manager. If your hosting company does not have a file manager then you may need to upload your plugin in a different way or contact a development team (like WP Runner) to get help with this part.

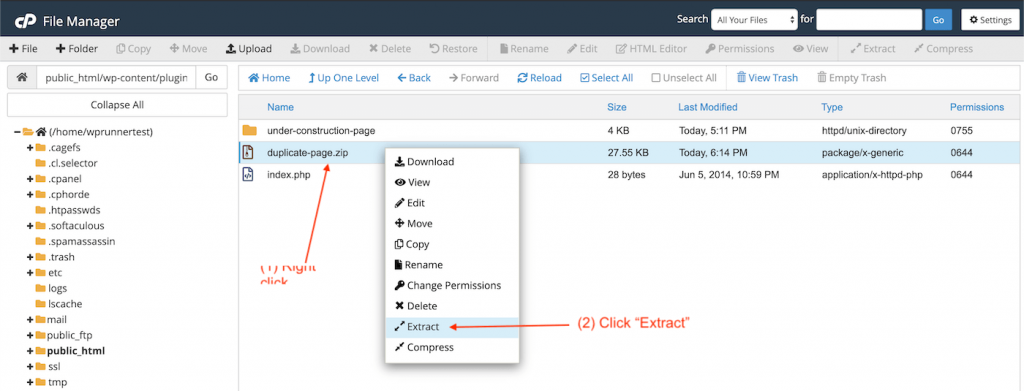
Once you login to the cPanel file manager then you need to navigate through the file manager to reach the “plugins” folder. You can do this by clicking “public_html” > “wp-content” > “plugins” once you reach the plugins folder you need to click upload and upload the “zip” file of the plugin you want to install.

Once you have uploaded your “zip” file you need to extract the zip into the current folder by right clicking the “zip” file and clicking “Extract”.

Once that is done you can delete the “zip” file by right clicking it and clicking “Delete”.
Once that is done you need to login to your WordPress dashboard and activate the plugin from the main plugin page:

What if I can’t upload my plugin? Or everything looks different?
The best way to upload a plugin if your hosting is not cPanel or you don’t have access to your hosting is to contact a developer. There are a lot of possible causes of small plugin upload issues and those can be debugged quickly by any skilled developer.
View the video guide:
Thanks for reading! We hope this guide helps you get more out of WordPress.


