MSI Global – The Leading Brand in High-end Gaming & Professional Creation
Different models of computers will be equipped with different versions of SteelSeries Engine according to the manufacture period. Here, SteelSeries Engine 3 (SSE 3 will be referred to as an example).
If the notebook has successfully installed the SSE3 software, the following icon will appear in the Windows tray.

Click this icon to launch the SSE3 software. The main screen and the functions of each area are as follows:
1. MY GEAR:The MY GEAR tab lists recognized SteelSeries devices which can be clicked to access advanced settings.


2. ENGINE APPS:Engine Apps is a collection of in-game integration and purpose-built applications that deliver custom-designed benefits.

3. LIBRARY:The LIBRARY tab shows what programs trigger a configuration for each device.

4. Small icon in the upper right corner: from left to right, “Update”, “Settings”, “Personal Account”
4-1. Update: SteelSeries Engine 3 will prompt you for a software update

4-2. Settings: You can set the SteelSeries Engine 3 interface language, update method and login settings. Click “About” to view software and device firmware information.


4-3. Personal account: Register and log in to your personal account, you can sync personal settings to the cloud, you also can download personal settings by logging in the account.

My Gear advanced settings interface and function introduction
Click “MSI PER KEY RGB KEYBOARD” below to enter advanced settings.
The figure below is for reference only and may differ from the actual situation.

1. Macro Editor: SteelSeries has a dedicated macro manager that you can launch by hitting the button on top of the list of keys. This is where you can save or remove macros.
2. View Options: Show or to hide Macro Editor, Configs and Keyboard Region.
2-1. Shown status

2-2. Hide status

3. Settings: You can open the left profile list window and add or edit profiles. You can edit the binding application and keyboard light mode to start at the same time.

4. Live Preview: gives you the full experience of your configuration’s look, feel, and sound while you are editing it.
5. Lighting: backlight color and mode adjustment

5-1. In the left color setting area, you can select a single key for color setting, or you can select multiple keys or areas for color setting at the same time.


5-2. Scheduled template adjustment on the right
Drain Mode:Keyboard backlight repeats gradient from side to side.

Freeway Mode:The keyboard backlight is irregular and the color is randomly flashing.

Gold splash Mode:Keyboard golden backlight repeats from the middle to the sides.

Plain Mode:Keyboard yellow backlight is always bright.

Rainbow Split Mode:Multiple color backlights, gradual from the middle to the sides.

Audio Mode:The keyboard backlight will flash in different colors as the music played by the device. This function requires more than 30% of the volume to be effective.

6. Keyboard area: This module can adjust the keyboard display language.

7. Save & Restore : Save the settings you have made, or restore the settings you have made.
The above is a description of the common settings. For more detailed settings, please read the manual in the following Windows path (only for models equipped with MSI preloaded Windows system)
This PC → Windows (C) → User Manual → Software Application Manual

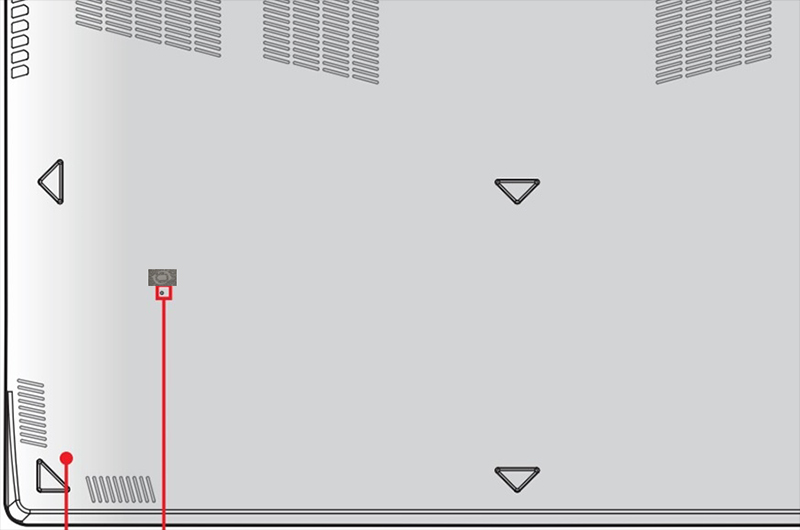
If SSE could not detect your keyboard or setting function is failed. Please try to update latest SSE and use a paper clip to insert into the battery reset hole at the bottom of the unit.
(Warning):
1. Some of the models might not have the battery reset hole, please remove the power adapter and the battery (if applicable, differ by model) for 15 seconds and place it back
2. The location of the battery reset hole might differ by the model, please refer to the product manual
3. After performing the reset, please have the battery and power adapter connected to activate the battery, otherwise it will not boot up the PC


