Open Broadcaster Software Review
Video streaming software is useful for many different applications. Many of the options on the market today can be quite pricy. Free options tend to lack features that are essential for a smooth broadcast. There is however, one option out there that is both free and loaded with features. That software is called Open Broadcaster Software, or OBS. This powerful program makes screencasting incredibly intuitive and is one hundred percent free to use. If you are looking into software to screencast for your podcast, live streaming, or other internet broadcasts, read on to discover the features of OBS.
You may also like:
Best OBS Settings for Recording
Mục lục bài viết
1. Key Features
The Open Broadcast Software offers many important features that will make your online broadcast stand out. With real-time video and audio mixing and capturing and unlimited scenes to switch between using transitions that you can customize, you’ll be able to create an incredibly dynamic stream with ease.
OBS has filters that allow you to use chroma keying, masking, and color correction, and an easy to use audio mixer that can filter sounds for noise suppression and gain. Use the robust yet accessible configuration options to add new sources and adjust their properties without hassle. Open Broadcaster Studio Mode allows you to check your sources and scenes out before you start broadcasting so that you can adjust anything, or create additional ones to make sure your stream is just right. You can easily set hotkeys for pretty much any action, including switching between scenes, starting or stopping your stream, muting audio, and more.
The settings panel has been designed to allow for easy, quick configuration of broadcasts and recording, and you can view all of these features in the default “light” interface theme, or choose the “dark theme” to take some strain off of your eyes.
OBS is lightweight and offers high performance comparable to pricier options. OBS supports streaming to Twitch, Hitbox, YouTube Live, Facebook Live, and more.

2. Interface
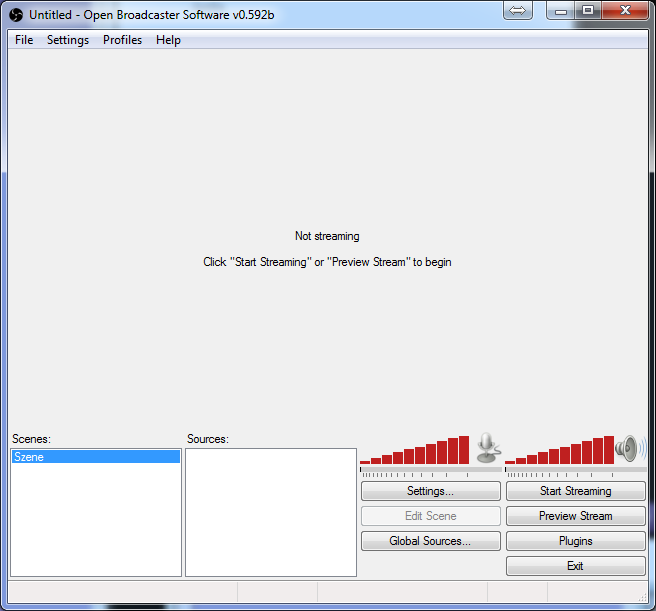
Open Broadcaster Software maintains ease of use through a clean and easy-to-read and full-of-technology interface. The interface allows you to easily add sources and images, capture cards, specific windows, and more. You can add multiple sources with ease, and you are offered many different settings that allow you to configure nearly every aspect of your stream. As previously mentioned, you can also switch between light and dark program themes, a small feature that many people who use computers constantly will appreciate.
3. Video Quality
When it comes to video capture software, one of the biggest concerns for streamers is video quality and how many frames per second can be captured. Open Broadcaster Software doesn’t fall short here. OBS allows you to customize your capture quality, a feature missing even from some of the most expensive capture software. You can set your own resolution, or choose to use the resolution of your monitor. You can also choose how many frames per second, and apply any resolution downscale that is necessary. Finally, you can customize your bit rate for the best possible quality video for your situation.

4. How to Record and Stream Gameplay
With Open Broadcaster Software, users will find it easy to record gameplay and live stream using the easy to use interface. It is important to experiment with different encoding settings to get the best possible stream. OBS offers official settings estimator on its website to help figure out what your optimal settings might be. OBS also offers the ability to use an encoder other than the standard CPU encoding. For online streaming, the standard is preferred, but otherwise, the other encoders are worthy of tinkering with. OBS also allows you to use a constant bit rate, which will ensure that the stream is broadcast at exactly the bit rate that you specify. This can help solve any latency or other quality issues that you may be having during your stream.
When recording gameplay, using a custom buffer size affects motion quality. The higher the buffer size, the better the motion size. However, the downside to increasing the buffer size is that if suddenly there is a scene change, the buffer will fill up faster than the average bit rate, which can cause a network data spike, leading to latency both in the recording and in your gameplay. Lower buffer size will make transmission less rocky but will reduce motion quality. While playing with a custom bit rate is fun to play with, it is best to leave custom buffer alone, and just use the same rate as the bit rate.
5. Pros and Cons
Pros
Cons
Free, open source and cross-platform
Doesn’t work on Windows XP
Streams to most live streaming video platforms
Can’t link to an audio file as a source
over 20 plugins that enhance functionality
—
Every piece of software has its pros and cons. Open Broadcaster Software is no different. OBS does an excellent job of streaming to most live streaming platforms like Twitch, Facebook Live, and YouTube live. OBS also offers more than 20 plugins to enhance functionality, including plugins for countdown implementation, server ping, and Teamspeak implementation. The best part of OBS, however, is that it is completely free, forever, with no hidden costs. Unfortunately, OBS does not work on Windows XP, and is unable to link to an audio file as a source.
Best Alternative to OBS: Wondershare DemoCreator
If you want to record high-paced online gameplays, consider Wondershare DemoCreator Recorder is the best alternative to OBS, which is a powerful but easy-to-use screen recorder & video editor. Some of its main features include recording high-paced games at up to 120 fps, recording screen and webcam simultaneously. Apart from that, it’s also a handy video editor tool, with which you will be able to do basic editing, add annotations/text/callouts, and more. Download the free trial version below.
1. Key Features of Video Recording
As the open broadcaster studio alternative, DemoCreator also provides stable screen recording functions that allow you to record screen, audio, and webcam simultaneously. Record gameplay from 15 fps to 120 fps. In the newest released version, DemoCreator launches 3D avatar that is essential for your to record presentations, demo video, and more. Selecting the resolution from 2K, HD or customizing the region is easy and you can also enable GPU acceleration for recording. There are advanced shortcuts for you to set to accelerate your video recording and editing.
2. Video Editing
As a lightweight video broadcaster, OBS is not providing video editing features. DemoCreator will be the best alternative by providing tons of video editing features. You can cut, trim, and combine videos with just a click. You can also import the music as background sound or add some pictures as thumbnails. Thousands of video resources can be found in the DemoCreator media packs that spark your creativity by selecting the suitable one for your tutorial, game, or live video.
Best OBS Settings For Recording 1080p
Here’s the tutorial video on how to set up OBS:
After you have installed Open Broadcasting Software for your operating system, open it up. Next, you will want to open up whatever game you want to stream. Switch back to OBS after you have opened your game up. You will see, on the bottom left of the window, a blank box with the word “Scenes:” above it. Right-click that and click “Add scene.” You can name it whatever you’d like.
In the adjacent “Source” box, right-click, then choose “Add” and then “Game Capture.” This will trigger another window to open asking you to choose the application you want to stream. Select your game from the dropdown box and click “OK.” If your game doesn’t work in full screen with the default game capture option, you can use monitor capture instead.
OBS also allows you to add a webcam feed to your stream. To do that, right-click in the sources box and add a “Video Capture Device.” There are many options to select here, but the important thing is to select your webcam from the dropdown box. You can then place it wherever you want on your stream.
Now you are ready to start streaming. You will need to navigate your browser to Twitch, YouTube Live, Facebook Live, or another favorite streaming service. After you have logged in, click on the tab on that website marked “Stream Key” and then click “Show Key” copy this key into your clipboard, and switch back into OBS. Go to “Settings” and then open the “Streaming Service” drop-down menu. Select your chosen service, and paste the key from your clipboard into the field marked “Play Path/Stream Key.” Click through any warnings you may get. If you want to adjust any other options before you begin your stream, now is the time to do it. Make sure everything looks the way you want it to and then click “Start Streaming.” You should now be broadcasting live. There are many other settings that can be adjusted to suit your needs, and you should experiment with them once you are more comfortable with the software.
If you are looking for great video editing software to edit your YouTube videos, so you can edit like a Pro, download our video editor Wondershare DemoCreator below now, which allows you to record and edit easily.

The Best Screen Recorder & Video Editor
Record your screen with audio and webcam, drawing on the screen when recording.
Built-in thousands of templates, resources, and effects, edit the video like a pro.
Edit the audio, video, recorded clips on different tracks simultaneously.
Supports AI Face Recognition, stress any key point on the recording screen.
Export to MP4, MOV, MKV, GIF and multiple formats, and with high quality.
Free Download

Secure Download
Free Download

Secure Download


