The Complete Guide to Installing Power Query – Excel Campus
Power Query is an amazing data tool for Excel! It is built by Microsoft to help you import, transform, and automate your data processes. Checkout my overview of Power Query to learn more about it.
Here is a quick list of compatible versions:
- “Free” add-in for Excel 2010 and 2013 for Windows.
- Built-in feature for Excel 2016 for Windows (Office 365 Subscription). Click here to learn where to find it.
- Power Query is not yet available for the Mac versions of Excel.

This page will help you determine if you have the right version of Excel, and provide installation instructions.
Mục lục bài viết
Video Guide to Installing Power Query
What Version Do I Need?
The download page for Power Query lists which version of Excel are compatible with Power Query.
The following Office versions for Windows are supported:
- Microsoft Office 2016 – All Versions
- Microsoft Office 2013 – All Versions
- Microsoft Office 2010 Professional Plus with Software Assurance
Both 32-bit and 64-bit are supported. Power Query is not compatible with any Mac versions of Excel yet.
Unfortunately, if you don’t have these versions you will need to upgrade to use Power Query. To me, Power Query is worth the upgrade to Office 365 alone, and there are a lot of other cool new features too.
How Do I Check My Version of Excel?
Excel 2010
Here’s how to determine your version and 32 or 64 bit in Excel 2010:
- Click the File button.
- Click the Help option on the left side menu.
- The Excel version will be listed under the Product Activated section.
- The bit version (32-bit or 64-bit) will be listed under the About Microsoft Excel section.
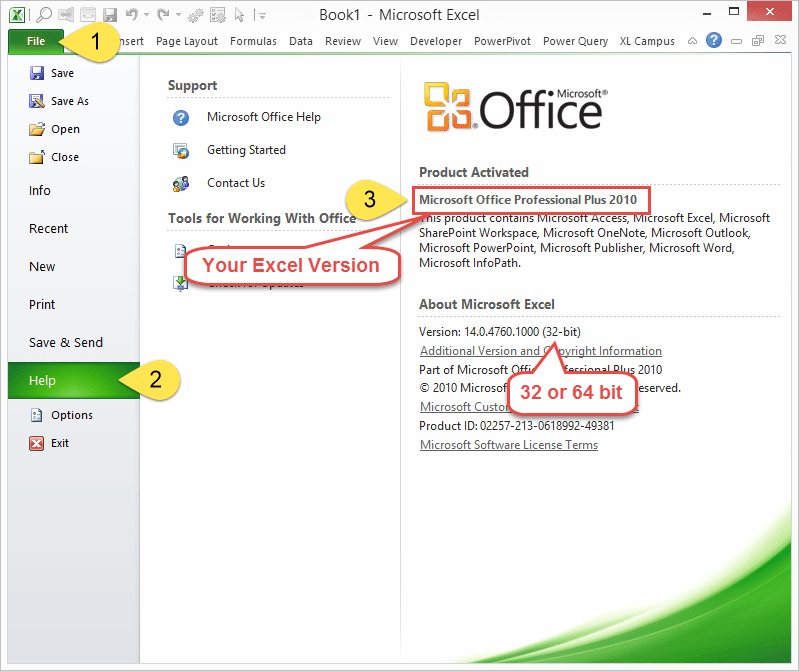
If your Excel looks like the screenshot above, then you are in luck! 🙂 Again, you will need the Professional Plus version of Excel 2010.
Excel 2013
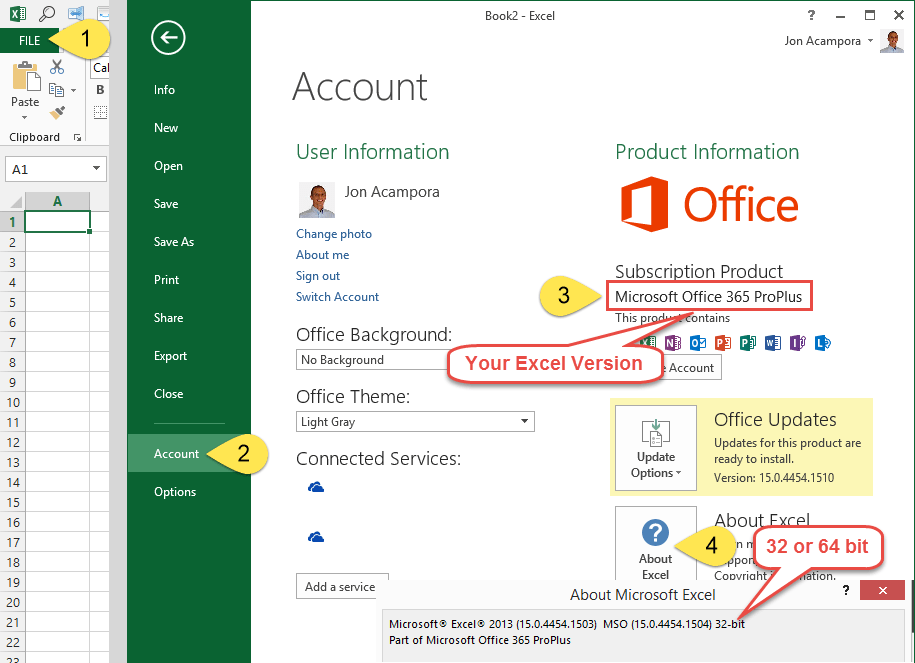
Here’s how to determine your version and 32 or 64 bit in Excel 2013:
- Click the File button.
- Click the Account option on the left side menu.
- The Excel version will be listed under the Subscription Product section.
- Click the About Excel button. The bit version (32-bit or 64-bit) will be listed in the first row of the pop-up window.
How to Install Power Query
Excel 2016
Power Query is included with Excel 2016 (Office 365). It has been renamed and is now on the Data tab of the Ribbon in the Get & Transform section.
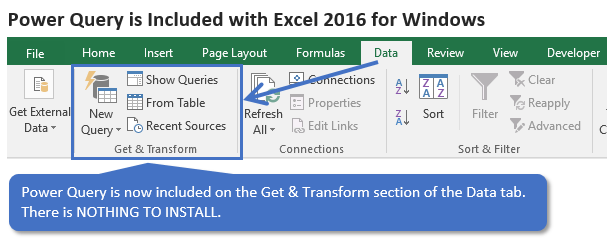
This means there is nothing to install. If you are using Excel 2016, go to the Data tab on the ribbon and press the New Query button to create a query and open the Power Query editor.
Power Query is available with all levels of Office 365 subscriptions. Here is an article that explains the features available for each subscription level.
It’s important to note that there are some differences in Power Query for different builds of Excel 2016.
If you are on the MSI (Windows Installer) version then you will not get frequent updates to Power Query. Your ribbon might look different from mine, and you won’t have all the latest features.
If you are on an Office 365 subscription then you have the Click-to-run version and you should get all the latest updates. Here is an article on how to determine which version of 2016 your are on.
If you are on the ProPlus version of Office 365 then you might be on the Deferred Channel. The name of the Deferred Channel has been changed to Semi-Annual Channel as of September 2017. This means you get updates every six months instead of every month.
Here is an article about the different channels for Office 365 ProPlus.
Here is an article on how to switch channels.
All the versions and channels make this very confusing, to say the least. Hopefully this guide helps you figure out how to get Power Query for Excel 2016.
Checkout my article on an Overview of Power Query to learn more about this awesome tool!
Excel 2010 & 2013
For Excel 2010 and 2013 you will need to download the Power Query add-in and install it.
The installation steps are about the same in Excel 2010 and 2013.
- Close (exit) Excel completely.
- Click the following link to go to the download page.
http://www.microsoft.com/en-us/download/details.aspx?id=39379
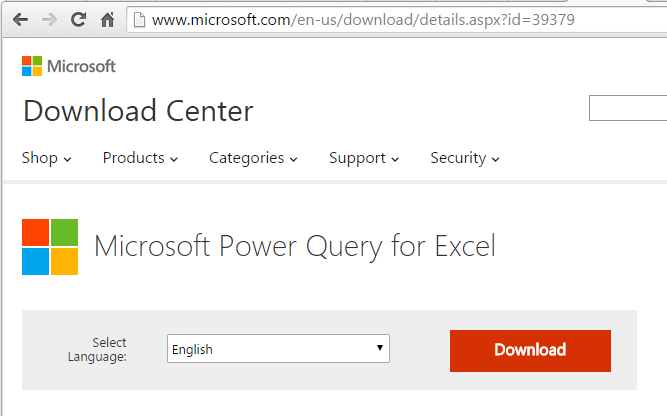
- Click the Download button.
- Click the checkbox for the bit version you are using. Most likely you will be using 32-bit.
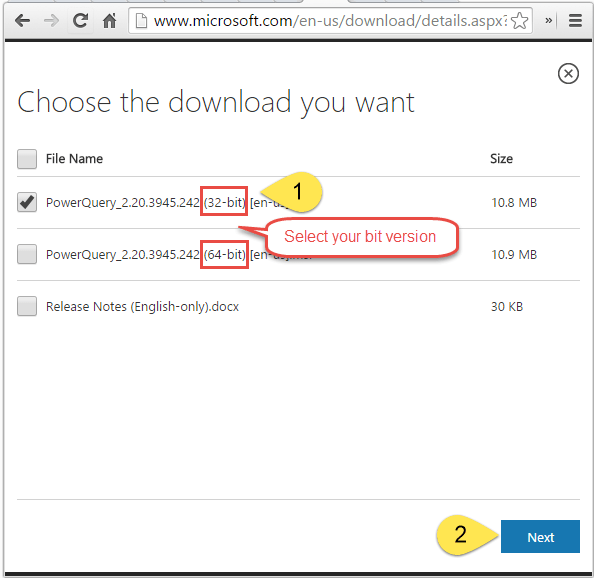
- Click Next
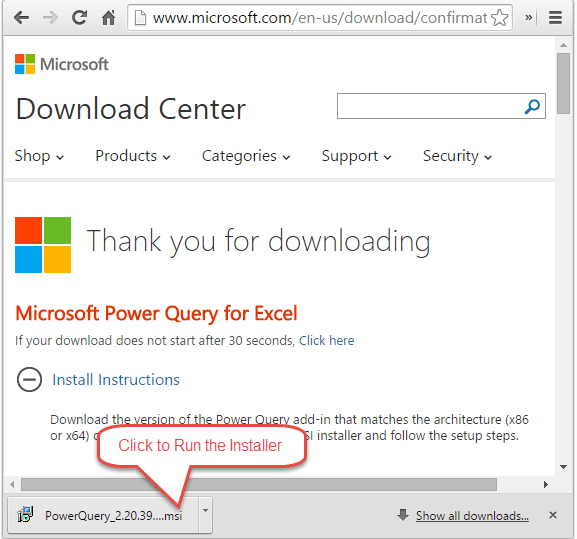
- The add-in installation file will download. Click the file to run the installation.
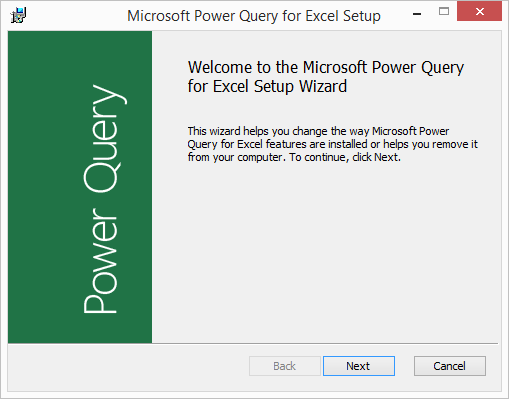
- The Setup Wizard window will open. Follow the steps to install Power Query.
- Once the installation is complete, open Excel. You should now see the Power Query tab in the Ribbon.


My Power Query Tab Disappeared
If your Power Query tab ever goes missing, you can usually re-enable the add-in by going to the COM Add-ins menu.
There are a few ways to get to the COM Add-ins menu.
- File menu.
- Click Options on left side menu.
- Click Add-ins on left side menu.
- Select COM Add-ins from the Manage drop-down.
- Click the Go… button
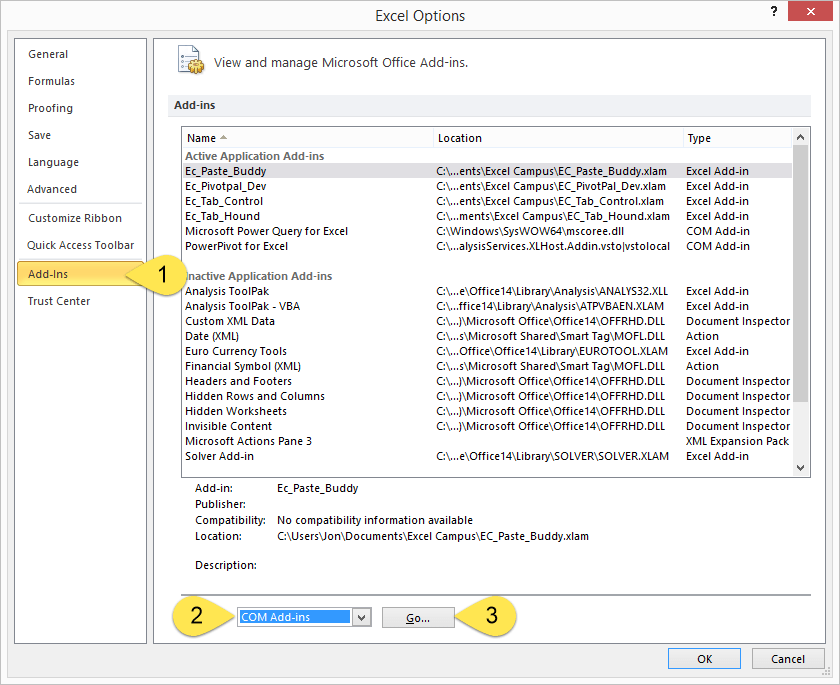
- That will open the COM Add-ins Window. If the Power Query check box is not selected, just select it to reload the add-in.
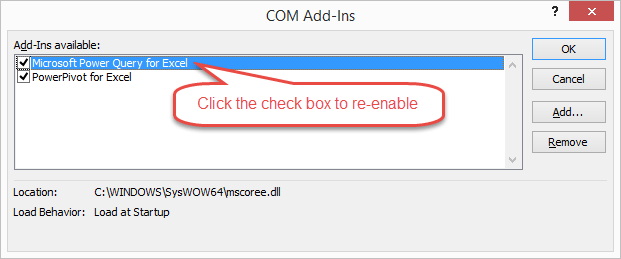
There is also a button on the Developer tab that will take you directly to this window.

Getting Started with Power Query
Power Query is my favorite tool for working with data in Excel. If you are not familiar with what Power Query can do, checkout my article on an Overview of Power Query to learn more.
Please leave a comment below with any questions.


