Top 9 Portable Video Recorder Software [New]
This article will introduce the best portable video recorder software for Windows. This software is essentially used to record the screen, and they do not need any form of installation for it to work. Being portable, you can keep them in any portable device like a USB and carry them with you and use it whenever you feel the need to.
The following screen recorder software will allow the users to capture the Windows desktop screen, a selected area, or a selected window. Some of this software also has advanced features that allow the users to record audio with a microphone along with the video on the desktop. A few of the below software also allow video recording via webcam. Find out more about how each software functions by reading on!
DemoCreator is a free screen recorder portable for Windows 10/8/7 that can be used to capture the desktop screen easily. With the help of a free cam & screen capture tool, you can easily create screencasts, edit the recorded video, and upload it online wherever you want. There is no recording number limit and the final video would be of high quality.
It offers sufficient tools to create, edit, and upload videos, optionally, you can also access a few more advanced screen recording features, such as recording the screen as well as the webcam simultaneously, adding hotkeys and annotations wherever required.

Steps to use DemoCreator:
Step 1: Launch the program, choose All-in-One Recorder and click on the REC button to start a recording.
Step 2: Once done, you can press F10 and use the editing tools to trim or silence certain noises in the background.
Step 3: You can then save the video on your computer or you can even upload it on YouTube.
Mục lục bài viết
2. CamStudio
CamStudio is an open-source screen recorder that can be used to capture all the activities on your desktop screen for an unlimited time. While recording the screen of your desktop, CamStudio also supports audio signals of your Windows computer. With some of the most advanced sets of features, it makes screen recording an easy task.
Once you record the video using CamStudio, it can be either saved on your computer or even exported in . AVI format. Sadly, this is the only output file format supported by this software. This software comes equipped with many other features that make video compression, movie recording, and high-quality video making a hassle-free ordeal.
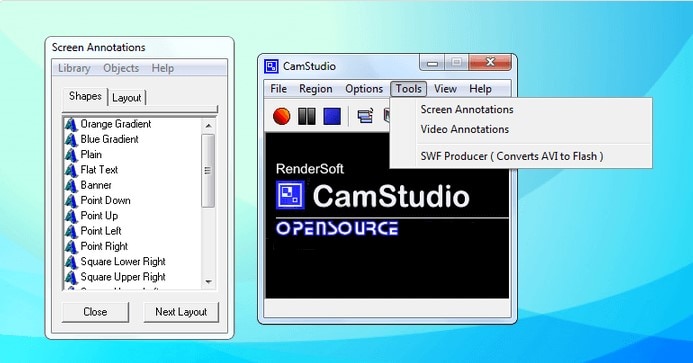
How to use CamStudio:
Step 1: Open the program and when you want to start recording, click on the red button on the window.
Step 2: You can select the area you wish to record by using the cursor, and then click on the blue button when you wish to stop the recording.
Step 3: You can specify the location where you wish to save the recording.
3. ShareX
ShareX is a free total screen recorder portable that is of open-source type. It can be used to record any part of your desktop screen and share it wherever you want with just a click of the button. It allows the users to upload text, images, or any other file types. This software extends its support to over 80 destinations.
The screen captured by ShareX can easily be scaled down if required. A wide range of advanced features is provided by ShareX. It also gives access to certain shortcut settings for screen recording and capturing. The only drawback offered by ShareX is that it does not support audio recording with the screen.

How to use ShareX:
Step 1: Open the program on your desktop, click on “Capture” and select the appropriate option for screen capture.
Step 2: You can click on any screen capture and edit it using the tools inbuilt in the software.
Step 3: You can then upload the created file to whichever location you prefer on your computer.
4. ScreenToGif
ScreenToGif is a webcam, sketchboard, and screen recorder that comes integrated with an editor. It is open-source software that is completely free to use. The size of this screen recorder portable for Windows software is just 3.3 MiB making it extremely compact. This software comes with all the powerful features to record, edit, and export the recorded screen with ease.
It is completely customizable which means that you can use it as you want as per your unique needs and requirements. You can export multiple file types using ShareX including Apng, Gif, Project, images, and PSD. The finished file can be either shared on your computer, or you can export it to Gfycat and Imgur.
Steps to use ScreenToGif:
Step 1: Once the program opens, click on the red “Recorder” button to start screen recording. Select the area you wish to record and click on “Record”.
Step 2: Click the “Stop” button to stop recording and make the necessary edits.
Step 3: Click on “Save As” and pick the location on your computer where you want to save the recording.
5. TinyTake
TinyTake offers the fastest way to record or capture screens, videos, and share them. This software can be used for free and is compatible with both Windows and Mac systems. With the help of this software, not only can you record or capture the desktop screen, but you can also add comments to the file and share it wherever you want.
Up to 120 minutes of video can be recorded with ease using TinyTake. The screenshot you take using TinyTake can be edited with annotations of your choice. The screen capture can easily be shared online, or you can even use the shareable link to upload it on whichever social platform online you want.
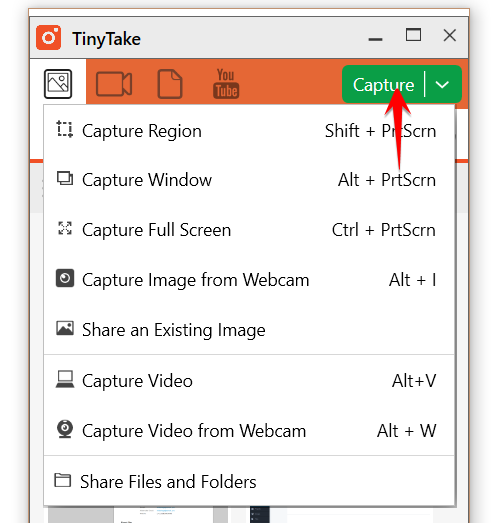
Steps to use TinyTake:
Step 1: From your system tray, click on the TinyTake icon and select “Capture Video from Screen”.
Step 2: You can even launch TinyTake and click on “Capture” to record the screen.
6. AviScreen
AviScreen is a popular free screen recorder portable that is essentially used to capture all your activities on screen in the form of bitmap images or AVI videos. This software allows the user to define the area on the desktop that they wish to capture. It also has the unique feature of “follow the cursor” using which you can produce images or videos of small dimensions while mouse activity is covered over the entire desktop area.
AviScreen is a pretty lightweight software that has a very user-friendly interface with simplistic controls. It does not take up much of the system resources while functioning and manages to produce high-quality output files.
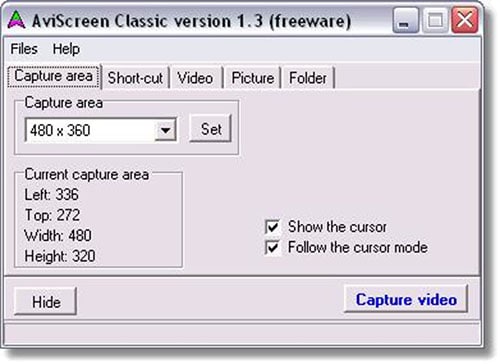
How to use AviScreen:
Step 1: Launch the AviScreen software and from the main screen click on “Capture area” and define the area on the desktop that you wish to record.
Step 2: Once you have selected the desktop area to be recorded, click on “Capture video”.
7. GifCam
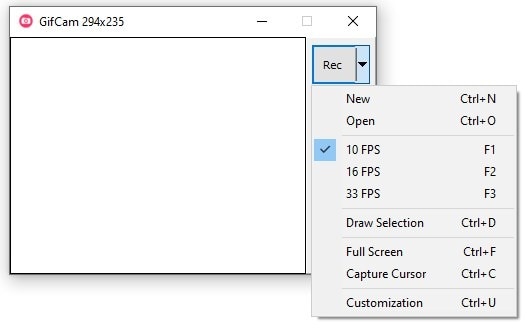
GifCam uses a unique idea of screen capture, where the program window can be moved throughout the screen and resized to capture the area you wish to record. When you are recording using GifCam, if the previous frame is similar to the new recording, this program automatically adds delays.
GifCam also does not draw the entire frame. Instead, it draws transparent pixels in the form of a green screen after comparing the alternate frames which save a lot of kilobytes. This software also comes with simple yet powerful video and image editing tools.
How to use GifCam:
Step 1: Open GifCam and resize the window according to the screen area that you wish to capture.
Step 2: Click on “Rec” button to start recording the screen and once done you can save it at the desired location you want.
8. Krut
Krut is a free portable screen recorder for Windows 10 that is written in Java and is designed specifically for recording desktop screens to make video tutorials, demos, and so much more. The videos made through Krut can be easily shared on any platform online. Krut can also be used to record movies on your desktop screen along with the sound.
You can even record only a selected area on the desktop screen as well with Krut. The recorded files by Krut would be in the .mov format. This software has a very user-friendly interface with intuitive features. Along with the movie, this program also records separate video and audio files, making encoding easy using an extended encoding program.

How to use Krut:
Step 1: Open the program and select “Settings/Save Files” from the “Menu”.
Step 2: Change the width and height to your desktop screen resolution and click on “Rec” to begin recording and then on “Stop” to stop the recording.
9. Screen2Avi
Screen2Avi is a free desktop screen recorder that can even be used to capture screenshots of your desktop screen. It comes in two different forms, portable and installable that can be selected based on personal preference. It produces screencasts and screen recordings of very good quality with minimum effort.
This software is compatible with Windows Vista/XP/Win7 and is Foto2Avi compatible as well. It can be used to capture the cursor as well as the audio with the screen. The best part about this software is that it can take instant screenshots even while the video recording is in process.
How to use Screen2Avi:
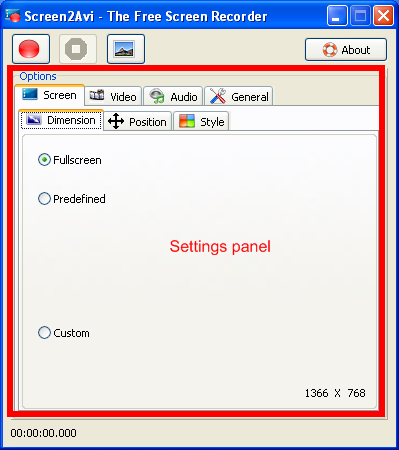
Step 1: Launch Screen2Avi and check the settings from all the tabs available under “Options”.
Step 2: If all the settings seem fine, you can click on the red button to start screen recording and press it again when you want to stop recording.
Conclusion
Screen recording software can be used for multiple purposes, and the good ones need not necessarily be expensive to use. Based on the operating system you use and your other requirements, you can easily find free screen recorder software like the ones mentioned above. If you are looking for advanced features and powerful functionalities, you can always go for the paid version of these best portable screen recorder software.


