Top Two Solutions to Backup Windows 10 to QNAP NAS
Mục lục bài viết
Overview of QNAP NAS
Network Attached Storage (NAS) is usually used by individuals and businesses to save backups. When we are faced with a number of NAS options, QNAP NAS is a well-known and well-respected one!
QNAP NAS provides excellent data transfer speed which ensures that your backups go smoothly, allowing you to easily move all your system and file backups to external storage devices when required. As some users have been concerned about the stability of Windows 10, we would recommend backing up your system drive to QNAP NAS just in case something unexpected happens.
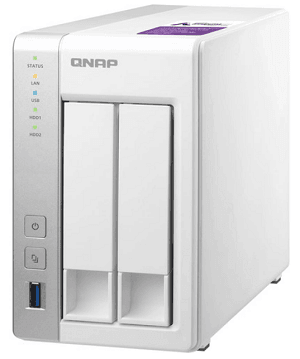
Backup PC to QNAP with the Windows 10 inbuilt backup tool
You can backup Windows 10 to QNAP with the Windows 10 inbuilt backup tool – Create a system image (also compatible with Windows 7):
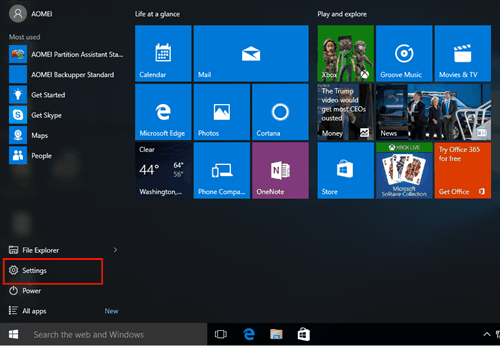
1. Open the Start Menu and click on Settings.
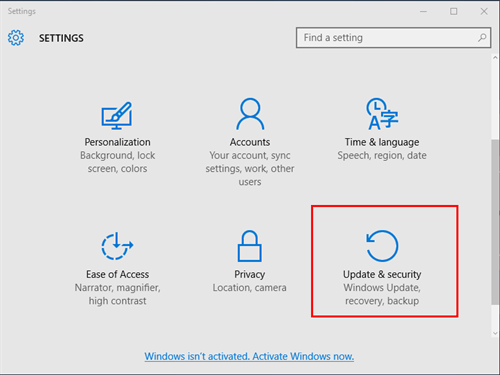
2. Click on Update & security.
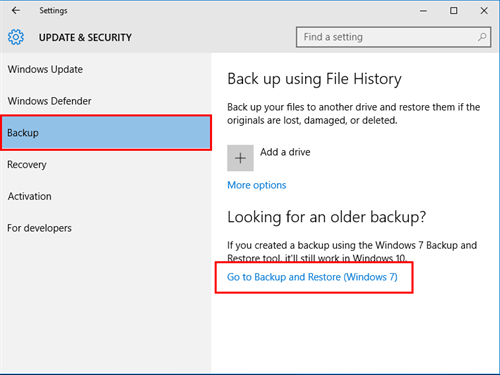
3. Click Backup > Go to Backup and Restore (Windows 7).
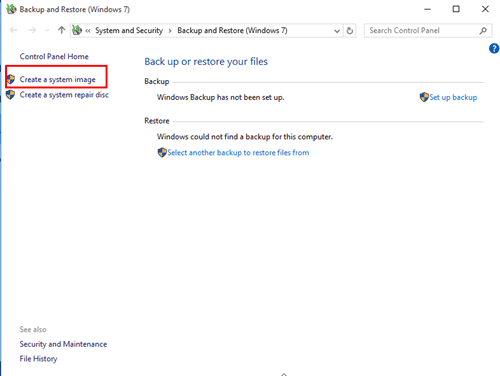
4. Select Create a system image.
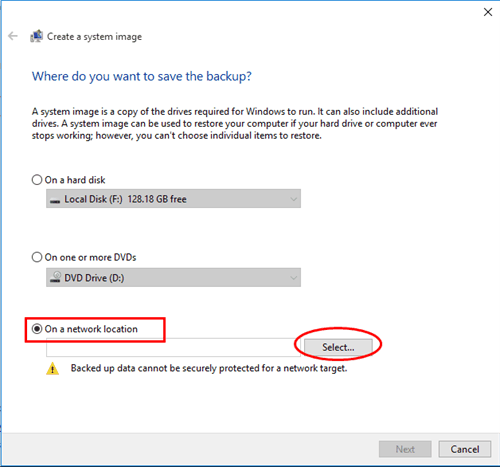
5. Click On a network location and then the Select button.
6. Enter “\\QNAP NAS IP address\shared folder name” in the Network Location field and enter username and password for network credentials. Click OK. Then click Next.

7. Select the drives to backup and click Next. Finally, click Start backup to execute it. Once the backup is completed, you can check the files in the File Station on the QNAP NAS.
QNAP Backup Windows 10 with AOMEI Backupper
AOMEI Backupper Standard is free QNAP backup software that helps you backup your data to your QNAP NAS easily.
- It doesn’t just help you backup your Windows 10 OS to a QNAP NAS. It can also be used to complete disk backups, partition backups, and file backups in Windows.
- It offers the Schedule Backup feature for you to create automatic backups. You can choose an exact time of every day, week or month to run the backup job.
- It supports all Windows editions including Windows 11, 10, 8, 8.1, 7, Vista, and XP (32 bit and 64 bit).
Download AOMEI Backupper now and follow the steps below to create Windows 10 backup to QNAP. The steps also apply to backing up Windows 10 to Synology NAS, FreeNAS, etc.
Download Freeware
Win 11/10/8.1/8/7/XP
Secure Download
1. Install and launch AOMEI Backupper Standard. Next, select System Backup under the Backup tab.

2. The system related partitions will be chosen by default. Then you should click the drop-down menu of the second bar and choose Add Share or NAS Devices.

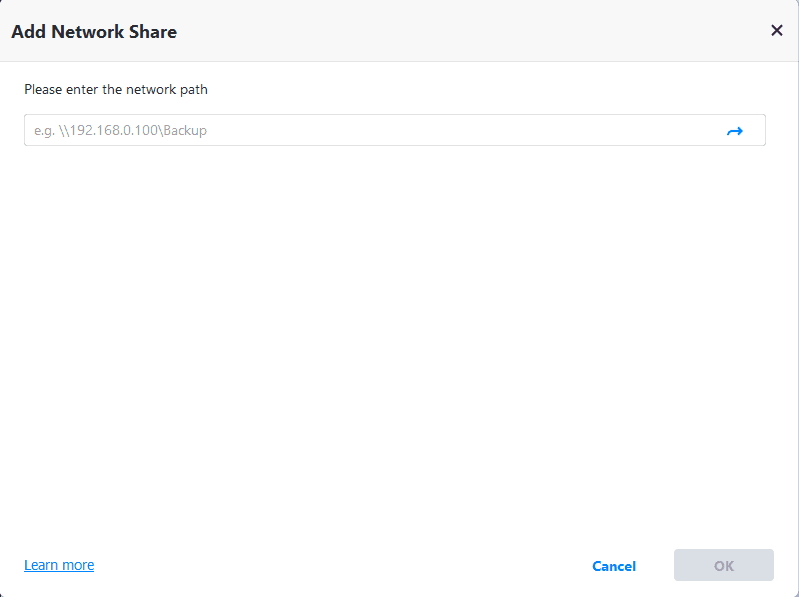
3. In the next window, type the network path or name of your QNAP NAS and click the blue button at the right. Input username and password if it is required.
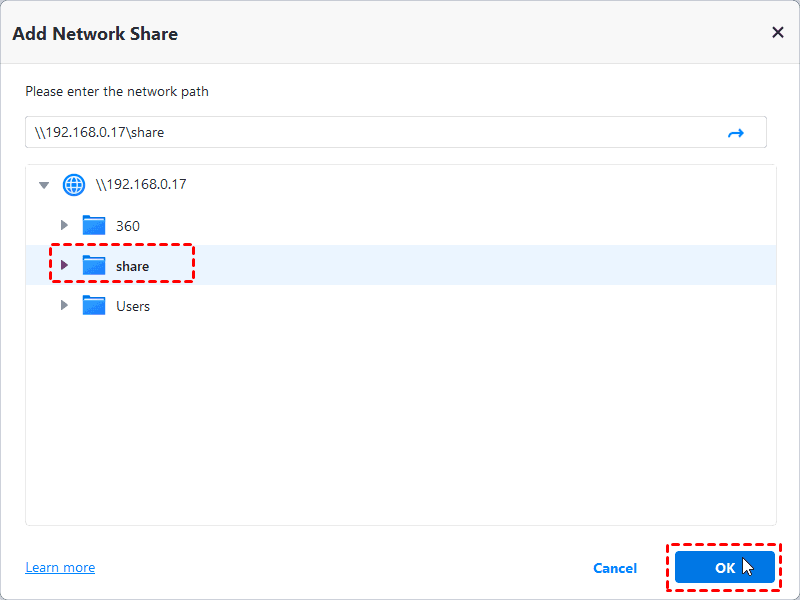
Then, choose one folder on the QNAP NAS as the destination path to store the backup image.
4. Finally, click Start Backup. If you have a lot of system files, then the backup may take a little while to complete.
Summary
As we’ve discovered, AOMEI Backupper is a convenient and versatile piece of software for backing up Windows 10 to a QNAP NAS, but it doesn’t just stop there. AOMEI Backupper can be used to easily create a bootable rescue media in case of a system crash and clone hard drive without reinstalling Windows.
To make a backup of client computers in the network on one centralized console, AOMEI Centralized Backupper is available. Click the links above to discover more great features of AOMEI products.


