Digital Input -How to use the button with Arduino. – Robo India || Tutorials || Learn Arduino || Robotics
Pushbutton is used to provide manual input to the microcontroller, we can program the microcontroller to perform a task when switch/button is pressed.
Mục lục bài viết
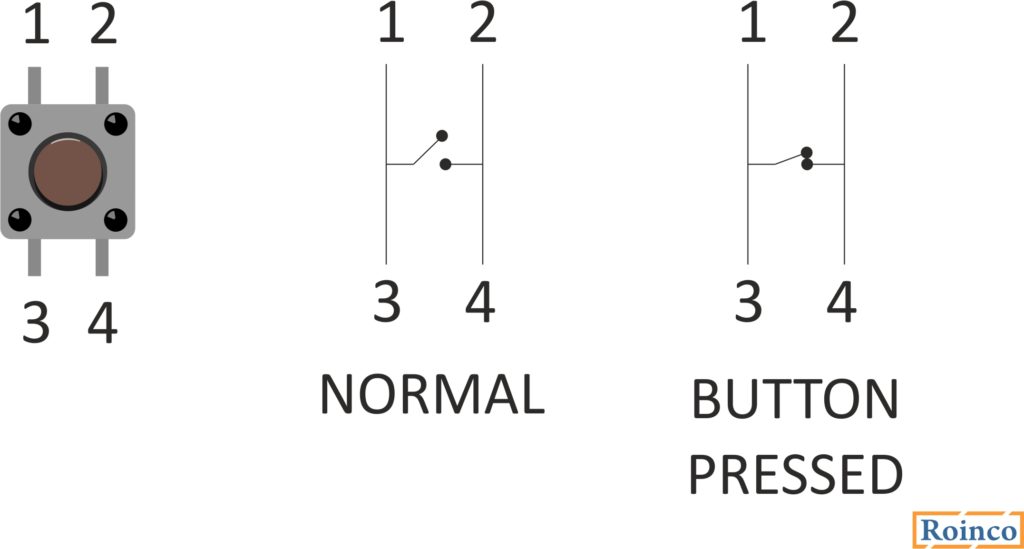
How button works:

Pin numbers 1-3 and 2-4 are internally connected when we press button 1-3 gets connected to 2-4 as explained in the image above.
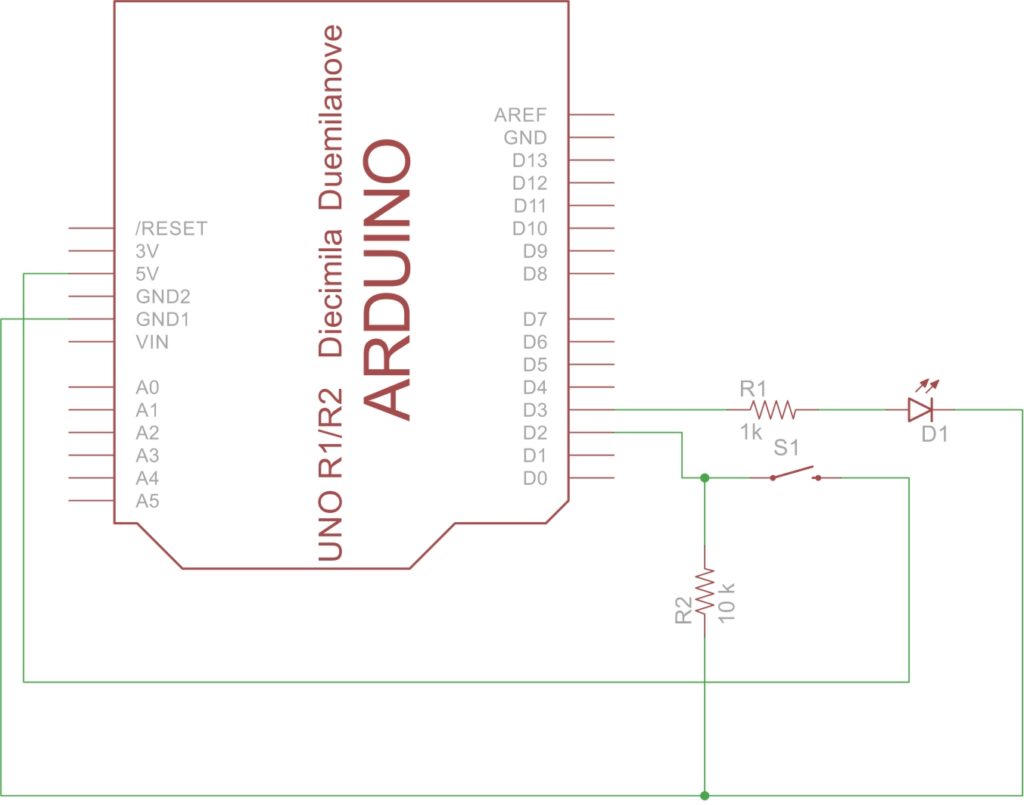
Arduino Schematics:

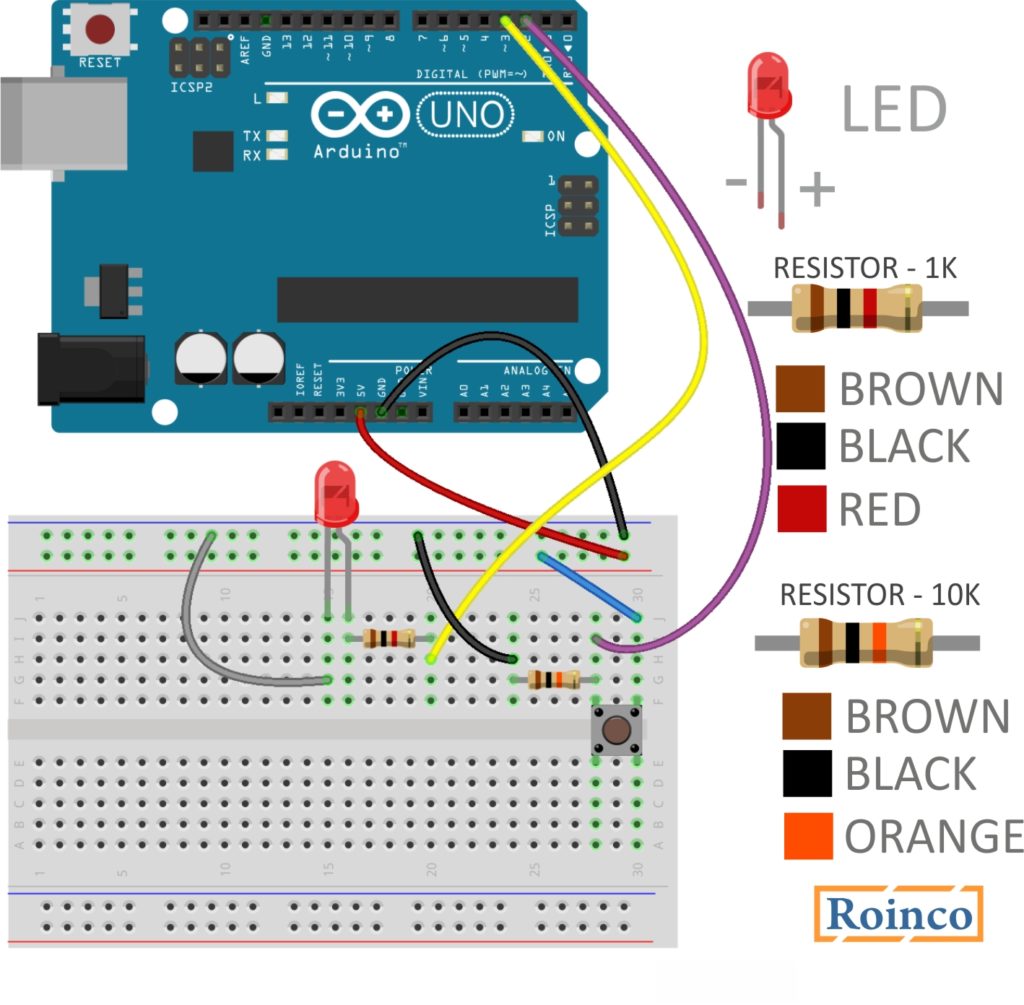
Arduino breadboard connections:

In the above circuit, we have connected the 1 side of the switch to 5v and another side to PIN number 2.
Also, we connected the pin number 2 to GND using 10k pulldown resistance.
Pulldown resistance keeps the value od the PIN to 0v when the switch is not pressed and when the switch is pressed due to high resistance value it ignores the GND/0v and connects the PIN to 5V.
Arduino code:
const int BUTTON = 2;     // Pushbutton Input to Pin No.2
const int LED =  3;       // Output LED to Pin No. 3


int BUTTONState = 0;      // To store input status

void setup() {
  pinMode(LED, OUTPUT);    // Define LED pin as output.
  pinMode(BUTTON, INPUT);  // Define BUTTON pin as Input.
}


void loop(){
  BUTTONState = digitalRead(BUTTON); // Reading input from Button Pin.

  if (BUTTONState == HIGH) // Checking if Input from button is HIGH (1/+5V)
   {
     digitalWrite(LED, HIGH);  // If input is High make LED ON (HIGH/1/+5V)
   }
  else
  {
     digitalWrite(LED, LOW);  // For every other condition make LED OFF (0/GND/LOW)
  }
}
How code works:
Define variable BUTTON and give value 2 as we are connecting button on PIN number 2.
const int BUTTON = 2; // Pushbutton Input to Pin No.2
Define PIN number 2 as Input.
pinMode(BUTTON, INPUT); // Define BUTTON pin as Input.
Read the button state(pressed/unpressed) using the command digitalRead(PIN Number). and save the same in the variable BUTTONState.
BUTTONState = digitalRead(BUTTON); // Reading input from Button Pin.
If the button is pressed digitalRead(BUTTON) will return 1 and if the button is not pressed it will return 0.
Button Pressed – 1
Button not-pressed – 0
In the above program when someone presses the button LED will glow and when the button is released LED will be off.
Practice problem:
- Connect 2 different color LEDs to Arduino red and green, red will glow when the button is pressed and green will glow if the button is not pressed in normal condition.


