Drag & Drop File Upload using HTML CSS and JavaScript Code
Telegram Group
Join Now
Mục lục bài viết
Drag & Drop File Upload using HTML CSS and JavaScript
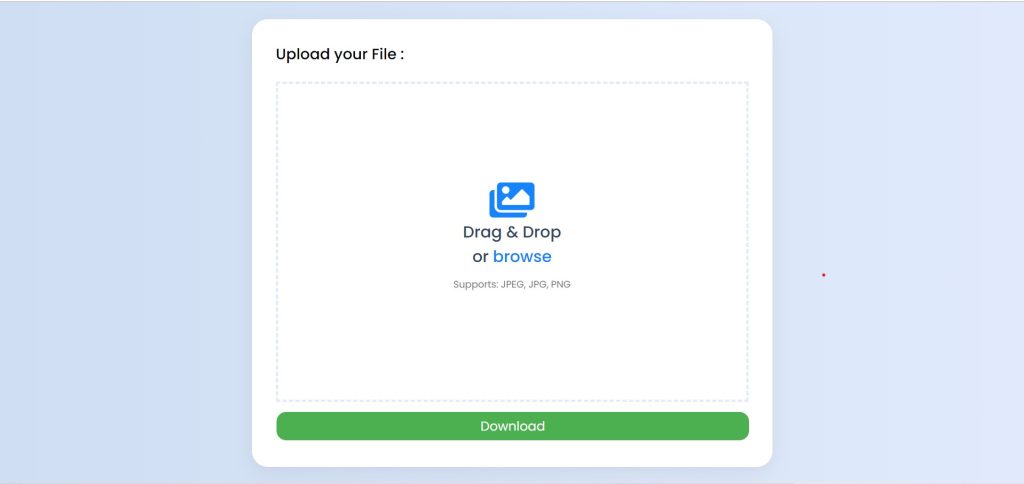
Hello Coders, In this tutorial, We are going to learn how to create Drag and Drop or browse to upload files with the download features using Html, Css, and JavaScript.Drag and drop is a beginner project used to clear the concepts of forms, CSS, and javascript concepts in order to make the drag and drop file using javascript.

You all need to understand what drag-and-drop file upload is and how to make it before we begin our project.Drag-and-drop file upload implies that you can submit the file by dragging and dropping it. to a web page. Most websites have this sort of file upload feature.
What is drag & drop file upload?
ADVERTISEMENT
Drag and drop file upload refers to the ability to drag and drop a file into place. Web applications may drag and drop files onto a web page using drag and drop interfaces. Most websites likely have this kind of file upload feature. There are several JavaScript frameworks that allow you to construct this kind of drag-and-drop file upload feature with just a few lines of JavaScript code, but in this blog post I’ll show you how to do it using only pure JavaScript.
50+ HTML, CSS & JavaScript Projects With Source Code
Steps to build a project
This article is purely for beginners. We will teach you how professionals build a project. The first thing they keep in mind is management. Managing a project is the first step that all coders follow; managing a project is necessary. To manage a project, we need to create different files for HTML, CSS, and Javascript.
Prerequisites:
index.html – For adding structure to the project
styles.css: For adding styling to the project
script.js – For adding drag and drop or browse features
I hope now you have a general idea of what the project entails. In our article, we will go over this project step by step.
Step1: Adding some basic HTML Code
HTML stands for HyperText Markup Language. This is a markup language. Its main job is to give our project structure. We will provide our project structure by utilising this markup language. So let’s look at our HTML code.
<html lang="en">

<head>
    <meta charset="UTF-8" />
    <meta http-equiv="X-UA-Compatible" content="IE=edge" />
    <meta name="viewport" content="width=device-width, initial-scale=1.0" />
    <title>Drag, Drop & Browse</title>
    <link rel="stylesheet" href="https://cdnjs.cloudflare.com/ajax/libs/font-awesome/5.15.3/css/all.min.css"
        integrity="sha512-iBBXm8fW90+nuLcSKlbmrPcLa0OT92xO1BIsZ+ywDWZCvqsWgccV3gFoRBv0z+8dLJgyAHIhR35VZc2oM/gI1w=="
        crossorigin="anonymous" referrerpolicy="no-referrer" />
    <link rel="stylesheet" href="style.css" />
</head>

<body>
    <div class="container">
        <h3>Upload your File :</h3>
        <div class="drag-area">
            <div class="icon">
                <i class="fas fa-images"></i>
            </div>

            <span class="header">Drag & Drop</span>
            <span class="header">or <span class="button">browse</span></span>
            <input type="file" hidden />
            <span class="support">Supports: JPEG, JPG, PNG</span>
        </div>
        <div>
            <button class="download">Download</button>
        </div>
    </div>
    <script src="index.js"></script>
</body>

</html>
Let’s start with HTML. Inside your index.html file, create the basic structure of the HTML document and add html, head, title, and body tags. Follow the below steps.
We must update certain links before we start our search box project. In order to complete this project, we had to connect the three distinct files we utilised for our HTML, CSS, and JavaScript. In order to achieve this, kindly place links to our CSS inside the header.
Build a Quiz App With HTML ,CSS and JavaScript
All of the links for the various icons that we utilised in our project must be embedded. You must include the Javascript file inside the HTML’s body if you want to link it to our HTML file.
//Head section
<link rel="stylesheet" href="style.css">
<script src="https://kit.fontawesome.com/1cf483120b.js" crossorigin="anonymous"></script>
<script defer src="https://maps.googleapis.com/maps/api/js?key=AIzaSyAi0RCj8aLdKFX-cvYkW6kDveuaUlMnpes&libraries=places&callback=initMap"></script>
//Body Section
<script src="index.js"></script>
Now let’s Add the structure for our Drag & drop or Browse project.
We’ll use the basic html elements to add the structure of our drag & drop project
- To make a container for our drag-and-drop structure, we’ll use the div tag.
- Using h3 tag we will create a small heading for our project.
- Now using a div tag we will create an area for drag and drop the file.
- we will use a image icon using the font-awesome classes and using the span tag we will add a small caption for user to drag the file and drop in here .
- We will now make a button that allows the user to select the file from their system by using a span element with the class “button.”
- We will also include a little not-using-the-span tag that will inform the user of the kind of files they can submit.
- We’ll make a download button for the image using the button.
Restaurant Website Using HTML and CSS
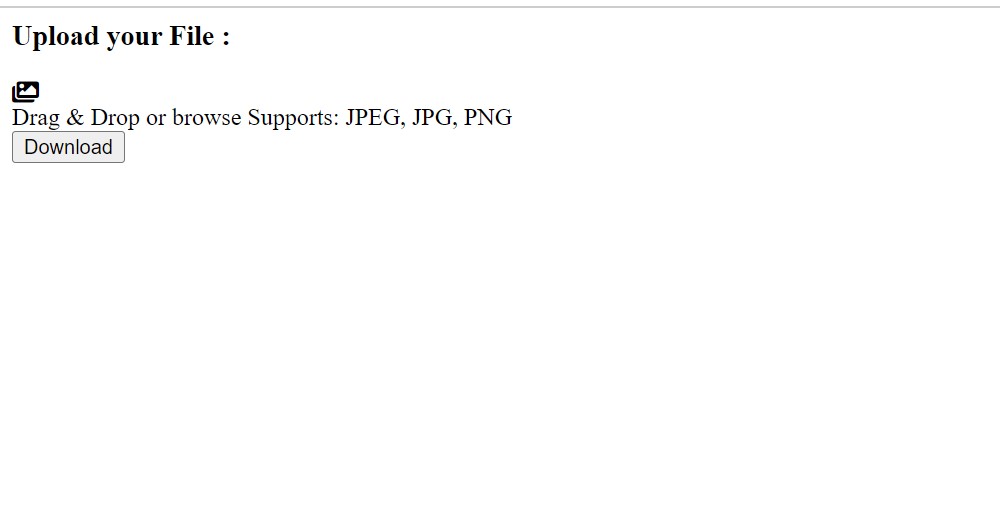
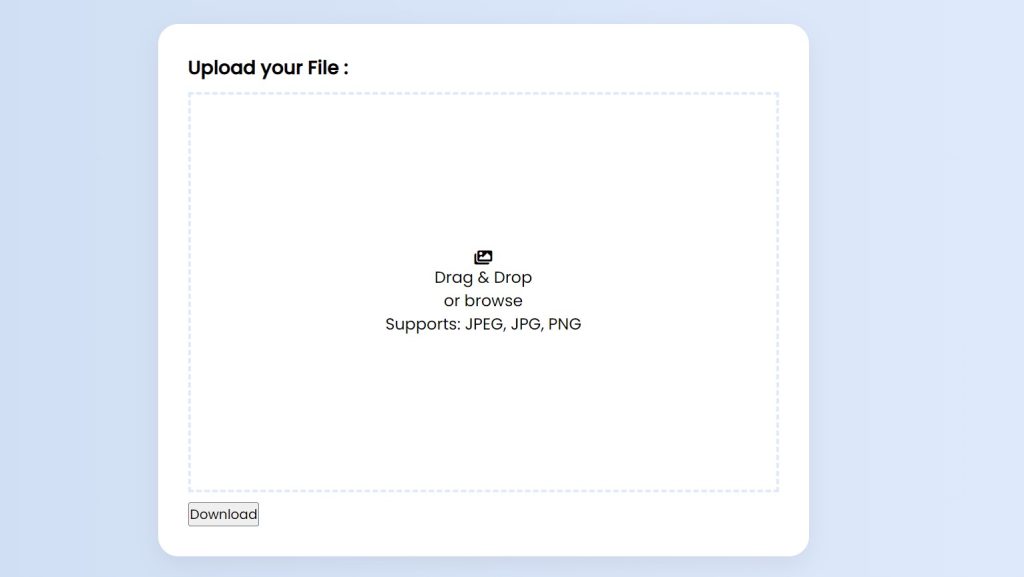
We don’t require anything else to build the structure for our drag & drop or browse. Now that we are using CSS, we will style our copy to clipboard button. But let’s look at our structure first.

Step2: Adding CSS Code
Cascading Style Sheets (CSS) is a markup language for describing the presentation of a document written in HTML or XML. CSS, like HTML and JavaScript, is a key component of the World Wide Web.
Now we will look at our CSS code.
@import url('https://fonts.googleapis.com/css2?family=Poppins:wght@200;300;400;500&display=swap');

* {
  margin: 0;
  padding: 0;
  box-sizing: border-box;
  font-family: 'Poppins', sans-serif;
}

body {
  display: flex;
  align-items: center;
  justify-content: center;
  flex-direction: column;
  min-height: 100vh;
  background: #e0eafc; /* fallback for old browsers */
  background: -webkit-linear-gradient(to right, #cfdef3, #e0eafc); /* Chrome 10-25, Safari 5.1-6 */
  background: linear-gradient(
    to right,
    #cfdef3,
    #e0eafc
  ); /* W3C, IE 10+/ Edge, Firefox 16+, Chrome 26+, Opera 12+, Safari 7+ */
}

.container {
  max-width: 650px;
  width: 100%;
  padding: 30px;
  background: #fff;
  border-radius: 20px;
  box-shadow: rgba(149, 157, 165, 0.2) 0px 8px 24px;
}

.drag-area {
  height: 400px;
  border: 3px dashed #e0eafc;
  display: flex;
  align-items: center;
  justify-content: center;
  flex-direction: column;
  margin: 10px auto;
}

h3 {
  margin-bottom: 20px;
  font-weight: 500;
}

.drag-area .icon {
  font-size: 50px;
  color: #1683ff;
}

.drag-area .header {
  font-size: 20px;
  font-weight: 500;
  color: #34495e;
}

.drag-area .support {
  font-size: 12px;
  color: gray;
  margin: 10px 0 15px 0;
}

.drag-area .button {
  font-size: 20px;
  font-weight: 500;
  color: #1683ff;
  cursor: pointer;
}

.drag-area.active {
  border: 2px solid #1683ff;
}

.drag-area img {
  width: 100%;
  height: 100%;
  object-fit: cover;
}
.download {
  background-color:#4CAF50;
  border: none;
  color: white;
  padding: 6px 32px;
  text-align: center;
  text-decoration: none;
  display: inline-block;
  font-size: 16px;
  margin: 3px 1px;
  border-radius: 12px;
  cursor: pointer;
  width: 100%;
}
After we’ve added the CSS code, we’ll go over it step by step. To save time, you can simply copy this code and paste it into your IDE. Let us now examine our code step by step.
We will be adding some basic styling to our copy to clipboard, but you guys can try new styling and share your code in the comments, which will help other people to think out of the box and will help them in adding their own styling.
5+ HTML CSS Projects With Source Code
Step1: We will be using a custom Google font, i.e., Poppins, with weights of 200, 300, 400, and 500 . Now to add this google font inside our project we need to import this using the google import link.
ADVERTISEMENT
Now using the universal selector we will set the padding and margin as zero for whole page and using the box-sizing property we will add border-box and we will set the font-family as “Poppins” using font-family property.
ADVERTISEMENT
@import url('https://fonts.googleapis.com/css2?family=Poppins:wght@200;300;400;500&display=swap');

* {
  margin: 0;
  padding: 0;
  box-sizing: border-box;
  font-family: 'Poppins', sans-serif;
}
Step2:Using the body selector, we will set the display to “flex,” and using the align-item property, we will align the items to the center, and using the flex-direction property, we will set the direction to column wise. We will add a light gradient background to the body of our webpage.
ADVERTISEMENT
body {
  display: flex;
  align-items: center;
  justify-content: center;
  flex-direction: column;
  min-height: 100vh;
  background: #e0eafc; /* fallback for old browsers */
  background: -webkit-linear-gradient(to right, #cfdef3, #e0eafc); /* Chrome 10-25, Safari 5.1-6 */
  background: linear-gradient(
    to right,
    #cfdef3,
    #e0eafc
  ); /* W3C, IE 10+/ Edge, Firefox 16+, Chrome 26+, Opera 12+, Safari 7+ */
}
Step3: Now we will add styling to our container and all the other element of our structure.Using the class selector (.container) we will set the maximum width of 650 px of our container and actual width is set to 100% . We have also added a padding of 30px and a white background . Using the box shadow property we also added a box shadow to our container.\
ADVERTISEMENT
Create A Travel/Tourism Website Using HTML and CSS
ADVERTISEMENT
Now lets add styling to our file drag area the height is set to 400px and using the border property we have added a dashed border with 3px width in light blue color and using the align item property we will align the items to the center . Using the margin we have a added margin of 10px outside our drag area.
.container {
  max-width: 650px;
  width: 100%;
  padding: 30px;
  background: #fff;
  border-radius: 20px;
  box-shadow: rgba(149, 157, 165, 0.2) 0px 8px 24px;
}

.drag-area {
  height: 400px;
  border: 3px dashed #e0eafc;
  display: flex;
  align-items: center;
  justify-content: center;
  flex-direction: column;
  margin: 10px auto;
}

Step4: Now, with the font-size set to 500, we will add a bottom margin of 20 pixels using the tag selector (h3) (making it bolder).
Now, our icon’s colour and text size are both adjusted to dark blue utilising the class (.icon). The styling we applied to our buttons and support section is similar; if you read the code just once, you will be able to grasp it.
h3 {
  margin-bottom: 20px;
  font-weight: 500;
}

.drag-area .icon {
  font-size: 50px;
  color: #1683ff;
}

.drag-area .header {
  font-size: 20px;
  font-weight: 500;
  color: #34495e;
}

.drag-area .support {
  font-size: 12px;
  color: gray;
  margin: 10px 0 15px 0;
}

.drag-area .button {
  font-size: 20px;
  font-weight: 500;
  color: #1683ff;
  cursor: pointer;
}

.drag-area.active {
  border: 2px solid #1683ff;
}

.drag-area img {
  width: 100%;
  height: 100%;
  object-fit: cover;
}
.download {
  background-color:#4CAF50;
  border: none;
  color: white;
  padding: 6px 32px;
  text-align: center;
  text-decoration: none;
  display: inline-block;
  font-size: 16px;
  margin: 3px 1px;
  border-radius: 12px;
  cursor: pointer;
  width: 100%;
}

Step3: JavaScript Code
The most significant component of this project is JavaScript. We can modify it to function the way we want it to using Javascript. The steps are listed below.
100+ JavaScript Projects With Source Code ( Beginners to Advanced)
const dropArea = document.querySelector(".drag-area");
const dragText = document.querySelector(".header");

let button = dropArea.querySelector(".button");
let input = dropArea.querySelector("input");

let file;

button.onclick = () => {
  input.click();
};

// when browse
input.addEventListener("change", function () {
  file = this.files[0];
  dropArea.classList.add("active");
  displayFile();
});

// when file is inside drag area
dropArea.addEventListener("dragover", (event) => {
  event.preventDefault();
  dropArea.classList.add("active");
  dragText.textContent = "Release to Upload";
  // console.log('File is inside the drag area');
});

// when file leave the drag area
dropArea.addEventListener("dragleave", () => {
  dropArea.classList.remove("active");
  // console.log('File left the drag area');
  dragText.textContent = "Drag & Drop";
});

// when file is dropped
dropArea.addEventListener("drop", (event) => {
  event.preventDefault();
  // console.log('File is dropped in drag area');

  file = event.dataTransfer.files[0]; // grab single file even of user selects multiple files
  // console.log(file);
  displayFile();
});

function displayFile() {
  let fileType = file.type;
  // console.log(fileType);

  let validExtensions = ["image/jpeg", "image/jpg", "image/png"];

  if (validExtensions.includes(fileType)) {
    // console.log('This is an image file');
    let fileReader = new FileReader();

    fileReader.onload = () => {
      let fileURL = fileReader.result;
      // console.log(fileURL);
      let imgTag = `<img src="${fileURL}" alt="">`;
      dropArea.innerHTML = imgTag;
    };
    fileReader.readAsDataURL(file);
  } else {
    alert("This is not an Image File");
    dropArea.classList.remove("active");
  }
}
Using the document.queryselector method, we will first begin by choosing all of the DOM components needed for that. Additionally, a variable will be created to store the values of each of those HTML elements.
Portfolio Website using HTML and CSS (Source Code)
Now to select button and input tag we will use the dropArea with query selector to select out our browse button.
const dropArea = document.querySelector(".drag-area");
const dragText = document.querySelector(".header");

let button = dropArea.querySelector(".button");
let input = dropArea.querySelector("input");

let file;
The drag and drop function will now be implemented first. To store and display the file, create a separate function. All the acceptable file formats that we wish to accept for the upload will be defined inside the function.
Three event listeners will be defined, one of which will monitor when the file enters the drag zone. One is used to track when the drag area is entered and one is used to track when the user drops a file inside the drag area.
// when file is inside drag area
dropArea.addEventListener("dragover", (event) => {
  event.preventDefault();
  dropArea.classList.add("active");
  dragText.textContent = "Release to Upload";
  // console.log('File is inside the drag area');
});

// when file leave the drag area
dropArea.addEventListener("dragleave", () => {
  dropArea.classList.remove("active");
  // console.log('File left the drag area');
  dragText.textContent = "Drag & Drop";
});

// when file is dropped
dropArea.addEventListener("drop", (event) => {
  event.preventDefault();
  // console.log('File is dropped in drag area');

  file = event.dataTransfer.files[0]; // grab single file even of user selects multiple files
  // console.log(file);
  displayFile();
});

function displayFile() {
  let fileType = file.type;
  // console.log(fileType);

  let validExtensions = ["image/jpeg", "image/jpg", "image/png"];

  if (validExtensions.includes(fileType)) {
    // console.log('This is an image file');
    let fileReader = new FileReader();

    fileReader.onload = () => {
      let fileURL = fileReader.result;
      // console.log(fileURL);
      let imgTag = `<img src="${fileURL}" alt="">`;
      dropArea.innerHTML = imgTag;
    };
    fileReader.readAsDataURL(file);
  } else {
    alert("This is not an Image File");
    dropArea.classList.remove("active");
  }
Let’s put the browse feature into action. We will imitate clicking on the file input when the browse button is pressed, opening file explorer. Once the user selects a file, we will wait for the change event and then execute the display function.
Weather App Using Html,Css And JavaScript
let file;

button.onclick = () => {
  input.click();
};

// when browse
input.addEventListener("change", function () {
  file = this.files[0];
  dropArea.classList.add("active");
  displayFile();
});
Now we’ve completed our drag& drop file project using JavaScript. I hope you understood the whole project. Let’s take a look at our Live Preview.
Output:
Codepen Preview Of drag & drop file HTML, CSS & JavaScript
See the Pen
Untitled by BWstreet (@BWstreet)
on CodePen.
See the Pen
Untitled by BWstreet (@BWstreet)
on CodePen.
Now We have Successfully created our drag& drop HTML, CSS & JavaScript You can use this project directly by copying into your IDE. WE hope you understood the project , If you any doubt feel free to comment!!
We have also created an article where you can find 10+ front-end project . if you intreseted you can checkout the below link.
If you find out this Blog helpful, then make sure to search codewithrandom on google for Front End Projects with Source codes and make sure to Follow the Code with Random Instagram page.
What is Drag & Drop File upload?
Drag and drop file upload refers to the ability to drag and drop a file into place. Web applications may drag and drop files onto a web page using drag and drop interfaces. Most websites likely have this kind of file upload feature
How to create a upload file section?
The upload files section is created using the form tag in which will take the input type as”file”.
Telegram Group
Join Now


