How to Rotate a Video on Windows 7/10/11
Mục lục bài viết
How to Rotate a Video in Windows 7, Windows 10 and Windows 11
March 14, 2023

Written By
Karen Greene
Summary :
How to easily rotate a video on Windows 7, Windows 10, or Windows 11 for free? No worries! In this post, you will find a free video editor to rotate videos in 4 steps and some video editing tips.
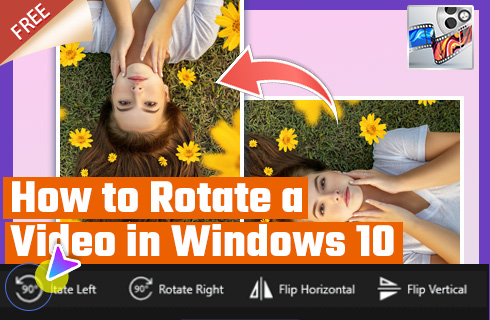
How to Rotate a Video on Windows 10
If you’ve looked up how to rotate a video in Windows 10, you’ve probably realized there are many ways to do so because there are a lot of video editing apps available. But today, I want to show you the 2 easiest methods you’ll find to rotate a video.
Using Photos to Rotate Video on Windows 10
Photos application is a piece of software that comes pre-installed on Windows 10 and Windows 11 operating systems. It works on video and picture editing, image viewing, video playing, etc as the best Windows Movie Maker alternative. It is totally free to use but it only supports a few video editing tricks which are not capable to make a great movie. No hesitation, let’s dive into the rotate video part.
Step 1. Upload the video to Photos
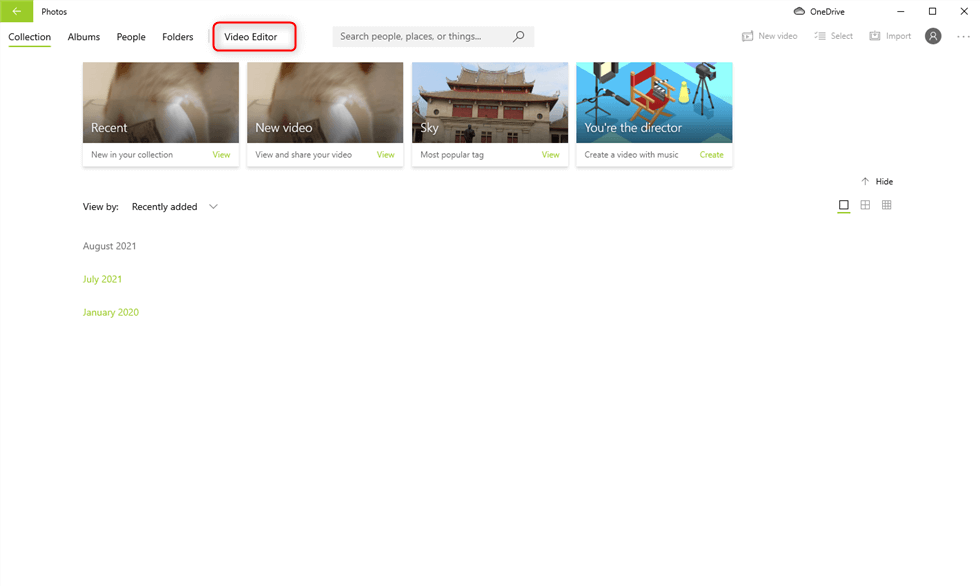
You need to run Photos on your computer before uploading the video to the app. You can search Photos at the search bar which will show you the program immediately. And then click on the Video Editor which is located on the right of the toolbar.
Step 2. Create a Video Project
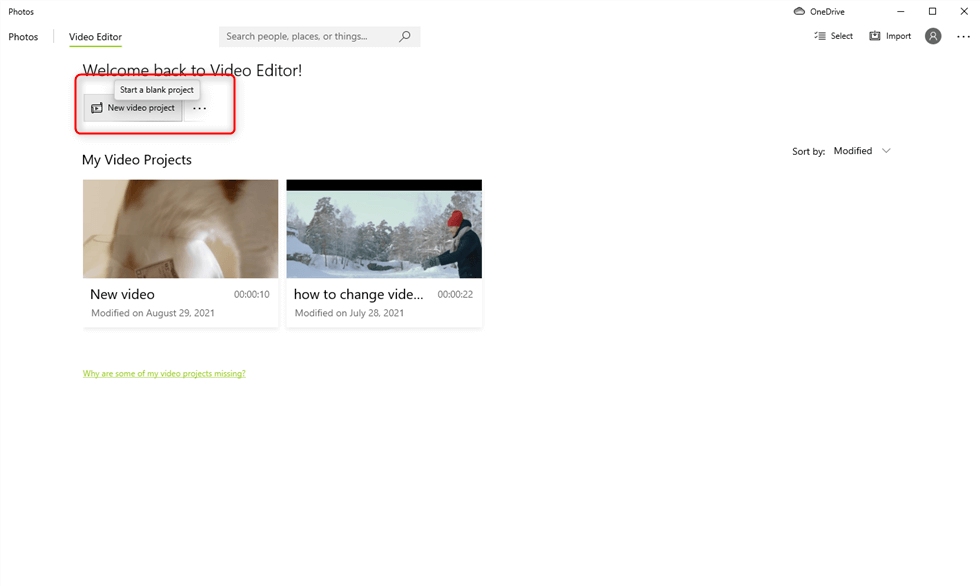
Later you should hit on the New video project and the video will be added to Photos immediately.
Step 3. Rotate the Video
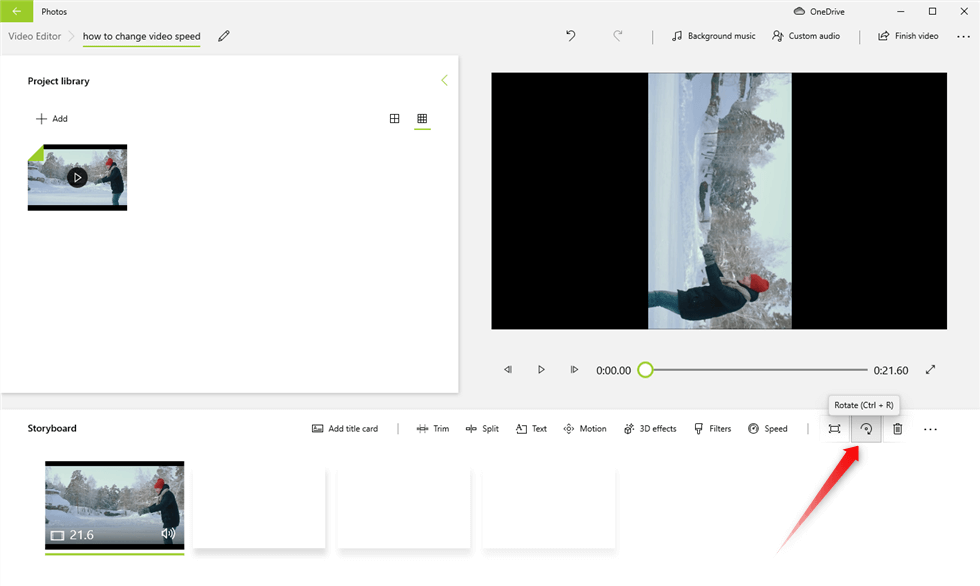
Now you can see there are lots of features that you can apply to the video. Tap the Rotate button or press Ctrl+R to rotate the video. You can preview the video you are editing on the window above.
Step 4. Save the Video
The Finished video button which you can hit to save the video you are editing. A window will pop up and ask to set the settings of the video. Click on Export to save the video now.

How to Rotate/Flip a Video with FilmForth for Free
A proper video editor on Windows 10/11 will save you much time to flip a video. In this part, let’s meet FilmForth, a free video editor, dedicated to making video editing easy and powerful. As the one to rotate the video, FilmForth is quite easy to use even if you have no previous experience with video editing apps. What’s more, you can save the video without a watermark with FilmForth.
Before we go to the steps below, you can also watch the video tutorial which reveals the details to rotate video in windows 10/11.
Step 1. Run the Video Editor
Now, download FilmForth from the Microsoft Store and start the video flip journey. Windows 10 will automatically handle the installation, and it should be ready to use within 3 to 5 minutes.

Step 2. Upload the Video to Rotate
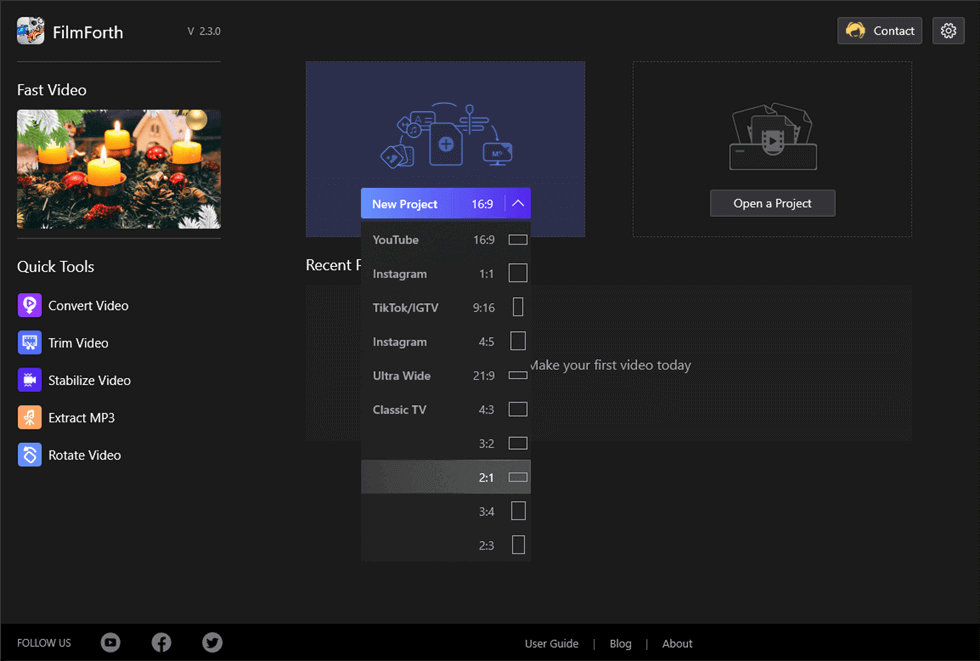
Once FilmForth is installed on your computer, you’ll need to open the video editor and create a project. To do so, open FilmForth and click on New Project or Open a Project as shown below.
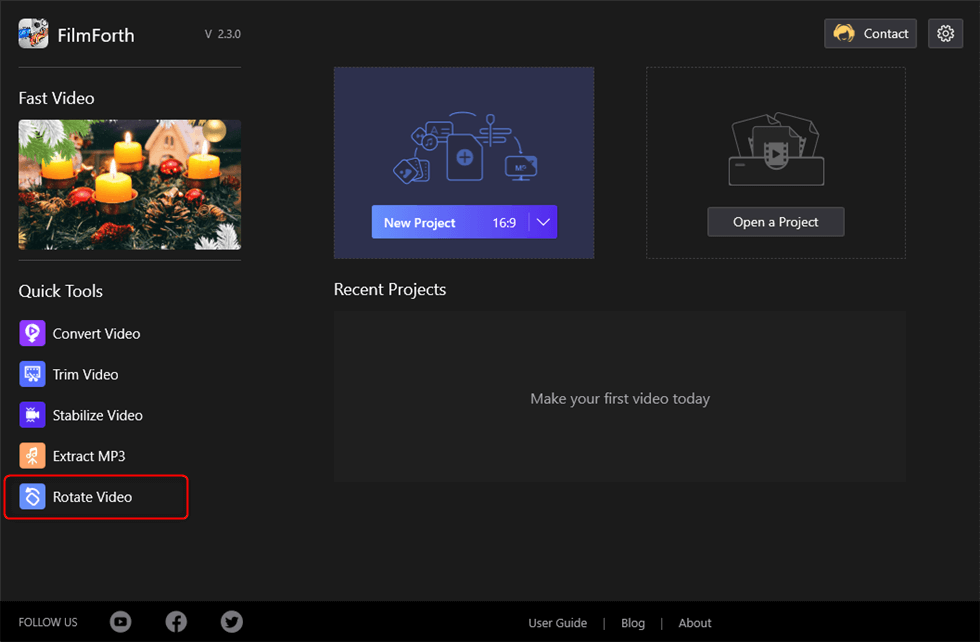
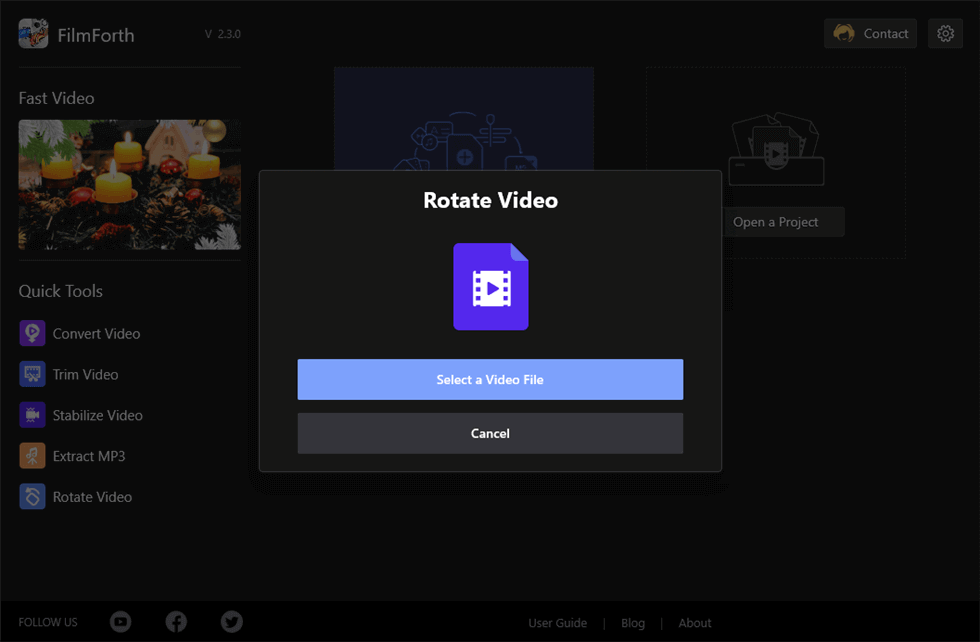
Now you will see there is a window popping up. It’s asking you to Select a Video File for FilmForth. Just tap the button and upload the video you are going to rotate.
Step 3. Rotate the Video
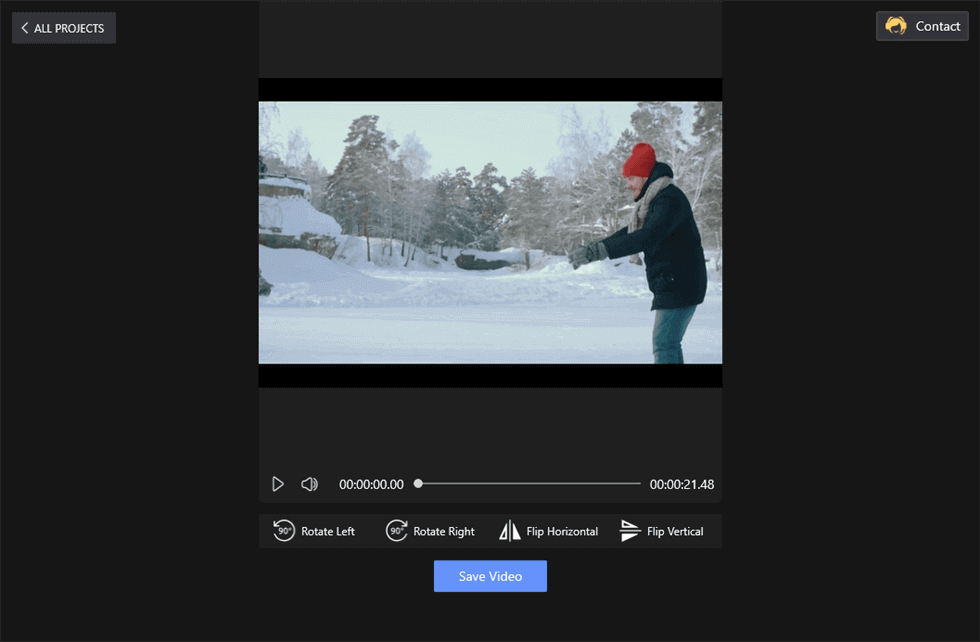
In this step, you can see there are 4 options to rotate the video on the screen.
- 90° Rotate Left means you can Rotate the video 90 degrees anticlockwise. Each click will rotate the video 90 degrees.
- 90° Rotate Right means you can rotate the video 90 degrees clockwise. Each click will rotate the video 90 degrees.
- Flip Horizontal means you can flip or mirror this video clip in the horizontal direction (left-right).
- Flip Vertical means you can flip or mirror this video clip in the vertical direction (up-down).
Each time you click 90° Rotate Left/Right, your video will rotate 90 degrees. So if you want to give it a 180° rotation, you’ll need to click two times. Now you can choose the certain needs you are searching for.
That’s it! That’s how simple it is to rotate a video using FilmForth.
Step 4. Save the Video
On the exporting window, you can choose the video resolution, video quality, and video frame rate. And if you don’t want a watermark, you should uncheck the Export with a watermark.
Once you completed all these settings, tap the Save button to get this rotated video exported to your computer.
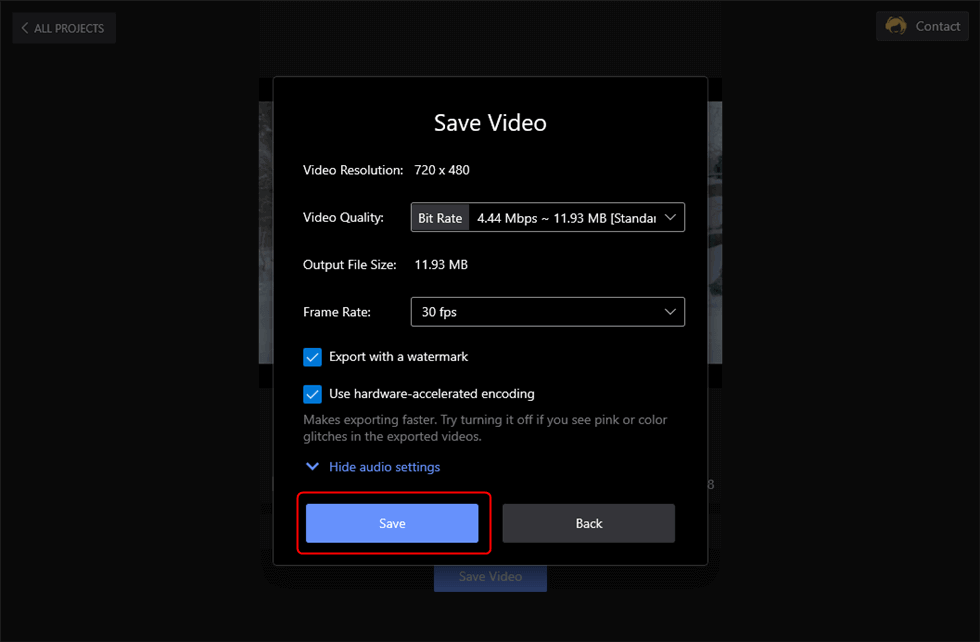
Depending on the duration of your video, you might need to wait a few minutes to get it exported. Once this process is complete, you’ll be able to share or upload it wherever you wish to.
How to Rotate a Video on Windows 7
For users who haven’t updated their Windows operating system to the latest Windows 10 and Windows 11, here is the solution to rotating videos on Windows 7 PC. To do so, what we need is the popular free and open-source video player app: VLC Media Player. In our earlier guides, we’ve introduced the free methods to rotate MP4 videos and add text to videos with VLC Media Player.
To get started, you need to first download and install VLC on your Windows 7 PC from VideoLan’s official website.
- Launch VLC from your Windows 7 PC, and go to Media > Open File to import.
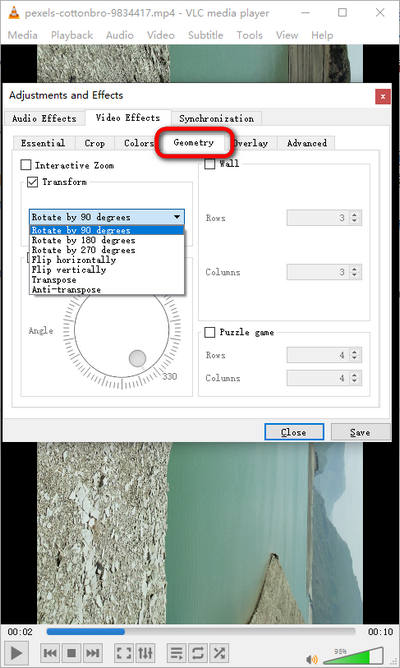
- Go to Tools > Effects and Filters, then the video effect window will pop up.
- Click on the Video Effects tab, then click on the Geometry tab.
- From the Geometry tab, tick on Transform, and you can rotate the video to a certain degree.
- When you’ve done rotating your video, go to Media Convert/Save to export your rotated.
More Video Editing Tips: To Make the Video Look Great
After rotating the video, take some time to experiment with the video editor to make sure it looks great. FilmForth is one of the best free video editors on Windows 10. You can easily rotate the video via FilmForth as you can easily make the video clip in your own way. Some nice and great features the tool can provide are listed below.
- Remove Background – This is probably a paid feature. But it’s totally free to use on FilmForth. No matter whether you want to change your video background or replace the green background. You can get it done via FilmForth.
- Picture in Picture – Picture in Picture is one of FilmForth highlights features. Users can add logos and make reaction movies with just a few clicks.
- Special Effects – As a powerful video editor, you can use it to add special effects to the video you are editing. It includes all popular transitions and filters. And they are all for free.
- Animation Text – If you are looking for a way to add text to the video or want to get video subtitles, you can get FilmForth. It provides lots of text fronts, alignments, and speech balloons. With FilmForth, making text move, sparkle, and change colors has become much easier for anyone on Windows 10.
- Audio Editing – Adding music, changing the background audio, or background audio removal can be done with FilmForth with great ease. Lots of built-in music and audio effects are free to use. Also, you can do the voiceovers with FilmForth.
So many great features of FilmForth you can find from its feature website and get the one you want the most.
Change the Video Aspect Ratios
If you want to upload your video, you’ll need to know precisely what aspect ratio means. Otherwise, you might end up uploading a vertical video to YouTube, or a horizontal video to your IG stories, which is far from ideal.
An aspect ratio is a proportional relationship between a video’s width and height. So if you have a video with a 1:1 aspect ratio, it means your video will be square because the width and height will have the same length.
It’s crucial you remember that the format for aspect ratio is width: height, meaning the width comes first, and the height second.
There are many aspect ratios, with the main ones being:
- 16:9 which is the basic widescreen ratio.
- 9:16 is the aspect ratio most phones use, and as you can guess by its name, it’s the exact flip of the basic widescreen ratio.
- 16:10 which is used mainly for computer screens.
- And 4:3 is a classic ratio that is rarely used. Old TVs mostly used it, but nowadays the majority of them have an aspect ratio of 16:9.
Now you don’t need to worry about what aspect ratios your video is. You can choose the aspect ratio you want while you are uploading the video to FilmForth.
What Aspect Ratio Should the Video Have?
Well, that depends on where you want to upload your video.
- For YouTube and Facebook, a 16:9 aspect ratio is ideal.
- For Instagram posts, you have a variety of options, but the ones I’d recommend are 1:1 (square), 4:5 (portrait), or 1.91:1 (landscape).
- For Instagram and Facebook stories, 9:16 is the best.
- For IGTV, you can use both 9:16 and 16:9.
Remember to take this into account when filming a video. If you want to upload it to Instagram, try to shoot it vertically so you can stick to a 9:16 aspect ratio, otherwise just film it horizontally.
Nowadays, many people recommend shooting your video vertically, as 3 out of 5 videos are viewed on a mobile device.
Personally, if I’m making a video that is meant to be shared with friends and family, then I’ll shoot it vertically, but if the video is meant to be uploaded to video platforms, I’ll shoot it horizontally. The decision is yours.
Can You Rotate a Video on YouTube?
This is a question many people have asked me since they wanted to upload a video to YouTube, but didn’t want to rotate it by downloading an app.
The thing is a few years ago YouTube received an update in which they removed their editing functionalities, which means you won’t be able to rotate videos there. So if you need to rotate a video, you should do so before uploading it to the platform.
Other Tools You Can Use to Rotate Video
Obviously, FilmForth is not the only video editing tool you can use to rotate videos, but it’s the one that will make the task easiest for you.
Also, remember that Film Forth is totally free to download and contains no watermark. In case you want to try other Windows 10 apps, here is a few of them that can also get the task done:
- Wondershare Filmora
- DaVinci Resolve
- VLC Media Player
- If you’re on Mac, Apple iMovie
- And if you’re on mobile, you can use KineMaster which is available for both Android and iOS
Conclusion
I hope you’ve enjoyed this tutorial on how to rotate videos. I decided to put this together after seeing how people had a difficult time trying to rotate their videos while using other articles as their guide.
If you want more tips to help you take your videos to the next level, please visit our other articles where we will go into detail about the different functions of FilmForth video editor, such as applying video effects, transitions, and more. Finally, in case you have any questions don’t hesitate to reach out in the comments!


