Photography Lighting for Beginners – 3 Essentials | CreativeLive
Mục lục bài viết
Photography Lighting for Beginners: 3 Lighting Essentials For Creating Incredible Images
Summary: The word photography actually stems from Greek roots that mean “writing with light.” In order to truly take control over your photography, you have to understand light and how it works. But grasping lighting is a bit more complex than learning the controls of your cameras — it bounces off some objects while passing through others, creates large or small shadows and even influences the colors of the image.
In this guide for beginners, you’ll learn:
- How the position of the light affects a photograph
- How to create mood lighting and flattering shadows
- How different lighting conditions and sources change the colors in the image — and how to fix it
- How to use basic concepts to take more control over both natural and artificial light
Even the most expensive camera is worthless inside a completely dark room.
Photography originated from a chemical reaction that occurred when light hit certain materials, and while the cameras inside our smartphones have come a long way from the first room-sized cameras, the essence of photography has remained the same: light. Whether you are shooting film or digital, you cannot shoot anything without light.
The way a light is captured inside a photograph has a dramatic effect on the final image — it’s why a professional photographer can shoot amazing images with a toy camera. So what do beginners need to know to harness the incredible power of light? Mastering photography lighting beings with understanding three concepts: position, strength and color.
Photoshoot Lighting Setup: How Position Plays A Role
Imagine you’re back in that completely dark room — but now you light a candle. Where that candle is in relation to the object you are shooting plays a dramatic role on the overall look of the final image. In photography, sometimes you can move that light source, and other times you have to move the subject to alter the position of the light.
Front lighting, or placing the subject so that light is directly in front of the person or object, brings out the detail. Why? With the light directly in the front, the shadows fall behind the object, so there aren’t any shadows in the image to conceal any details. Front lighting is the simplest to shoot, however, it sometimes looks rather flat or boring.
Side lighting, or placing the light source or the subject so that the light hits from the side, fights the boring look of front lighting by creating shadows and depth. Side lighting is still fairly simple to shoot — you just have to careful and watch how the shadows fall. Side lighting doesn’t have to be at a 90 degree angle and even minor adjustments can change the way the shadows fall. When shooting with lighting from the side, watch where the shadows fall — small adjustments in the subject’s position can create more interesting or flattering shadows.
Back lighting is the trickiest of the bunch — proceed with caution. Without a light modifier or the understanding of manual mode, you’ll end up with a silhouette. Beginners are often best to avoid backlighting scenarios, like when you place the subject directly in front of a window. Don’t ignore it for too long however — once you’re comfortable in manual mode, backlighting can create spectacular images. When backlight, many things appear to glow — leaves and flowers, for example. Backlighting also gives portraits a nice pop and almost a halo effect.
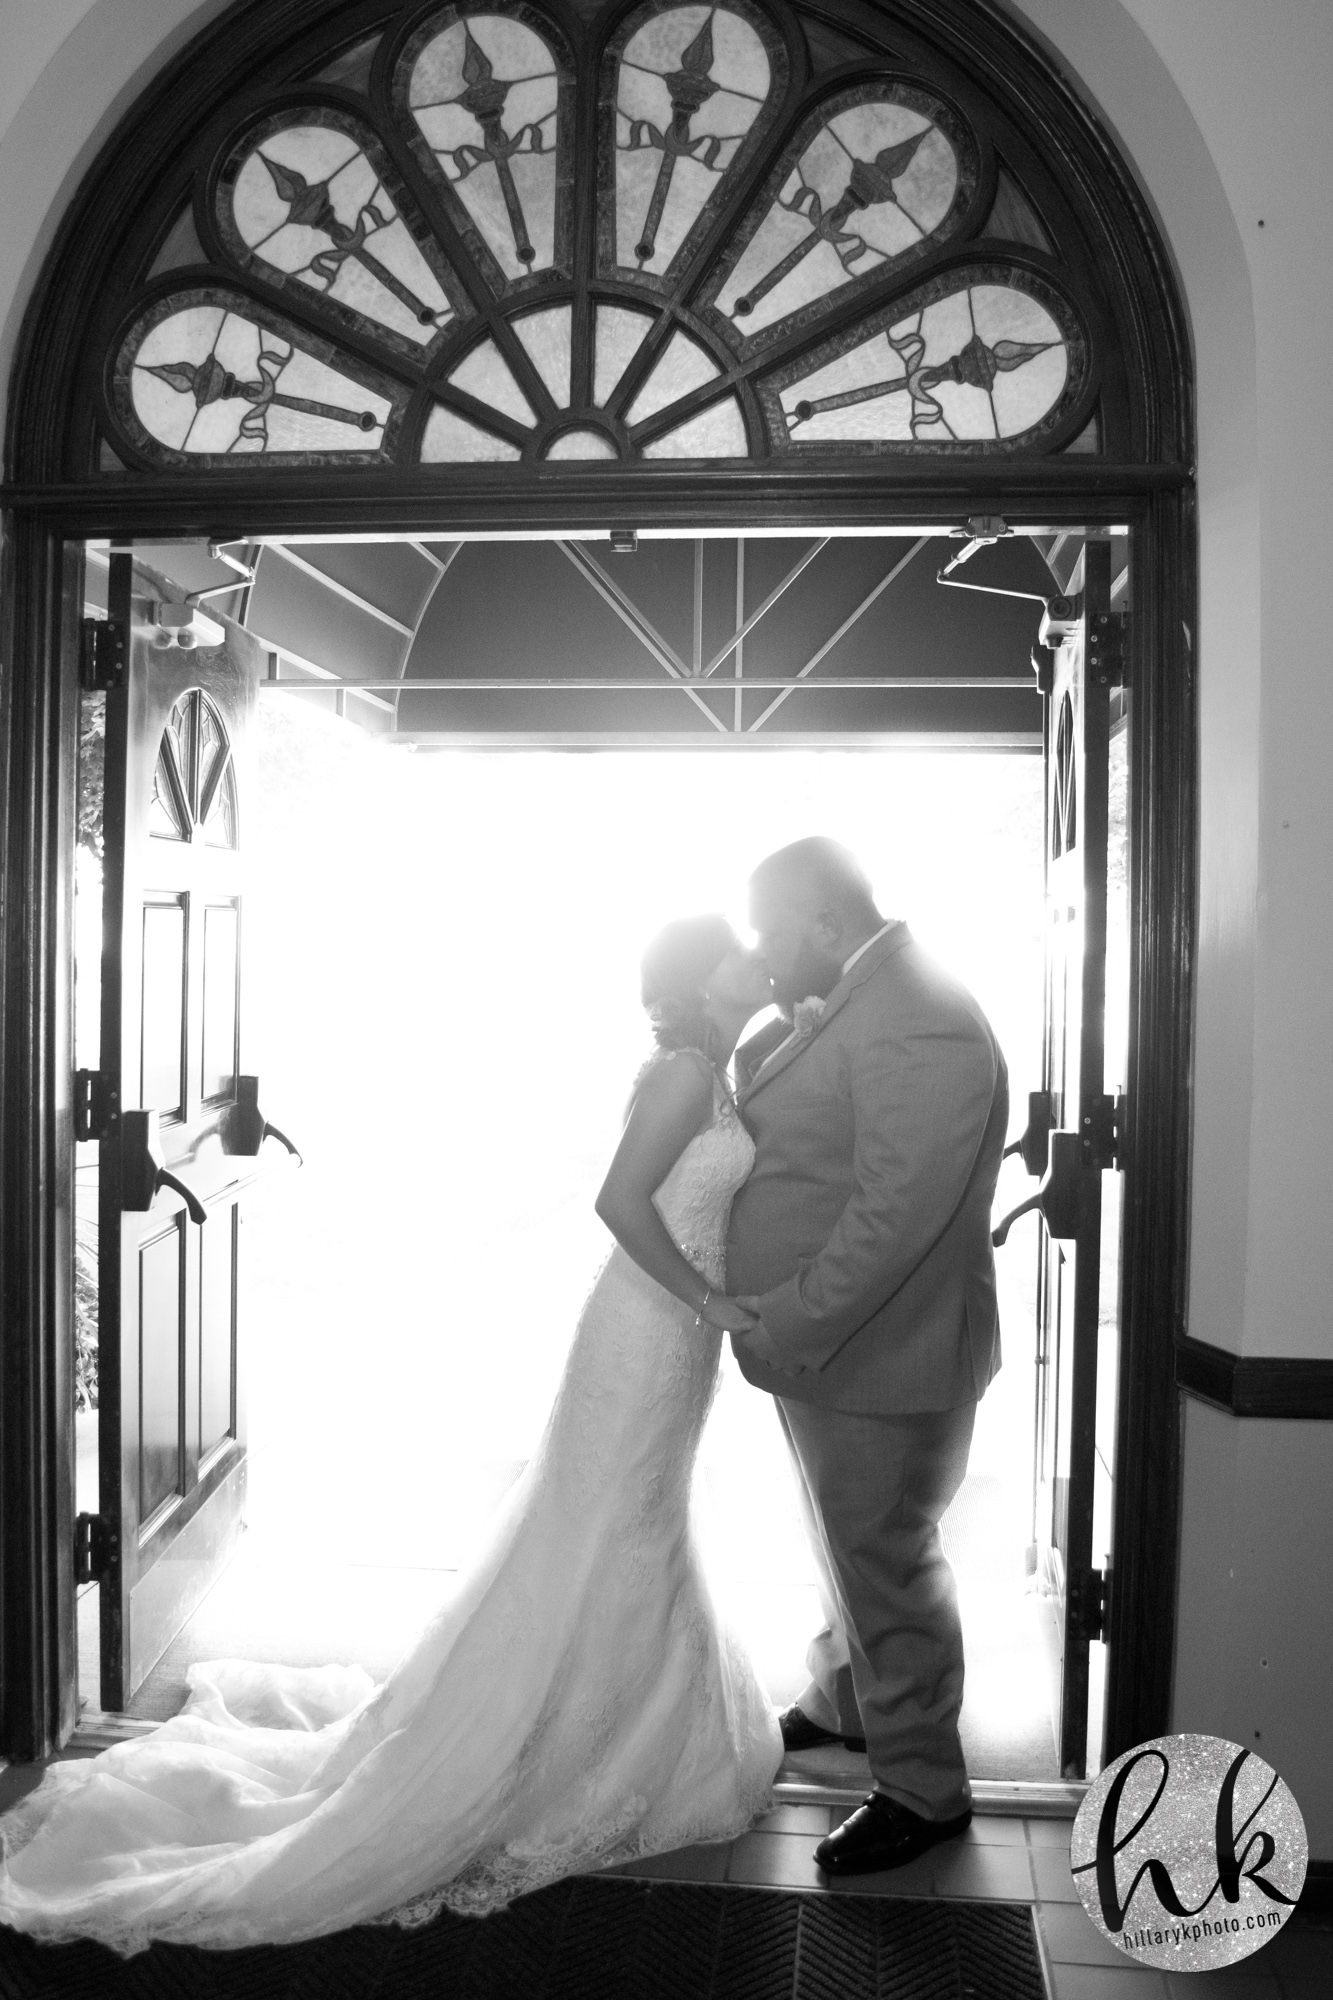
With the light hitting the subject from behind, all of the light’s shadows are in the front of the subject, which turns the subject into a dark silhouette. Using manual modes, however, you can adjust the exposure so that the subject will be properly exposed. That will leave the background overexposed, but that sometimes creates a neat effect, like this:

— Photo by Hillary K Photography (www.hillarykphoto.com) and used with permission
See how the background is completely overexposed behind the newlyweds? To prevent overexposing the background, a reflector or a flash in front of the subject can provide a more even exposure while still giving the subject that backlit glow, like this:

— Photo by Hillary K Photography (www.hillarykphoto.com) and used with permission
The position that the light is in determines where the shadows fall — and while it’s impossible to move the sun, moving the subject (or using a mobile light source like an off-camera flash) gives photographers the power to choose just where those shadows fall.
Photography Lighting Basics: Soft Light Vs. Hard Light
Changing the position of the light source in relation to the subject changes where the shadows fall, but just how light or dark are those shadows? That’s where the light source, and any light modifiers, come into play.
A hard light source produces shadows with minimal transition between the light and dark areas of the image. While hard light refers to the transition between light and dark and not how deep the shadows are, hard light is often (but not always) associated with creating deeper, darker shadows. Hard light gets a bad rep — used incorrectly, hard light will create dark shadows under the eyes in a portrait, for example. But, hard light tends to create more contrast in an image. Hard light can be combined with the position of the light to avoid shadowy eyes and create drama inside a portrait.
Soft light, on the other hand, has a much more subtle transition between the light and dark areas of the image. Shooting with soft light has less drama, but the smoother shadows prevent details from being lost in the dark areas of the image. When shooting a portrait, hard light tends to emphasize imperfections in the skin while soft light tends to disguise blemishes a bit better. Soft light is like the front lighting of light direction — it’s a great starting point for beginners because it’s easier to work with.
So what makes a light source hard or soft? Large light sources produce soft light, while smaller light sources crate those harsh shadows. Just imagine holding a flashlight underneath your face telling scary stories around the campfire — the creepiness comes from the light and dark areas with no transition between them. Camera flashes, without a modifier, create hard light because they are small light sources.
But, distance also plays a role. Close light sources are softer, while distant light sources create that harsher transition between light and dark. Taking a portrait next to a window, shooting close to the window will create soft light while moving the subject to the opposite side of the room will create harder shadows.
The sun is a large light source — but it’s so far away that it becomes a hard light source. Shooting in the middle of the day with a cloudless sky, you’ll wind up with dark, hard shadows.
On a cloudy day, however, that same sun produces a soft light. Why? The clouds diffuse the light, or spread it out over a larger area, and making a light larger makes it softer. That’s why many photographers love cloudy days — the soft light is easy to work with.
Clouds are not the only diffusers either — lights such as flashes and studio strobes can use diffusers too. A white umbrella placed in between the light and the subject, called a shoot through umbrella, softens the light. Soft boxes are another form of diffusers — and some of them are even small enough to use on an on-camera flash. Bouncing a light source also softens it — bouncing a hot shot flash off the ceiling or a white wall, for example. Using a flash softbox or taking the flash off camera and putting it on a stand with an umbrella allows photographers to take a small, hard light source and create soft lighting.
Used together, the direction and softness of the light can be used to create different effects and moods in a photograph. Hard side lighting creates lots of drama, while a soft front light creates a softer mood.
Color Temperature: Understanding the Kelvin Scale
A lightbulb may look white to our eyes, but light actually comes in different colors. The sun at sunset creates an orange light. A florescent light bulb will create a different color of light than an incandescent one.
A camera’s white balance corrects the image automatically so white objects are white in the photograph under different light sources. Most cameras have an automatic white balance mode, as well as options named after the different types of light sources, like shade and incandescent. Manual white balance allows you to take a picture of a white object, then the camera will determine the white balance from that image. Manual white balance doesn’t offer as much control as using the Kelvin scale, however.

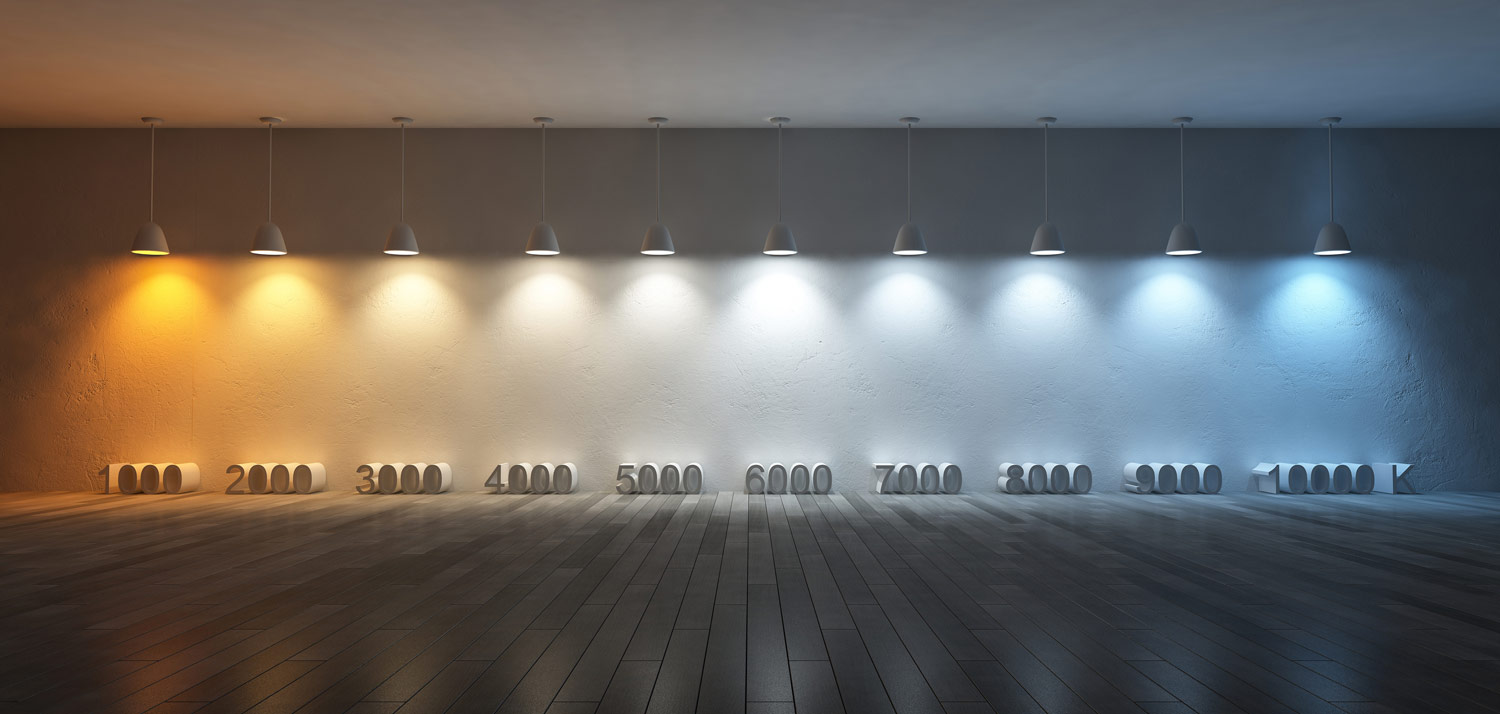
Adjusting the white balance on the Kelvin scale is the equivalent of manual mode for exposure — it gives photographers complete control over the white balance. Shade is often set at 7500K, while daylight is about 5500K and sunset 2500K.
An accurate white balance means that objects that are white in real life are also white in the image — but “accurate” isn’t always what’s right for the photograph. Using the Kelvin scale to skew the white balance to be more orange creates a warm feeling in an image, creating a look similar to shooting near sunset. On the other side, adjusting the white balance towards the blue end creates a cooler look, often used to create a somber mood in a photograph. Film photographers often used warming and cooling filters to create these effects, but digital photography makes it easy to simply adjust the white balance in camera (or in post).
White balance is also one of the reasons many photographers shoot RAW files instead of JPEG — with a RAW file, adjusting the white balance is as simple as using a Lightroom slider. Getting it right in-camera is easier, but editing in post with a RAW file makes fixing white balance errors easy. RAW files also make it easy to remove a green or purple hue as well.
Outside of using white balance to create a balanced image or one that’s warm or cool, photographers can also get creative with the source of their light using flash gels. These colored pieces fit over the flash and create colored lights — like the lights on a dance floor. Since color helps create mood in a photograph, using gels can be a fun way to experiment with the color of light.
Without light, there is no photography — and without understanding light, you simply cannot become a great photographer. Start simply by learning to recognize soft light and front and side lighting — these types of light are easy to work with and great for beginners. As you advance and learn how to modify light, then move onto experimenting with hard light and backlighting — they may be trickier to get right, but they can create some pretty dramatic images.


