RTL-SDR Blog V3 R820T2 RTL2832U 1PPM TCXO SMA Software Defined Radio 500 kHz to 1.7 GHz (Dongle Only)
Mục lục bài viết
RTL-SDR Blog V3 R820T2 RTL2832U 1PPM TCXO SMA Software Defined Radio (Dongle Only)
Please check the license details you will need to purchase this unit
(Please note you will need an Amateur Radio License to purchase this item)
Icasa will have to issue you with the necessary license to use this unit (It will depend on the use of the device). We would require a copy of your license or callsign.
See section in G14 in this document http://www.zs6wr.co.za/live/wp-content/uploads/2010/10/RadioRegs-Act-No.-103-of-1996-Amentment-2005-2007-1.pdf
Section
G14 Radio receiving apparatus with continuous tuning (1) No person shall use or have in his possession any radio receiving apparatus with continuous tuning that can be tuned to bands above 30 MHz other than the international broadcasting and amateur bands except where the Postmaster General’s prior approval was obtained.
Product Description
- Includes 1x RTL-SDR Blog brand R820T2 RTL2832U 1PPM TCXO HF Bias Tee SMA Dongle (V3)
- Great for many applications including general radio scanning, air traffic control, public safety radio, ADSB, AIS, ACARS, trunked radio, P25 digital voice, POCSAG, weather balloons, APRS, NOAA APT weather satellites, radio astronomy, meteor scatter monitoring, DAB, or for use as a low cost panadapter with a traditional ham radio.
- Several improvements over generic brands including use of the R820T2 tuner, improved component tolerances, a 1 PPM temperature compensated oscillator (TCXO), SMA F connector, aluminium case with thermal pad for passive cooling, software activatable bias tee circuit.
- Can tune from 500 kHz to 1.7 GHz and has up to 3.2 MHz (2.4 MHz stable) of instantaneous bandwidth. (HF reception below 24 MHz runs in direct sampling mode)
- Uses a SMA female antenna port. Please note that this is the dongle only, no antennas are included.
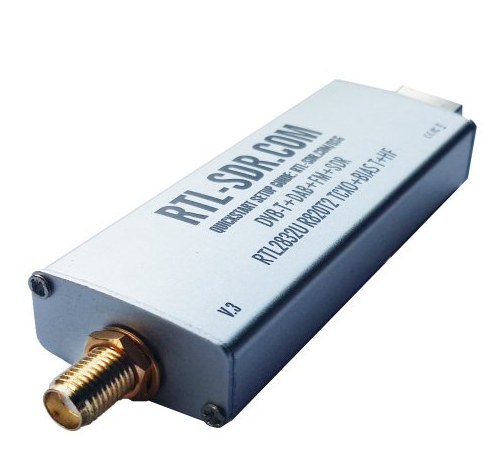
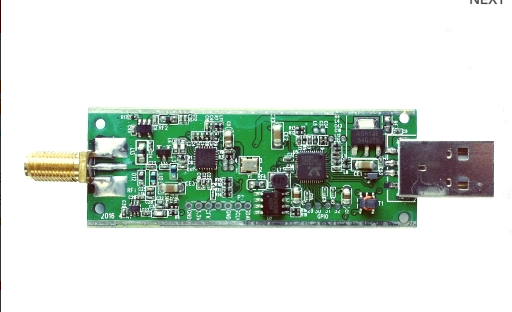
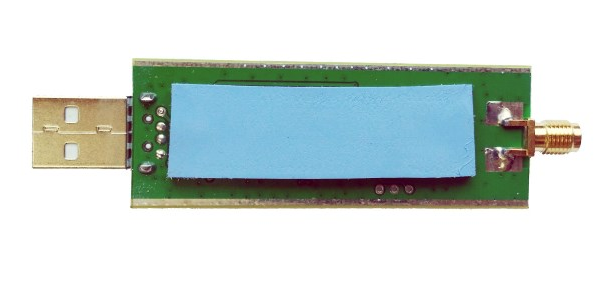
Feature 1: Direct Sampling HF Mode
This feature allows you to listen to HF signals between about 500 kHz to 28.8 MHz.
To use direct sampling mode
- Connect an appropriate HF antenna to the SMA antenna port (this is the same port where you connect your VHF/UHF antenna).
- In SDR# select the Q-branch in the configure menu (the cog icon next to the play button). (If it is greyed out make sure you stop the SDR first, by clicking the stop button in SDR#)
- Press Play and tune to 500 kHz – 28.8 MHz.
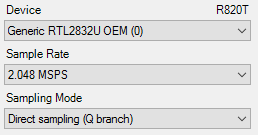
VHF antennas like small discones or short whip antennas will probably not pick up HF signals very well, if at all. If you have no such antenna you might get something with the large telescopic antenna to its maximum length of 1.5m, but really this is not long enough for HF. You can instead use the screw nut provided with the antenna base to clamp on a long wire antenna that is 5 meters or more in length. Ideally you should use a 9:1 unun with the long wire antenna for optimal reception. Even more ideally you’d use an antenna tuner, though this is expensive.
Other software like HDSDR and GQRX can also support direct sampling. It may entail setting a device string, and for the Q-branch, the value should be 2. In GQRX the device string would be “rtl=0,direct_samp=2” (without the quotes). Make sure that there is no space after the comma. For SDR-Console please see this linked post for a modified ExtIO that can enable direct sampling. SDR-Touch on Android has a direct sampling option available in its settings page.
To go back to listening to frequencies above 28.8 MHz remember to change the sampling mode back to “Quadrature Sampling”.
Note that this feature makes use of direct sampling and so aliasing will occur. The RTL-SDR samples at 28.8 MHz, thus you may see mirrors of strong signals from 0 – 14.4 MHz while tuning to 14.4 – 28.8 MHz and the other way around as well. To remove these images you need to use a low pass filter for 0 – 14.4 MHz, and a high pass filter for 14.4 – 28.8 MHz, or simply filter your band of interest.
Feature 2: Software Selectable Bias Tee
V.1. and V.2. of our dongles included a bias tee which could manually be enabled by opening the case and soldering two pads on the PCB together. V.3. introduces a 4.5V bias tee which can be enabled entirely in software. The bias tee can continuously pull up to 180 mA of current.
WARNING: Before using the bias tee please ensure that you understand that you should not use this option when the dongle is connected directly to a DC short circuited antenna. Although the bias tee circuit is dual protected against accidental shorts with a PTC automatically resetting fuse and overcurrent protection on the LDO, short circuiting the bias tee for an extended period of time (hours) could damage the LDO or fuse permanently. Only use it while connected to an actual powered device, like an LNA, active antenna or the SpyVerter.
To make things clearer: DC Short Antenna -> LNA -> Coax -> V3(bias tee on) is absolutely fine. What’s not good and makes no sense anyway is DC Short Antenna -> Coax -> V3(bias tee on). DC Short Antenna -> Coax -> V3(bias tee off) is fine.
Note that the legacy DVB-T TV drivers will activate the bias tee by default. On Linux ensure that you have properly blacklisted the DVB-T drivers. More info on how to blacklist on the Linux section on the quickstart guide.
To enable the bias tee in Windows:
- Download and extract all the files in this zip file to a folder on your PC. It contains two batch files that can be run.
- Make sure all SDR software like SDR#/HDSDR/SDR-Console etc is fully closed.
- Run the biastee_on.bat file to turn the bias tee on. It will run and open a CMD prompt that will briefly say “Found Rafael Micro R820T Tuner”. The CMD prompt will close soon after upon success.
- The bias tee is now on. To turn it off repeat steps 2 & 3, but instead run the biastee_off.bat batch file. Alternatively, simply disconnect and then reconnect the SDR to turn the bias tee off.
If you have multiple dongles connected you’ll need to edit the batch file to specify what dongle’s bias tee you want to activate. Open the bat file with any text editor, like Notepad, and add the dongle selector “-d” flag. For example to activate the bias tee on the dongle that was plugged in second you’d need to change it to “rtl_biast -b 1 -d 1”.
If you get a Smart Screen message, click on More Info, and then on Run Anyway. Also note that some versions of Windows may fail to run batch files due to misconfiguration or aggressive antivirus software. If you cannot fix these problems with Windows or your antivirus, run the command manually on the CMD line.
To run it manually on the CMD line first browse to the directory where the bias tee software is stored using “cd” (e.g. cd C:\SDR\bias_tee_folder), and then run:
- ON: rtl_biast -b 1
- OFF: rtl_biast -b 0
- If needed select a particular RTL-SDR device with the -d flag.
To enable the bias tee in Linux:
In Linux or MacOS download the source from git, compile it the same way you do the regular RTL-SDR drivers, and then run ./rtl_biast -b 1 to turn the bias tee on and ./rtl_biast -b 0 to turn the bias tee off. The procedure is:
git clone https://github.com/rtlsdrblog/rtl_biast
cd rtl_biast
mkdir build
cd build
cmake ..
make
cd src
./rtl_biast -b 1
If you want to be able to run the bias tee program from anywhere on the command line you can also run “sudo make install”.
If you have trouble running the bias tee check with a multimeter if there is 4.5V at the SMA port. Also check that your powered device is actually capable of receiving power. Remember that not all LNA’s can accept bias tee power. We recommend Adam 9A4QV’s LNA4ALL, as you can order this from his store with the bias tee power option enabled. If you need further help please contact us at [email protected].
Modified rtl_tcp for direct sampling
The standard version of rtl_tcp only allows for direct sampling on the I-branch, which is useless as we need direct sampling on the Q-branch. This patched version of rtl_tcp (note source files only – requires compilation) kindly provided by Pieter-Tjerk from websdr.org fixes this. Use rtl_tcp -D 2 to activate direct sampling on the Q-branch.
Feature 3: Selectable Clock & Expansion Headers
This is for advanced users who need to daisy chain clocks together for coherent experiments, or need to access other ports. You can either bridge the clock selector the directly with a solder bridge, or solder on a 1.27mm 2×2 header pin jumper.
To add a jumper to the CLK selector header.
- Carefully remove the 0 Ohm resistor.
- Very carefully solder a 1.27mm 2×2 header onto the clock selector pads.
- You can now select your clock input.
How to connect the CLK jumpers:
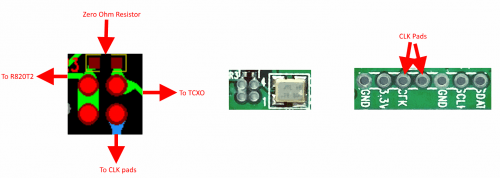
The first position allows you to output the dongles clock to the CLK pads. The second position allows you to input an external clock.
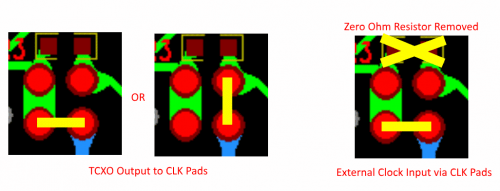
An example of CLK daisy chaining is shown below. One dongles TCXO is connected to two other dongles who have disconnected clocks.
LF Improvement / Bias Tee Disable Mod:
If you want to improve the performance at LF and do not require the bias tee, then you can remove the bias tee inductor at L13. Of course remember that if you are interested in VLF/LF, it might be a better idea to use an upconverter like the SpyVerter, which can be powered by the bias tee on the dongle.

Current Known Issues:
We’re constantly trying to improve our units and we always make note of what issues exist and how to fix them.
Please remember that these units do get hot to the touch when used in warm climates. This is not an issue and is expected. We have improved the thermal bonding and heat transfer between the chips and the metal case. This results in making the metal case hotter, but it keeps the chips much cooler, resulting in better performance. To lengthen the life of the dongle we recommend keeping the unit away from direct hot sunlight.
Batch 2 and newer (Shipping Now):
- 0.2 – 0.3% of units may have a faulty RTL2832U chip. This is characterized by higher than normal USB currents (normal is 0.28A), and higher than normal heat. The same problem affects all brands of RTL-SDR.
Known V3 Batch 1 Issues (limited quantity batch, no longer shipping):
- Increased sideband noise on very strong narrowband signals. This should not be a significant problem as it only affects very strong signals. The hardware fix is to add about 100-220uF of capacitance on the 3.3V power line. Batch 2 will reduce this noise.
- The bias tee when turned on adds a large spur in direct sampling HF mode. This may be problematic only if you intend to use a bias tee powered HF LNA in direct sampling mode. This can be fixed by adding about 2.2uF of capacitance to the output of the LDO, before the inductor. Batch 2 will fix this.
- The bias tee can be damaged by accidentally short circuiting the output for a few seconds while it is on. This damage only occurs on USB3.0 and USB2.0 ports that can provide up to 1A or more or current. Batch 2 will add a resettable fuse to prevent damage.
How to enable hf mode goto https://www.rtl-sdr.com/rtl-sdr-blog-v-3-dongles-user-guide/
Quickstart Guide: http://rtl-sdr.com/QSG
If you want to no more how to configer and install the RTL dongle read more on the blog http://zr6aic.blogspot.com/search/label/RTL2832U and http://zr6aic.blogspot.com/search/label/rtl_tcp
To see this RTL dongle in action go to my webSDR at http://zr6aic.giga.co.za:8901 the 2m band is using RTL dongle.
It has an MCX antenna connector, which is not really popular so you will need adapter if you want to connect to external antenna.
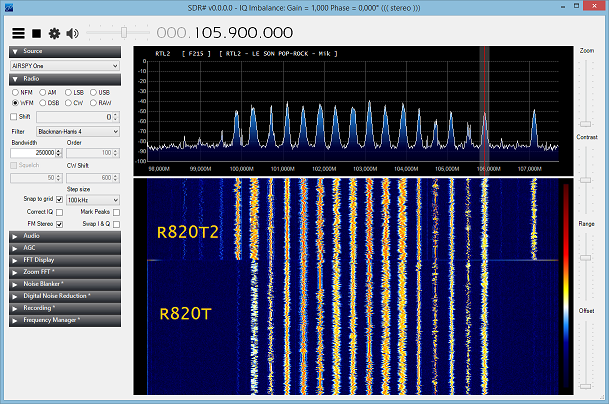
Windows SDR# software is avalible here
This image show the difference in sensitivity and filter.
Linux Quisk software.
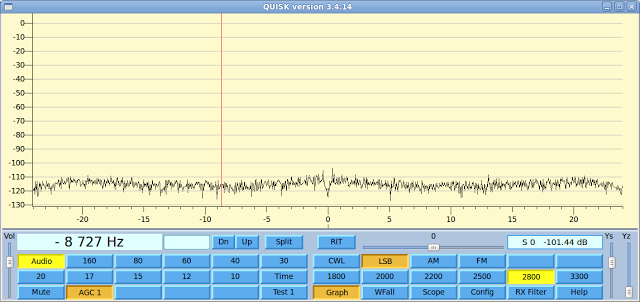
Quisk is available here
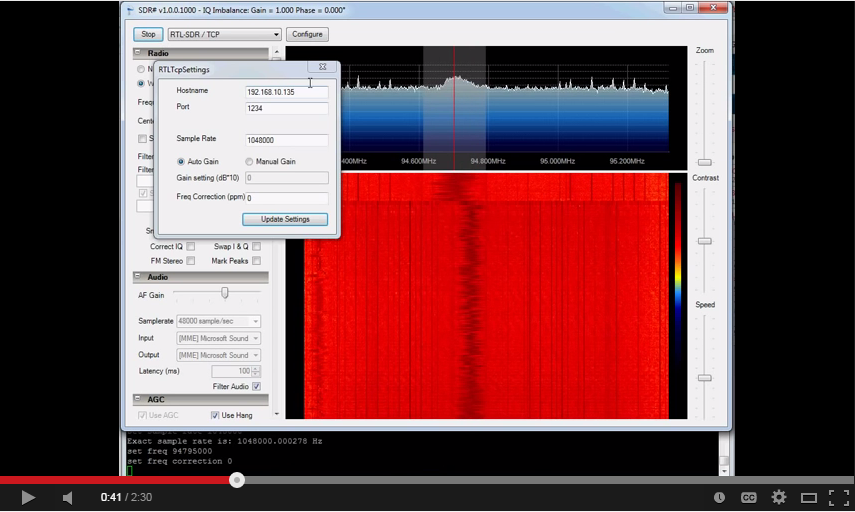
Click on Youtube video below to see the RTL dongle in action
Gqrx On Linux
Installation instructions here


